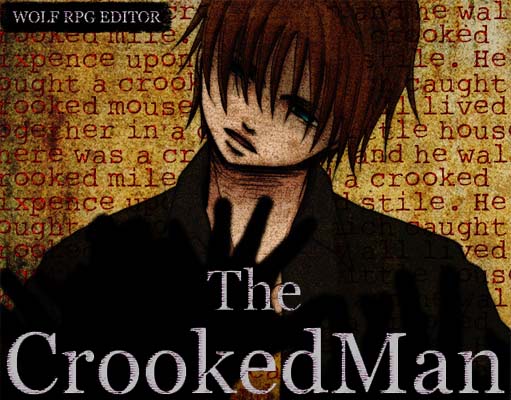
The Crooked Man is a freeware horror adventure game by Uri made in WOLF RPG Editor. It is the first game in the Strange Men Series.
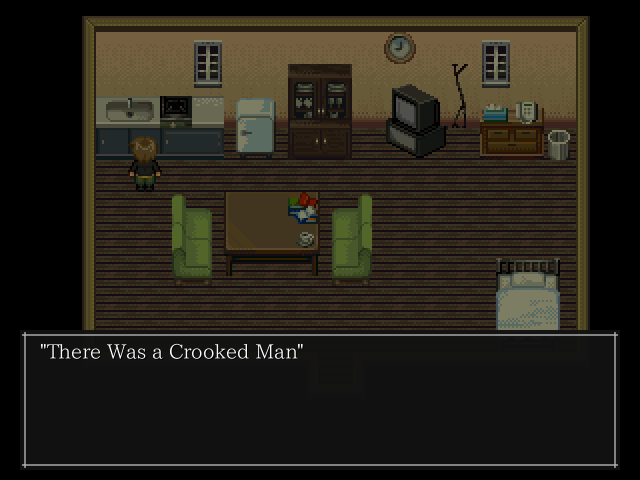
David Hoover decides to move into a new apartment during a rough time in his life.
After some odd occurrences, he decides to ask about the room's former owner, but learns little.
So he sets off in search of him, strangely compelled to know more about this man...
(Content Severity: Discretion Advised)
Click here for content warnings.
Body horror.
Hanging and suicide.
Jumpscares.
Animal death (a mutilated corpse you find; graphics-wise, it's low-detail).
Mild swearing.
The Strange Men Series
The Crooked Man | The Sandman | The Boogie Man | The Hanged Man
Download The Crooked Man (Version 4) | (Mirror)
(Chrome may falsely flag the download as malicious, but it's safe to ignore.)
The Crooked Man is now available on Steam for $3.
The game will remain free here, but you can show Uri your support by purchasing it.
Supported Platforms
The game's engine is made for Windows only, with no native support for other platforms. To play on Mac, you can try a general-purpose tool like WineBottler.
Usage Notes
Videos are allowed, but should not be profited off of, with the exception of YouTube monetization. Live streams are allowed.
Fanworks are generally allowed and can be sold. However, you should not sell anything that uses any specific resources from the game.
Troubleshooting
Make sure to extract the game to its own folder instead of running directly from the ZIP file. If you don't do so, any saves made will be lost the next time you run the game.
If pictures aren't appearing where it seems they should, you must run the game as an administrator. Right-click Game.exe, go to Properties, and under the Compatibility tab, check "Run this program as an administator."
(The first such picture should appear shortly after getting the brass key.)
You may get an error about Game.dat not being found if the game folder's filepath contains special characters (accents, etc.). This can be fixed by moving the game folder somewhere without special characters in the path. There may also be errors when running in certain locales, but it should always work in English or Japanese locale.
Screenshots
Walkthrough
I've provided a walkthrough if people get stuck. Click or highlight the black boxes to show the spoiler text for puzzle solutions.
Walkthrough
Prologue
Get Paul's license from the table. Try to go outside. Answer the phone, then go to bed.
Go outside and knock on 201 (at the right end of the hall).
Go back to David's room and try to sleep.
Go to the bathroom and check the washbasin. Check under the bed.
Answer the phone. Go outside and talk to Paul.
At the hospital, go to David's mom's room on the far end. Talk to the doctor afterward.
Back in David's room, go to the computer room and check the desk drawers.
Answer the phone. Try to go to bed, then check the TV, then the sink. Go to bed.
Check outside, then go back in.
Talk to the landlady in the far-left room on the first floor.
Back in David's room, check the crack with footprints leading up to it.
Go to bed. Check the closet in the computer room. Go back to the living room.
Scene 1: Hotel Ruhenheim
Go to 203 (2F west hall) and examine the mirror for a notebook scrap.
Check the dresser in 104 (1F west hall). Go to the cafeteria (top-right door in the lobby) and check under the top-right table for the gold key.
Use the gold key to open the library (2F west hall). Get the key to 108 there.
Go to 108 (1F east hall) and push one of the chairs next to the dresser to get the wire cutters on top.
When you hear the piano, go to the rec room (top-left door in the lobby) and meet Sissi.
Use the wire cutters to open the door behind the counter to the staff room. Check the journal for the key to 106, and check the door to the owner's room.
Go to 106 (1F west hall) and into the bathroom. Get the doorknob. Go back to the staff room and attach it.
Read the board in the owner's room, and stomp on the off-color tile to open the basement door.
Go down, use the lighter (from the items screen), and...
Go to the 2F west hall and into 203 for a scene.
Return to the owner's room and into the basement (again, use the lighter) for the bronze key.
Go to the bar (2F east hall) and read the journal.
Check the S to T shelf in the library to find the Jekyll and Hyde book. (You must have read the journal, because... uh...)
When the Crooked Man appears... Check the hole to push him in.
Go to the passcode-locked door (1F west hall) and input the code.
Hint: It relates to Jekyll and Hyde, but you can ignore the actual text. There was a note that mentioned missing chapters...
Answer: 3679.
Check the shining object in the food storage, then use the ladder to get the key to 209. Check the ashes in 209 (2F east hall) for a notebook scrap.
Go into the bar and examine the red writing on the floor. When the Crooked Man appears...
Hint: Smashing the brandy on him won't work, but it's halfway there.
Answer: Smash the brandy on him, then use the lighter from the menu.
Return to the food storage (1F west hall) to get the knife.
Follow the blood to 112 and talk to Sissi for a key.
Use it to go to the courtyard (only remaining door in the lobby). Get the box from the fountain.
Return to 112, then go to the rec room.
Defeat the Crooked Man with 15 hits of the knife (swing with Z). Try to hit him then back away, and watch out for his periodic "charges."
In the following scene, choose "Don't cry" to get Bad End 1.
Choose "What's wrong with..." to proceed onward.
Scene 2: Julius Stone Law School
Go upstairs to see a shadow.
Go to Leftie's room (2F east hall) and get the screwdriver, crowbar, and hammer from the toolbox.
Go to Ray's room (3F east hall) and read the book about binary.
Go to Franz's room (also 3F east hall) and read the diary.
Go to Cyndi's room (3F middle area) and read the diary.
Go to John's room (3F west hall) and get the key to the room, and read the notebook.
Go to the faculty room (1F east hall) and get the infirmary key.
Go to the infirmary (1F west hall) and get the parlor key from the cabinets.
Go to the parlor (2F west hall) and look at the wire art.
Go to Ray's room (3F east hall) and open the security box for the reference room key.
Hint: Translate Ray's wire art from binary to decimal numbers.
Answer: 2515.
Try going downstairs to meet D.
Go to the reference room (2F middle area) and read the book. Check the portrait. Use the screwdriver to find a code.
Go to John's room (3F west hall) and open the security box for the lecture hallway key.
Hint: His diary mentions surpassing the "father of our law," thus...
Answer: 1647.
When the Crooked Man appears...
You got the key to John's room, so leave the room and use it on the door to lock it behind you.
Go to the lecture hallway (on 1F, go down into the indentation).
Enter the far-right room to find D. Read the newspaper on the bulletin board.
Go upstairs to find a notebook scrap on the ground.
Go to Cyndi's room (3F middle area) and open the security box for the lecture rooms key.
Hint: She uses her birthday, which is also...
Answer: 0619.
Go to the locked lecture room in the hallway. Read the note on the blackboard, and get the notebook scrap.
Go to the infirmary (1F west hall) to finally get some rest.
Go to the reference room (2F middle area) and look through the crimonology shelves for a code. You must have first read the note about the seminar and Criminal Behavior.
Go to Franz's room (3F east hall) and open the security box for the computer room key. Answer: 9981.
Go to the computer room (2F west hall) and read the paper in the trash.
Go unlock Andrew's room (3F west hall) and read the diary.
Hint: Franz's diary mentioned Andrew's practices.
Answer: 144246.
Go to the basement and into the unlocked room.
Move the bookshelf aside. You can break the wall immediately with the hammer, or with three attempts of the iron pipe. Open the elevator with the crowbar. Climb up the boxes, then the ladder.
Go to the auditorium (second floor on the lecture side).
Choose "That's life" to proceed onward.
Choose "You shouldn't give up" to get Bad End 2.
Fight the Crooked Man; he takes 20 hits. Also, the energy drink can be used as a healing item.
Scene 3: Central Hospital
Go to the nurse station (behind the counter) and solve the puzzle box on the wall to get the cafeteria key and elevator trunk key.
Quickest solution: Click the middle square and all four corners.
Go to the cafeteria (center of 2F). Walk by the cans, then check the fallen can for a piece of wire.
Go into the room with blood outside on 2F (203) and read the bloody message on the left bed.
Go to the dayroom (center of 3F) and read the book.
When you hear a cat on the third floor, inspect 306, the room to the left. Get the bloody key from the cat. (You must have read the message in 205.)
Go to room 410 (4F, puddle of vomit outside) to find a notebook scrap.
Go into the elevator on 4F and open the trunk for an AED.
Go to 3F and into the dayroom to meet Fluffy.
Return to the nurse station (behind the counter in 1F) and use the wire to open the locker for a note with a number.
Use the AED in your inventory to take out the battery. Use it on the door to the outpatient clinic (down in 1F) and enter the code. Answer: 4489.
Go to the staff room (clinic 1F) for the counseling room key.
Go to the director's room (clinic 1F) and read the diary for a hint paper. Use it to get, well, hints. Check the flowers on the table for the Y piece.
Go to the pediatrics room (clinic 2F) to find Fluffy.
Check the phone on the third floor of the clinic for the F piece.
Go to the maternity and gynecology room (clinic 3F) and check the shelves for a small key.
Get the notebook scrap on clinic 4F.
Go to the counseling room (center of hospital 4F) and read the diary for the psychiatry key.
Go to the psychiatry room (clinic 4F). Read the diary and the note on the board.
Check the bed in the middle treatment room of 2F, the trashcan in the top room of 3F, and the board in the bottom room of 4F. You get the numbers 7, 1, and 6.
Go to the women's bathroom on 3F and check the sink for the A piece.
Check the wall in the women's bathroom (below the concrete fragments).
Then go get the hammer from the staff room (clinic 1F) to use it on the wall. Find Fluffy in the stall.
Go to the cafeteria (center of hospital 2F) and check the teacup for the L piece.
Go to the nurse station (behind the counter in 1F) and check the box for the I piece.
Go to the hallway of operating rooms on clinic 3F to find an entrance to the emergency stairs. Enter the code.
Hint: It's related to the note in the psychiatry room.
Answer: 716.
Go up to the door to the roof and examine the wire on the door.
Go to the staff room (clinic 1F) and unlock the cabinet for the chemical closet key.
Go to the chemical closet (clinic basement). Read the diary, then check the top-left shelves to find a bottle of hydrogen bromide.
Return to the door to the rooftop and use the HBr to melt the wire.
Climb the ladder on the roof and get the M piece.
Check the maternity and gynecology room on the third floor.
Go to the fourth floor to find Fluffy. Quickly use the fire extinguisher to the left.
Go to the director's room (clinic 1F) and solve the puzzle for the safe key.
Hint: Check the director's diary. And what does he mention right after that hint?
Answer: FAMILY.
Open the safe for a revolver and pistol ammo.
Go to the rooftop. 10 shots. Suffice to say, don't shoot Fluffy.
Try to leave out the entrance door on the hospital side.
Go to the clinic basement and into the open room.
Scene 4: Central Hospital (Part Two)
Go to the fourth floor.
Go to the clinic side.
Go to the rooftop.
Choose "Persuade" to get Bad End 3.
Choose "Take the gun" to get Bad End 4.
Choose "Punch" to proceed onward.
Final Scene
Use the bloody key on the door.
Investigate all the rooms for notebook scraps and the notebook itself.
Go to the guest room in the top-left.
Pretty much the safest strategy: Keep circling around the center table/chairs, and turning back to fire shots before going around the corner.
Open the door to the attic.
Music
Below are all the songs in the game and their sources. Beware of spoilers for their usage! [Old] songs were those used in Version 1/2, and replaced in Version 3.
Do not reupload these songs elsewhere without permission from their respective creators.
Song List
| Usage | Name | Source Link |
|---|---|---|
| Opening | Good Old Days | Source |
| I'm Waitin' For You [Old] | Darkness's Beginning | Source |
| I'm Waitin' For You | Monster Movie | |
| Sissi's Piano | Nocturne No. 2 Op.9-2 | (Chopin) |
| Meet Crooked Man [Old] | Death's Axe | Source |
| Meet Crooked Man | Piano Sonata No. 23, Op.57 | (Beethoven) |
| Sissi | Impromptu for Your Slumber | Source |
| Sissi's Ex [Old] | Walking Man | Source |
| Sissi's Ex | Nocturne No. 20, Op.72-2 | (Chopin) |
| Pre-Battle [Old] | Demon's Banquet | Source |
| Pre-Battle | Prelude, Op.3-2 | (Rachmaninov) |
| Battle 1 | Mazeppa | (Liszt) |
| Sissi's Despair | Only Sadness Knows | |
| Lost Love | Caught in two minds | |
| D's Kindness | judas | Source |
| Danger [Old] | Fires of Judgement | Source |
| Danger | Kreisleriana Op.16 | (Schumann) |
| Flight School [Old] | Guidance | Source |
| Flight School | Venetian Gondola Song Op.30-6 | (Mendelssohn) |
| Go After Him [Old] | Woods Without Exit | Source |
| Go After Him | Horror Movie Ambiance | |
| Battle 2 [Old] | Wilde Jagd | (Liszt) |
| Battle 2 | Etude Op.10-12 | (Chopin) |
| Badly Hurt [Old] | Revealed Truth | Source |
| Badly Hurt | La Valse | (Ravel) |
| Battle 3 [Old] | Allegro Inquieto | (Prokofiev) |
| Battle 3 | Danse Macabre Op.40 | (Saint-Saens) |
| Who Are You Talking To?! [Old] | Don't Look | Source |
| Who Are You Talking To?! | Corrupt World | Source |
| David's Desperation [Old] | BestScaryBGM | |
| David's Desperation | Furnace Main Titles | |
| Tell Him the Truth | Turning Screw | Source |
| Hated, But Liked [Old] | Forgotten Time | |
| Hated, But Liked | Dreams | Source |
| Final Battle | Erlkonig | (Schubert) |
| Recuperating [Old] | Bitter Romance | |
| Recuperating | Vexations | (Satie) |
| Mom's Happiness | Ending Theme | Source |
| Shirley | You Are My Light | Source |
| Credits | Bye Bye Blackbird | (Ray Henderson) |
| Extra Room | And Then We Were One | Source |
| Final Conversation | Song From The Deep | |
Extra Links
These posts contain spoilers for all aspects of the game. Only read them after you've beaten it fully.
Translation Notes
Origins of the Story