
Ib (pronounced "Eeb," similar to "Eve") is a freeware horror adventure game by kouri made in RPG Maker 2000.
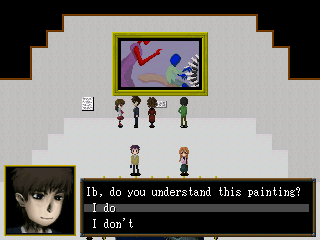
A young girl named Ib visits an art gallery with her parents.
While observing the many exhibits, she suddenly realizes she is alone.
And in her search for others, she finds things awry in the gallery...
The game is focused on exploration and puzzle-solving. There are no battles, and it does not demand quick reflexes. It's designed to be accessible to all kinds of players, so enjoy.
(Content Severity: Mild)
Click here for content warnings.
Minor jumpscares.
A few instances of blood (not very detailed at all).
Mention of hanging, and a person hanged offscreen.
Very low-resolution nudity on one painting.
(Chrome may falsely flag the download as malicious, but it's safe to ignore.)
A remade version of Ib is now available on Steam and consoles (Switch, PS4).
(The original version will remain free here.)
Supported Platforms
The game's engine is made for Windows only, with no native support for other platforms.
The multi-platform EasyRPG Player mimics the behavior of RM2K and RM2K3, but may not always be exact. (Make sure to treat the Data folder as the game folder, not the containing folder.) Also, for Macs, you can try a general-purpose tool like WineBottler.
Usage Notes
Videos and live streams are allowed. Monetization is allowed on gameplay videos only for the paid remake; kouri has forbidden making any form of profit from videos of the free version.
Do not modify, misappropriate, or redistribute any images or music from the game. In particular, do not reupload the music online, as it was made by others and is used in the game with permission.
Most fanworks are allowed, but creating fangames is not (sequels, offshoots, usage of the characters in general). Similarly, modification of the original game is not allowed (beyond the purposes of translation).
Fanworks can be sold only if kept to a "hobbyist" scope (this includes conventions). They should also not use the official logo nor pixel art from the game, or be easily mistaken for official merchandise.
[1] Japanese rules page
[2] Japanese paid remake guidelines
Troubleshooting
Make sure to extract the game to its own folder instead of running directly from the ZIP file. If you don't do so, any saves made will be lost the next time you run the game.
If you get a DirectDraw error, right-click the EXE, go to Properties, Compatibility, and try other compatibility modes.
If the font doesn't seem correct, download and install the MS Mincho font.
RPG Maker 2000 has some inherent, unfixable control bugs ("automatically moving in a direction" or "no buttons work"). The issues often seem to involve gamepads, or getting "stuck" on an input if Shift and a Numpad key are pressed simultaneously. Thus, try fiddling with gamepads and your keyboard until it fixes. (Reinstalling the game likely won't help.)
If you get "not implemented" errors on or near startup, make sure you have a working sound device (speakers/headphones). It can also occur mid-game if your system doesn't like a particular MP3, in which case, try to delete or replace the file in Music.
You may get "RPG Maker 2000/2003 RTP is not installed" or missing file errors on startup. This can happen if the path contains special symbols, causing files (including RPG_RT.ini) to not be found. Try moving the game folder somewhere without any special symbols in the path.
Screenshots
Music
All the music in the game can be found in the Music folder. Below is a list of songs and their sources. Note that there are some spoilers, mostly with regard to where songs are used.
Do not reupload these songs elsewhere without permission from their respective creators.
Song List
| Filename | Orig. Name | Game Name | Source Link |
|---|---|---|---|
| title | Title | Title | Original |
| Ib_Memory | Ib: Memory | Main Theme: Memory | Original |
| spreludenew | Prelude in C Minor | Prologue | Source |
| CorelliLaFolia | Corelli La Folia | Gallery Theme | Source |
| BlindAlley | Blind Alley | Garry's Theme | Source |
| olddoll | Old Puppet | Moving Storybook | Source |
| HideAndSeek | Hide and Seek | Times of Sorrow | Source |
| Ib_Uneasiness | Ib: Uneasiness | Danger! | No Source |
| puppet | puppet | Mary's Theme | |
| NoOneInSight | No One In Sight | Sketchbook | Source |
| BGM008 | BGM008 | Uneasy Air | |
| doll | The Little Doll's Dream | Game Over | |
| Inquiry | Inquiry | Dungeon 1 | Source |
| Disappearance | Disappearance | Dungeon 2 | Source |
| Dining_room | Dining room | Dungeon 3 | Source |
| Noise | Noise | Dungeon 4 | Source |
| Goofball | Goofball | Dungeon 5 | Source |
| Departure | Departure | Ending | Source |
Walkthrough
A guide through the game and its puzzles.
This does not give full details about how to get different endings (see the Endings Guide for that), but does mention some of the moments that can impact what ending you get.
Walkthrough (Free Version)
Introduction
Walk around the gallery. On the second floor, the lower hallway between the left and right side has a big painting. Inspect the title of it.
Head back down to the first floor; the lights will flicker off.
Return to the big painting and check the blue liquid dripping down. Check the message that appears where it was.
Go back downstairs, go right from the entrance, and follow the blue footprints into the big painting on the floor.
Blue Area
Go to the right and take the rose from the vase. Push the table out of the way. Enter the door and take the Blue Key inside.
Back outside, you can place the rose in the vase to heal. Go left to find a save point and a door. Open the door with the Blue Key.
Green Area
Talk to the ant wandering around. Follow the sign's advice and walk up through the middle of the hallway, to avoid the hands that come out. Check the Ant Painting to take it.
Go back down and to the right. Put the Ant Painting over the hole in the floor to get across.
Pick up the Green Key, then run back. Go up to the door near where you got the Ant Painting and open it with the Green Key.
Yellow Area
Go to the left room. Talk to the stick figure and find their hiding place. (It can be one of three places: second from the left on the lower row, bottom-right, or top-left.) After finding the stick figure, read their message and pick up the Wooden Fish (Head) at the top of the room.
Go to the right room. Walk through the middle, and shortly after, a bust will begin moving. Lead it right so it goes over the crack on the floor. Pick up the Wooden Fish (Tail), and you'll combine the two into the Fish Key.
In the center room, use the Fish Key to open a path forward.
There are clues around this area for the code for the door in the top-right. (There's no need to find these if you already know the code.)
1. Check the white painting in the bottom-left twice. (Red 9)
2. Go up the middle of the hallway to avoid another hand. Check the red doll hanging near the ground, then check the one that falls. (Green 18)
3. Enter the Liars' Room in the top-left. Inspect the messages and work out who's giving the correct directions for the next room. (Resulting code number: Purple 4)
Enter the code for the door in the top-right. (Answer: 18 x 9 + 4 = 166) Inside, take the Wooden Apple.
Be careful to walk down the middle of the hallway on the way back. Give the Wooden Apple to the mouth on the wall in the bottom-right.
Go down the hallway, going slowly near the end to avoid the guillotine that falls in front of the last painting.
Red Area
Upon reaching a large room, check the Lady in Red painting in the top-right. She'll start to chase you when you walk away; dodge around her to grab the Red Key she drops, and use it on the door in the middle.
Check the top-left bookshelf. Either read the book, or don't read it and push the book in. Either way, the door will open.
Note that the healing vase here is infinitely usable. Go right and inspect the person on the ground for a Small Key.
Go left and enter the room. Dodge around the Lady in Blue to pick up the Blue Rose she drops, then run away, and keep running.
Return to the center and place the Blue Rose in the vase. Go back and talk to the person on the ground.
Go right and check the statue to have Garry move it.
Gray Area
Go up to the larger room, and enter the door to the Labyrinth (on your left). Press the hidden switch on the wall directly south of the top-left red mark - note that you may want to lure the statues toward the right side first so they don't trap you in the alcove.
Back in the main room, enter the upper-right door to the room of stools and easels. Push the stools (leaving and re-entering to reset if you mess up) to reach the Eyedrops.
Exact directions: Push the stool to your right up. Push the next stool to your right right twice. Next, there's a stool above and a stool to the left; push the left one twice. Move up one tile and push that stool left. Push the stool above you up. Walk left to the Eyedrops.
On the left side of the main room, use the Eyedrops on the red eye on the floor. Check the wall it looks at to find the Red Glass Ball. Put it in the snake painting at the top. The small painting that falls gives a hint.
Enter the door in the bottom-right. Go behind the tree sculpture and check it for a Silver Ring.
Go down to the first room of the Gray Area and put the ring on the left hand's ring finger for a Bouquet. Give the Bouquet to the blue face in the top-right of the main room.
Walk down the hallway. At the far right of the large room, inspect the clothes of the Hanged Man painting to see a number. Go to the two doors next to each other and enter the password to unlock the left one. (Answer: 6295)
Push the vase table left onto the four little holes in the floor to activate a switch.
Enter the now-unlocked door on the far right of the main room. Check the mirror. Check the mannequin head. Check the mirror again. The option you pick here can influence your ending.
Go down and avoid the painting ladies to take the Gray Key, then run right from the Lady in Red who jumps down. Use the key on the bottom door next to the save point.
Check the painting, then try to leave. Wait for a while, and a painting lady will come through the window, then another through the wall. Dodge them and exit through the hole the second one made. Run left to the partly-open door.
Picking up Garry's coat and talking to him enough times in the safe room can influence your ending. Leave once you're done.
Violet Area
Walk right. The maze of ropes is optional, but can influence your ending.
Continue around the area until you reach the end of the hall, with a door above and a door below. Enter the door below and push the statue out of the way. Pull the cord and exit downward.
Read the hint that appeared on the wall. Select "A" for "Abyss." Take the shortcut back to the end of the hall and use the password to open the upper door.
Check the painting and leave. Go right and follow the red footprints. In the next room, use the vase before moving on.
Proceed ahead, then go in the left door. Check the painting. Check the left bookshelf. Get the Violet Key from the shattered green rabbit.
Split
Check the top-right open box in the storage room for a Palette Knife. Check the bottom open box. Try to push the statue from the side, then take the upper door out of the room.
Proceed ahead until you reach a gap in the floor. Check the nearby blue rose icon to switch to Garry.
As Garry, enter the room and check the right bookshelf. In the next room, pull the fourth cord from the left, then use the red rose to switch back to Ib.
Ask the painting to let you cross the gap. Push the triangle block right into the gap. Switch to Garry, and push the block into the triangular hole.
Walk down the passage. What you do to the doll at the end can influence your ending.
Enter the upper-left door and read the note on the wall about balls of paint. Back in the main room, take the Ball of Paint (Yellow) that's appeared in the bottom-left.
Switch to Ib. Go across the gap again and walk down the passage.
In the big brown room, enter the bottom-right door and take the Tree Key. Take the mannequin head off the bottom-left table to make a crack in the floor.
Go to the bottom-left door and select Marvelous Night. Enter the library. Read the Collected Works of Guertena book for a hint. Use the Tree Key on the keyhole painting.
Switch to Garry. Enter the birth year of the Juggling painting (6223). Take the Ball of Paint (Blue).
Make sure you're at full health, then enter the poison room in the bottom-right, which damages you every time you take a step. Walk right to take the Umbrella, then leave.
Check the Fishing Hook painting and hook the Umbrella to send it up to Ib. Enter the top-right door (under the now-grown tree icon). Check the rightmost bookshelf in the top-left and pick up the Ball of Paint (Green).
Switch to Ib. Take the Umbrella from the Fisherman painting, then enter the room below and give it to the Lady Without Her Umbrella.
Switch to Garry. Heal and enter the poison room again; thanks to the rain and crack in the floor, there should be water dripping into the vase now. Walk to the right side of the vase, heal, walk to the cord on the right, and pull it. Take the Ball of Paint (Violet).
Enter the door under the tree icon again. Take the Ball of Paint (Pink). Check the right bookshelf and read the "M" entry.
Outside, read the message next to the doll, and take the Ball of Paint (Red) from it.
Before entering the door, you may want to save. Go inside and take the Ball of Paint (White).
Detailed advice for the following sequence:
There are four doll layouts chosen from randomly, with the key being in a set doll in each.
One way to identify which layout you have is to note the colors of the "sentinel" dolls to the immediate left and right of the door.
1. If the left sentinel is orange and the right sentinel is white, it's one of two layouts that look identical. The key is either in the right sentinel, or the lower white doll further to the right.
2. If the left sentinel is blue and the right sentinel is pink, the key is in the orange doll just up and left of the left sentinel.
3. If the left sentinel is orange and there's no doll immediately right of the door, the key is in the top-middle orange doll.
If you were successful:
Go upstairs. Talk to Mary if you didn't earlier. Go into the left door and go across the rainbow bridge to get the Brown Key. Use the Brown Key to unlock the right door.
If you failed:
Go into the left door and go across the rainbow bridge to get the Brown Key. Use the Brown Key to unlock the right door. Go downstairs and enter the doll room. This may lead into an ending.
In the Brown Area, go into the room in the bottom-right formerly blocked by gas. Have Garry push the statue and go down the stairs.
Sketchbook
Go left past the house, then up after the sign to the central pink building. Read the blue message on the building. Go left and enter the house. Take the Bucket on the left.
Go to the upper-right corner of the area and fill the Bucket with water. Go to the bottom-right corner and water the tulip bud right of the house. Take the Gallery Key from it.
Walk left and use the Gallery Key to unlock the door. Open the box inside and get the Little Mirror.
Go up to the top-left corner. Talking with Garry in the sunny spot enough times can influence your ending. When you're done, put down the Little Mirror and go inside the building.
Use hints hidden around the Sketchbook to solve the puzzle and get the Plastic Key.
General hint:
Search for the wall symbols in each segment of the Sketchbook, noting which symbols are where.
Hint 1: Plainly visible in the top-left section.
Hint 2: Check the door in the top section.
Hint 3: Stare into the water in the top-right section.
Hint 4: Check the differently-colored butterfly in the left section.
Hint 5: Observe the trees in the right section.
Hint 6: Check the back of the sign in the bottom-left section.
Hint 7: Check the bulletin board in the bottom section.
Hint 8: Check the bookshelf in the house in the bottom-right section.
Answer: Press the switches in order: Top, left, top-right, top-left, bottom-right, bottom, right, bottom-left.
Use the Plastic Key to enter the house at the top. Check the toy box. Depending on your route, the order of events here can differ.
Possibility 1:
Pick up the rose in the upper-left, then find Garry on the right side. Find the Pink Key near the bottom, right next to the pink cat's hind legs. Afterward, run up to the exit.
Possibility 2:
Find Garry on the right side. Find the Pink Key near the bottom-right corner, down and right of the clown's face. Head up to the exit.
Depending your route, you may have the option of using Garry's lighter to burn the vines and go upstairs. If you do so: Run to the end and burn the painting.
Use the Pink Key to unlock to the central pink building and go down the stairs.
Black Area
On a second playthrough, there will be a new passage here leading to a bonus dungeon (which the rest of this walkthrough covers). Otherwise, go upstairs to the big painting, and check it to proceed to a final choice and the ending.
Orange Area
In the large room, talk to the white ant near the hole in the floor. Get the Anthill Painting from the room to the right. Put the Anthill Painting over the hole.
Enter the door to the right of the clock and pull the snake's tail. Go up the winding passage, dodging the knives, and free the butterfly. Go down and catch the Warm Butterfly.
Leave the room, and get the Candle Painting after the butterfly flies over to it.
Enter the dark room to the left of the clock. Check the middle painting in the dark room ("Alarm for the Clock") and switch it to activate the clock.
Enter the clock code.
Hint: Combine the numbers in the dark room (there are six total) with the colors of the five frames in the right room, including the green anthill that was on the right end.
Answer: 72391
Go back in the room with the snake's tail. Go up to the top and check the night sky painting (formerly a blue sky) and shake it for Stardust. Give the Stardust to the wandering white ant for the Orange Key.
Go up past the now-sleeping flowers and unlock the door with the Orange Key.
Abyssal Space
Central Park
Pick up the painting piece near Drinking in the Night.
Left: Smiles
Pick up the painting piece in the lower-left. Watch the paintings closely (a random one of them blinks) to determine which one to point to for another painting piece.
Bottom-Right: Cactus Maze
Go through the maze for two painting pieces. If Garry is there, you can check the poster and switch to him.
Bottom-Left: Croquis Tag
Get the painting piece on the left side.
Catch all the black stick figures, avoiding the damaging red ones. After catching enough, you can check the poster near the door to switch to a very fast Garry if he’s around.
Return the stick figures to the book in the bottom-right and get the painting piece in front of the coffin painting.
Right: Endless Corridor
You need to bring the bird from the croquis room. Watch the path it takes and walk the same path to get a painting piece. (Exact steps: Right, right, down, right, up, up, right, right, down, right, right.)
Top-Left: Break Room
If Garry is with you, you have to complete the croquis room first, then talk to him until he falls asleep.
Get a painting piece from the Cubism book on the lower-left bookshelves.
After the room glows and the shelves shake (only if Garry is there, otherwise you can read it right away), check the top-left shelf to read about the secret room (both parts). Follow the directions.
In the secret room, examine the painting closely. Enter the correct answers into the left and right panels, then read the plate. (Answer: 3, Fish)
Get the painting piece, then... check the bottom-right wall to exit.
Top-Right: Copernicus
Go up the stairs and take the painting piece. Drop down the Copernicus display and note what you see.
Talk to the jewel box and choose the correct bodies on the wall for a piece. Answer: Red ball on left, green ball on right.
End
Once you have all the pieces, check the painting at the top of the main area to go to the Atelier.
If Garry isn’t around, you can sleep on the Final Stage for an ending.
If this is your first time doing the dungeon, there will be a chest with a Black Key, which unlocks the True Guertena Exhibition once you reach any "Ib escapes" ending.
Walkthrough (Remake Version)
Introduction
Walk around the gallery. Go up to the third floor to find a big painting. Inspect the title of it.
Head back down to the first floor; the lights will flicker off.
Return to the big painting and check the blue liquid dripping down. Check the message that appears where it was.
Follow the blue footprints.
Blue Area
Go to the right and take the rose from the vase. Push the table out of the way. Enter the door and take the Blue Key inside.
Back outside, you can place the rose in the vase to heal. Go left to find a save point and a door. Open the door with the Blue Key.
Green Area
Talk to the ant wandering around. Follow the sign's advice and walk up through the middle of the hallway to avoid the hands that come out. Check the Ant Painting to take it.
Go back down and to the right. Put the Ant Painting over the hole in the floor to get across.
Pick up the Green Key, then run back. Go up to the door near where you got the Ant Painting and open it with the Green Key.
Yellow Area
Go to the left room. Talk to the stick figure and find their hiding place. (The location is random: either top-left, bottom-right, or second from the right on the lower row.).
After finding the stick figure, read their message and pick up the Wooden Fish (Head) at the top of the room.
Go to the right room. Push the blue stool out. Check the stool and look at its feet. Check the open box in the top-right for a Glass Heel. Put the Glass Heel on the stool.
Lead the stool in front of the shelf with something on top of it and have it stop. Get on top to grab the Wooden Fish (Tail), and you'll combine the two into the Fish Sculpture.
In the center room, insert the Fish Sculpture to open a path forward.
Go right to the end of the hallway and turn the sprout-shaped wind-up key. Go up and check the pink doll hanging low to the ground, then when the doll falls, turn the wind-up key it was hiding.
Enter the Liars' Room on the left. Inspect the messages and work out the correct tile to pull in the next room. (Answer: B-2) Turn the wind-up key.
Take the Blue Fruit from the Clockwork Plant in the center of the main hall.
Head to the right, being careful to avoid the hand that comes out of the right wall before the intersection, and give the Blue Fruit to the lips on the wall.
Go down the hallway, going slowly near the end to avoid the guillotine that falls in front of the last painting.
Red Area
Upon reaching the large room with two big statues, check the Lady in Red painting in the top-right. She'll start to chase you when you walk away; dodge around her to grab the Red Key she drops, and use it on the door in the middle.
Check the top-left bookshelf. Read the book (on a second playthrough, you can skip it by pressing Cancel), and the door will open.
Note that the healing vase here is infinitely usable. Go right and observe the person on the ground for a Small Key.
Go left and enter the room. Dodge around the Lady in Blue to pick up the Blue Rose she drops, then run away, and keep running.
Return to the center and place the Blue Rose in the vase. Go back and talk to the person on the ground.
Go right and check the statue to have Garry move it.
Gray Area
Go up and enter the left door to the tea room. Slide the cups so they're in front of the corresponding-color teapots.
Exact directions: Blue down, green down, green left into position. Red right, red down into position. Blue up, yellow left, blue down, blue right, blue up into position. Yellow up into position.
Back in the main room, enter the upper-right door to the room of stools and easels. Push the stools (leaving and re-entering to reset if you mess up) to reach the Eyedrops.
Exact directions: Push the stool above the "leave the room to reset" sign up. Push the stool to the right of it right twice. Push the stool above you up. Go right and push the stool there up into the top-right corner. Push the next stool down. Push the last stool left and take the Eyedrops.
On the left side of the main room, use the Eyedrops on the red eye on the floor. Check the wall it looks at to find the Red Glass Ball. Put it in the snake painting at the top. Read the small painting that falls for a hint.
Enter the door in the bottom-right formerly blocked by the cat. Inspect where the painting told you to (random between back of white bust, skeleton's hand, or back of tree) for a Silver Ring.
Go down to the entrance area and put the ring on the left hand's fourth finger for a Bouquet. Give the Bouquet to the blue face in the top-right.
Walk down the hallway. At the far right of the large room, inspect the clothes of the Hanged Man painting to see a number. Go to the two doors next to each other, enter the password on the floor, and open the left door. (Answer: 2569)
Take the Golden Fish, and optionally check the mirror. The option you pick here can influence your ending.
Go to the bottom-right and take the Ball With Hole to make the Golden Lamp. Run left from the Lady in Yellow who jumps down.
Give the Golden Lamp to the Lady Reading the Newspaper on the left for the Golden Elephant. Give the Golden Elephant to the Noble Boasting of Gold on the right to get a Golden Bird. Put the Golden Bird in the hanging cage to lift the bars.
Note that if you give a petal to the Guardian of Time (provided you have one), you'll receive some small assistance for the following sequence. (The autosave won't give you a chance to go back and do so, so make a manual save here if you think you might want to.) Go inside the room formerly blocked by the bars.
Take the Gray Key from the painting frame, then try to leave. Wait, and a painting lady will come through the wall, shortly followed by another. Dodge them and exit through the hole.
Run left and keep running toward the locked door in the top-right. Choosing to break through headless statues for a shortcut can influence your ending. (Note that while there's an obvious first set of statues, there's also a second set you'll only encounter if, after passing the Guardian of Time, you take the upper rightward passage instead of just going straight up.)
Picking up Garry's coat and talking to him at least once in the safe room can influence your ending. Leave once you're done.
Violet Area
Walk down and left into the maze. Directions: Step on the blue triangle switch. Step on the orange circle switch. Step on the pink square switch. Step on the orange circle switch again. Head to the now-lowered pink obstacle on the far right (stepping on the blue triangle switch on the way).
Push the statue above to make a shortcut. Enter the room to the right.
Check the painting and leave. Follow the red trail up.
Proceed ahead, then go in the right door. Check the painting. Check the left bookshelf. Get the Violet Key from the shattered green rabbit.
Split
Open the left door. Check all the open boxes in the storage room. Try to push the statue from the side, then take the upper door out of the room.
Proceed ahead until you reach a gap in the floor. Check the nearby blue rose icon to switch to Garry.
As Garry, enter the room and check the right bookshelf. In the next room, pull the fourth cord from the left, then use the red rose to switch back to Ib.
Ask the painting to let you cross the gap. Push the crescent block left into the gap. Switch to Garry, and push the block into the crescent-shaped hole.
Walk down the passage. What you do to the doll at the end can influence your ending. In the big room, take the Ball of Paint (Yellow).
Switch to Ib. Go across the gap again and walk down the passage.
In the big brown room, check the Guardian of the Door by the bottom-left door. Accept the challenge and answer correctly. Answer: Heavenly Thread, then either Marvelous Night or Depths (picked randomly).
Enter the now-unlocked door. Read the Collected Works of Guertena book for a hint. Pick up the Odd Painting. Go over to the snake paintings on the right and swap out the belly painting.
Switch to Garry. Enter the birth year of the Juggling painting (6223) for a Ball of Paint (Blue). Take the Glass Heart from the snake and put it in the hands of Heart in Custody to unlock the nearby door.
Enter the unlocked door. Check the bookshelf right of the eye painting, then pick up the Ball of Paint (Green). Take the Umbrella.
Outside, check the Fishing Hook painting and hook the Umbrella to send it up to Ib.
Switch to Ib. Take the Umbrella from the Fisherman painting, then enter the room below and give it to the Lady Without Her Umbrella. Climb up on the turtle and rotate the painting twice, so it has the green on top and the red on the bottom.
Switch to Garry. Make sure you're at full health using the vase, then enter the poison room below the snake paintings, where only the green grates should be emitting gas. Take the Ball of Paint (Violet). Walk through the gas to the bottom; you'll survive with 1 health left. Rotate the painting to disable the green grates, then push the clover into the top-right hole.
Enter the study next to Heart in Custody again. Take the Ball of Paint (Pink). Check the right bookshelf and read the "M" entry.
Outside, read the message next to the doll, and take the Ball of Paint (Red) from it.
Before entering the door, you may want to save. Go inside and take the Ball of Paint (White).
Detailed advice for the following sequence:
There are four doll layouts chosen from randomly, with the key being in a set doll in each.
One way to identify which layout you have is to note the number of dolls (and sometimes their color) along the bottom row of the room.
1. Four dolls along bottom (pink, white, green, orange): Key is in not the bottom-left-most pink doll, but the pink doll a bit up and right of it.
2. Four dolls along bottom (white, pink, orange, blue): Key is in the uppermost orange doll, just right of the big painting.
3. Five dolls along bottom: Key is in not the bottom-left yellow doll, but the yellow doll above it.
4. Six dolls along bottom: Key is in the bottom-right-most green doll.
If you were successful:
Go past the palette up the stairs. Talk to Mary if you didn't earlier. Go into the top-left door and go across the rainbow bridge to get the Brown Key. Use the Brown Key to unlock the top-right door.
If you failed:
Go into the top-left door and go across the rainbow bridge to get the Brown Key. Talk to Mary and use the Brown Key to unlock the top-right door. Go downstairs and enter the doll room. This may lead into an ending.
In the Brown Area, go into the angled door in the bottom-right. Have Garry push the statue and go down the stairs.
Sketchbook
Walk along either the top or bottom path. The top has more dangerous hazards that fall/come up from below, but has a "treasure" which gives a small scene.
Go left and up between the wall drawings to the central yellow building. Read the blue message on the building. Go left and enter the house. Take the Bucket on the left.
Go to the upper-right corner of the area and fill the Bucket with water. Go down to the right section and water the blue tulip bud. Take the Little Mirror from it.
Go up to the top-left corner. Talking with Garry in the sunny spot at least once, as well as looking at the pudding, can influence your ending. Point the Little Mirror toward the door and go inside the building.
Use hints hidden around the Sketchbook to solve the puzzle and get the Pink Crayon.
General hint:
Search for the wall symbols in each segment of the Sketchbook, noting which symbols are where.
More detailed hint:
Most sections have a plainly visible symbol, but some aren't depicted on the map and can only be seen by actually going there.
Answer:
Press the switches in order: Bottom, top-right, left, top-left, right, top, bottom-right, bottom-left.
Go to the top section and use the Pink Crayon to gain entry to the house. Check the toy box. Depending on your route, the order of events here can differ.
Possibility 1:
Get woken up by Garry. Find the Toy Key in the bottom-right corner, next to the turtle's head. Afterward, run up to the exit.
Possibility 2:
Pick up the rose in the bottom-right, down and left of the clown's face, then find Garry in the top-right. Find the Toy Key near the top-left, under the blue stool with heels. Afterward, run up to the exit.
Depending your route, you may have the option of using Garry's lighter to burn the vines and go upstairs. If you do so: Run to the end and burn the painting.
Use the Toy Key to unlock the central yellow building and go down the stairs.
Black Area
On a second playthrough, there will be a new passage here leading to a bonus dungeon (which the rest of this walkthrough covers). Otherwise, go upstairs to the big painting, and check it to proceed to a final choice and the ending.
Orange Area
In the large room, talk to the white ant near the hole in the floor. Get the Anthill Painting from the room to the right. Put the Anthill Painting over the hole.
Walk around and enter the door to the right of the clock. Go up the winding passage, dodging the darts, and step on the black rose to stop them. Free the butterfly on the left. Go down and have the Warm Butterfly come with you.
Leave the room and check the candle painting in the top-left of the main room. Take the Candle Painting.
Enter the dark room to the left of the clock. Find the seconds hand on the floor (can be in one of three random locations) and leave.
Configure the stones beneath the clock and turn the wind-up key.
Answer: Match the colors of the five frames in the right room, including the green anthill that was on the right end: Red, blue, yellow, purple, green.
Go up past the now-sleeping flowers at the top, enter the door, and go up the stairs.
Abyssal Space
Bottom-Left: Croquis Tag
Catch all the black stick figures, avoiding the damaging red ones. Return them to the book by the entrance and take the painting tile in front of the tombstone painting.
Left: Smiles
Watch the paintings closely (a random one of them blinks) to determine which one to point to for a painting tile.
Top-Left: Break Room
If Garry is with you, you have to complete the croquis room first, then talk to him until he falls asleep.
After the shelves shake (only if Garry is there, otherwise you can find it right away), check the book that starts to glow on the top-left shelf. Open the curtains in the uncovered painting.
Set up the room correctly, then tell the girl you're done for a tile.
Hint: There are two valid answers based on what title you give the painting on the nameplate.
Answer:
Using the title "Five Hours Earlier": Fully-uneaten fish, book with no writing, full-height candles, unbloomed flower bud, clock at 12:00 (single visible hand facing up), blue sky.
Using the title "Five Hours Later": Fully-bones fish, book with writing on both pages, fully-melted candles, flower with fallen petal, clock at 10:00 (hour hand facing up-left), dark night sky.
Bottom-Right: Cactus Maze
Go through the maze for the painting tile. If Garry is there, you can use the blue rose icon to switch to him for extra health.
Right: Path of Trust
After rescuing the bird from the croquis room, follow it to the end of the corridor and take the painting tile.
Top-Right: Messy Room
Enter the door in the top-right once you have at least three of the painting tiles. Talk to the jewel box and check the instructions that appear in the top-right.
Arrange everything so it matches the descriptions, then talk to the jewel box for a tile.
You can talk to Garry for some hints; after enough hints from him, you can also talk to the jewel box for a random hint.
Painting positions: From left to right: Three eyes, pistol, jellyfish, brush.
Statue positions: Arrow in bottom-right corner. Fish two tiles left of arrow, aligned with jellyfish painting. Crow on top row under pistol. Dancer on far left in center row, her foot pointing toward the jewel box.
End
Once you have all the tiles, check the painting at the top of the main area to go to the Atelier.
If Garry isn’t around, you can sleep on the Final Stage for an ending.
Endings Guide
A guide on the factors that go into getting the game's various endings.
This guide is extremely spoilery, so do NOT read this if you haven't beaten the game at least once. Even then, it's only recommended that you read this if you want to know exactly how to get the other endings and aren't willing to experiment on your own.
Endings Guide (Free Version)
Doom Counter
If there are three or more points in this, things will go sour in the toy box.
These actions lead to doom:
Gray Area
- Kicking the mannequin head in the mirror room (instead of having Ib stop Garry)
Violet Area
- Pulling the rightmost of the five cords, which drops a mannequin or doll
- Kicking the persistent doll (instead of moving it aside)
- Failing the doll room (adds 2 points)
Brown Area
- Telling Mary you would leave with Garry
- Breaking all three mannequin heads by pushing them off
Garry Bond
If your bond is eight points or higher, you're able to get Promise of Reunion.
These actions add to your bond:
Gray Area
- Reading the poster about the right-hand trick in the maze room
- Stopping Garry from kicking the mannequin head in the mirror room
- Picking up Garry's coat in the safe room
- Talking to Garry seven or more times in the safe room (after giving back his coat)
Violet Area
- Reading the diary in the rope maze near the beginning of the area
- Looking at the milk puzzle (regardless of your answer)
- Saying you're there or not there (not "..........") after the lights go out
Sketchbook
- Talking to Garry six or more times in the fake sunlight
- Telling Garry you're either "fine" or "hurt all over" (not "..........") after falling into the toy box
Mary Affection
If Mary's affection for Ib is four points or higher, you're able to get Welcome to the World of Guertena.
These actions add to Mary's affection:
Violet Area
- See the "sinister painting" in hide and seek, as well as the Hanged Garry message; then, when you meet Mary, ask if she's okay before Garry does
- Agree that Red Eyes is cute or pettable
- Agree with Mary that Ib and her will be fine on their own
Brown Area
- Tell Mary you'd leave with her [Note: not useful, given the Doom Count requirement]
- Talk to Mary seven or more times in the brown area (while she follows you around after stabbing the mannequin)
Is Garry beyond saving...?
There are three requirements for this:
- See the "sinister painting" in the hide and seek room
- See the Hanged Garry message after kicking the mannequin head
- Do all Doom-Counter-increasing actions up to the doll room
If all of these are fulfilled and you fail the doll room, Garry is too far gone to be saved.
If Mary's affection is less than four, you proceed to "A Painting's Demise." If it's four or more, you get "Welcome to the World of Guertena."
If Garry dies, you have two options:
- Go straight to the gallery to get "Together, Forever."
- After Mary is done with Garry's rose, go back and get Garry's lighter to burn Mary's painting. If you jump into the big painting, you get "Forgotten Portrait." If you don't, or go with the fake Garry, you get "Ib All Alone."
In the Atelier at the end of the second-playthrough extra dungeon, you can get a variation of "Ib All Alone" by falling asleep, so long as Garry isn't there to stop Ib.
If Garry lives, there are two possibilites:
- Your bond is too low, Ib doesn't get to give Garry her handkerchief, Garry doesn't remember Ib, and you get "Memory's Crannies."
- Your bond is high enough, Ib gives Garry her handkerchief, and Garry remembers Ib, so you get "Promise of Reunion."
Going with the fake mother in either case, you get "Ib All Alone."
After a "good" ending (where Ib escapes), you have the option of starting over, which preserves knowledge of the endings and artworks you've seen. (A playthrough starting from "new game" will not have any memory of this.) When you reach the end of the game on a repeat playthrough, the dark gallery at the end has a path to an extra dungeon.
The Black Key at the end of this dungeon unlocks the True Guertena Exhibition. (You're presented with the option of going there after any "good" ending.) There, you can see all the artwork Ib has learned the complete names of.
Getting specific endings adds NPCs to the true exhibition:
- Promise of Reunion adds Garry to the main "real gallery" area.
- Forgotten Portrait adds Ib's father to the main "real gallery" area.
- Memory's Crannies adds Ib's mother to the area with the "real gallery" sculptures.
- Together, Forever adds Mary to the room with all the color doors.
Miscellaneous changes as a result of choices:
- Seeing the "sinister painting" of Ib (during hide and seek in the yellow area) results in seeing a hanged Ib in the lower-left of the sketchbook.
- Kicking the mannequin head in the mirror room makes more mannequin heads appear in general. The room with the poster about damaging exhibits has a hanged mannequin put in it. It fills the vase below with red paint/blood, which will make your rose wilt. Later, after the lights go out in the violet area, the mirror may show Garry with his head blotted out. Lastly, if Garry pulls the rightmost of the five cords in Violet Area, a mannequin head falls rather than a doll.
- Mary will only ask Ib the hypothetical "if there were only two" question if the Doom Count is at zero.
- Breaking all three mannequin heads in the brown area makes more appear in the main room. Later, it places a hanged Ib near the pink house in the sketchbook, though Garry doesn't see it.
- If Garry moves the persistent doll aside, he gets the ball of paint from its stomach prior it running into the doll room. If Garry kicks it, the doll will be decapitated and he'll get the ball of paint from its head. Additionally, he has less time to do the doll room.
- If you succeed in the doll room, Garry will go up the stairs himself and intercept Mary as she closes in on Ib. If you fail the doll room, Ib and Mary find Garry talking to the dolls/rabbits, but Ib snaps him out of it (maybe). However, he doesn't remember Mary's secret until they go up the stairs, Mary drops her rose, and he knocks her out.
- If Ib calls Red Eyes "cute" or "pettable," Mary will take this to be her opinion of the blue dolls and comment on it in the toy box while discussing the rose trade.
- If you have the Candy in the "Together, Forever" ending, Mary will eat it. If you took the Lighter (and ate the Candy to make room), Mary will say it's dangerous and take it away.
Endings Guide (Remake Version)
Doom Counter
If there are three or more points in this, things will go sour in the toy box.
These actions lead to doom:
Gray Area
- Kicking the mannequin head in the mirror room (avoid by stopping Garry/never checking mirror) (+1)
- Breaking through statues while escaping Gray Area (one forced encounter and an optional second, +1 each)
Violet Area
- Pulling the middle cord of the five cords, which drops a mannequin or doll (+1)
- Kicking the persistent doll (instead of moving it aside) (+1)
- Failing the doll room (+2)
Brown Area
- Telling Mary you would leave with Garry (+1)
Garry Bond
If your bond is nine points or higher, Garry will accept Ib's handkerchief at the end, allowing you to get Promise of Reunion.
These actions add to your bond:
General
- Talking to Garry with talk button (+1 or +2; +1 for 10-19 times, +2 for 20+ times)
(Repeat conversations still count, but not if it's the same one twice in a row) - Doing at least 7 optional events with Garry (see below) (+1)
Gray Area
- Stopping Garry from kicking the mannequin head in the mirror room (+2)
- Picking up Garry's coat in the safe room (+2)
Violet Area
- Saying you're there or not there (not "......") after the lights go out (+1)
- Snapping Garry out of it after failing doll room (+3)
Sketchbook
- Telling Garry you're either "fine" or "hurt all over" (not "......") after falling into the toy box (+1)
So how tight is the requirement for Promise of Reunion?
In short, if you fail the doll room, the +3 from rescuing Garry gives you some lenience with bond points, but at the price of needing to avoid anything else that increases Doom Count.
If you succeed at the doll room, you must get all other bond points, including talking to Garry at least 20 times throughout the game and doing most of the optional events below.
Below are the optional Garry events you must do at least 7 of for a bond point:
Green Area
- Backtrack with Garry and check the ant
Yellow Area
- Backtrack with Garry and check the stool
Red Area
- Look at Abstract Art in the place you meet Garry (response doesn't matter)
Gray Area
- In the tea room, read the Scent-Sensitive Porcupuss title (response doesn't matter)
- In the safe room, talk to Garry at least once (after giving back his coat)
Violet Area
- Look at the milk puzzle (response doesn't matter)
Sketchbook
- Take the upper path at the start and look at the treasure
- In top-left sunlight, look at the pudding and agree with Garry
- In top-left sunlight, talk to Garry at least once
Is Garry beyond saving...?
There are four requirements for this:
- Must be a second playthrough (new game after beating game once, marked with diamond)
- See the fallen Ib painting in the hide and seek room
- Tell Mary you'd leave with either Garry or her, rather than dodging the question
- Have a Doom Count of 5+ by the doll room (i.e. all dooming actions except Mary's question)
If all of these are fulfilled and you fail the doll room, when you find Garry, you'll get a choice between "Snap out of it!" and "Garry...?" The former will bring Garry back as usual, but the latter will not, leading to new endings.
If you told Mary you'd want to leave with Garry, you proceed to "A Painting's Demise."
If you told Mary you'd want to leave with her, you get "Welcome to the World of Guertena."
If Garry dies, you have two options:
- Go straight to the gallery to get "Together, Forever."
- After Mary is done with Garry's rose, go back and get Garry's lighter to burn Mary's painting. If you jump into the big painting, you get "Forgotten Portrait." If you don't, or go with the fake Garry, you get "Ib All Alone."
In the Atelier at the end of the second-playthrough extra dungeon, you can get a variation of "Ib All Alone" by falling asleep, so long as Garry isn't there to stop Ib.
If Garry lives, there are two possibilites:
- Your bond is too low for Garry to accept Ib's handkerchief, or you just don't try to give it to him, leading to "Memory's Crannies."
- Your bond is high enough that Ib can give Garry her handkerchief; doing so will lead to "Promise of Reunion."
Going with the fake mother in either case, you get "Ib All Alone."
After reaching any "good" ending (where Ib escapes), you unlock a bonus dungeon; on a second playthrough, the dark gallery at the end will have a new path to take.
Additionally, you're able to access the True Guertena Exhibition from the title screen. There, you can see all the artwork Ib has learned the complete names of across all playthroughs.
Getting specific endings adds NPCs to the main area of the true exhibition:
- Promise of Reunion adds Garry near Abyss of the Deep.
- Forgotten Portrait adds Ib's father near the left sculptures.
- Memory's Crannies adds Ib's mother near the right sculptures.
- Together, Forever adds Mary near all the color doors.
Collecting all the artwork is recognized by the receptionist, and rewards you with a special illustration that gives an achievement on Steam.
All Artwork Guide
A guide for "collecting" every piece of art. Contains spoilers for all artworks in the game.
All Artwork Guide (Free Version)
Artworks are listed more or less in order from left to right, top to bottom.
The rule of thumb for a piece being added to the True Exhibit is that Ib specifically must know its full title, with Garry present to help when needed. Most tricky situations with regard to this are pointed out here, but take particular note of this rule for the parts where you play as Garry.
Main Hall
- Isolation at Water's Edge: Read with Garry in dark gallery at end
- Horizon View: Read in intro gallery
- Glass of Antipodes: Read with Garry in dark gallery at end
- A Well-Meaning Hell: Read with Garry in dark gallery at end
- Serpentine Spirit: Read with Garry in dark gallery at end
- The Sky Seen From A Hill: Read in intro gallery
- Selfless Guard: Read in intro gallery
- The Coughing Man: Read in intro gallery
- Lady Taking the Newspaper: Read in intro gallery
- The Hanged Man: Read in intro gallery
- Couplet Towers: Read with Garry in dark gallery at end
- Worry: Read in intro gallery
- Nature-Morte on Table: Read with Garry in dark gallery at end
- Abyss of the Deep: Read with Garry in dark gallery at end
(No, learning it for the puzzle in Violet Area doesn't count) - Misshapen Diamond: Read with Garry in dark gallery at end
- The Lady in Red: Read in intro gallery
Sculpture Room
- Bitter Fruit: Read in intro gallery
- Spectacle of Century's End: Read with Garry in dark gallery at end
- Your Dark Figure: Read in intro gallery
- Enlightenment: Read with Garry in dark gallery or Abyssal Space break room book
- Fusion: Read with Garry in dark gallery at end
- Wariness: Read with Garry in dark gallery at end
- Taste-Cleansing Tree: Read in intro gallery
- Embodiment of Spirit: Read with Garry in dark gallery at end
(No, hearing Garry say it in safe room or Memory's Crannies ending doesn't count) - Reserved Seat: Read in intro gallery
- The Gleam of Ores and Stars: Read with Garry in dark gallery at end
- Death of the Individual: Read in intro gallery
Blue Area
- The Geometric Fish: Come back to Blue Area and read with Garry
(No, reading name in Brown Area book does not count)
Green Area
- Prologue: Read in Green Area right passage
- Chapter 1: Read in Green Area right passage
- Epilogue: Read in Green Area near first Death of the Individual
- Chapter 2: Read in Green Area right passage
- Last Chapter: Read in Green Area right passage
Yellow Area
- (Green Liar): Read message in Yellow Area Liars' Room (before solving)
- (Brown Liar): Read message in Yellow Area Liars' Room (before solving)
- (Yellow Liar): Read message in Yellow Area Liars' Room (before solving)
- (Blue Liar): Read message in Yellow Area Liars' Room (before solving)
- (White Liar): Read message in Yellow Area Liars' Room (before solving)
- (Red Liar): Read message in Yellow Area Liars' Room (before solving)
- Apple Born of a Tree: Read in Yellow Area Wooden Apple room
- A Chef's Talent: Read in Yellow Area hide and seek room
- (Moon): Find in Yellow Area hide and seek room
- (Nude): Find in Yellow Area hide and seek room
- (Sword): Find in Yellow Area hide and seek room
- (Spitting Painting): Inspect in Yellow Area
- (Handprint): Find in Yellow Area hide and seek room
- (Hide and Seek): Effectively no requirement (find in hide and seek)
- (Music Note): Find in Yellow Area hide and seek room
- (Fallen Ib): Find in Yellow Area hide and seek room
- (Rose): Find in Yellow Area statues/busts/boxes room
Red Area
- Smoking Aristocrat: Read with Garry in Red Area large room
- Heart Wounds: Read in Red Area large room
- Breath: Read in Red Area first room
- Soul-Sapping Throng: Read with Garry in Red Area first room (secret wall passage)
- Peacock Pattern: Read with Garry in Red Area large room
- Open: Read in Red Area large room
- Shut: Read in Red Area large room
- Heartbeat: Read in Red Area large room
- Forsaken Shelter Under Cloth: Read with Garry in Red Area small Lady in Blue room
- Eternal Blessing: Read next to infinite vase in Red Area
- Abstract Art: Read with Garry in Red Area room where he joins
Gray Area
- Grieving Bride: Read in Gray Area first room before putting on ring
- Grieving Groom: Read in Gray Area first room before putting on ring
- Blessed Bride: Read in Gray Area first room after putting on ring
- Blessed Groom: Read in Gray Area first room after putting on ring
- Grieving Bride's Left Hand: Check in Gray Area first room before putting on ring
- Grieving Bride's Right Hand: Check in Gray Area first room before putting on ring
- Blessed Bride's Left Hand: Check in Gray Area first room after putting on ring
- Blessed Bride's Right Hand: Check in Gray Area first room after putting on ring
- (Flower-Liking Painting): Effectively no requirement (give Bouquet)
- Unbalanced Box: Read in Gray Area room before mannequin hallway
- Devotion to Custody: Read in same room as Unbalanced Box
(version when you haven't seen hide and seek "sinister painting" - Heart in Custody: Read in same room as Unbalanced Box
(version when you have seen hide and seek "sinister painting" - Couple: Effectively no requirement (look at it as part of progression)
- (White Snake): No requirement
- Untitled: Read in Gray Area safe room
- Wine Sofa: Read in Gray Area sculptures room
- Melancholy: Read in Gray Area sculptures room
- (Eyedrops): No requirement
- Puzzle: Read in Gray Area sculptures room
- Feeling: Read in Gray Area sculptures room
Violet Area
- Red Eyes: No requirement
- Separation: Effectively no requirement (read in Violet Area)
- Flowers of Jealousy: Read in Violet Area split-up room before being split up
- Fishing Hook: Read in split segment Violet Area after coming down with Ib
- Fleeting Thoughts on a Moonlit Night: Read in Violet Area
- Marvelous Night: Read in split segment Violet Area after coming down with Ib
- Juggling: Read in split segment Violet Area after coming down with Ib
- Strained Ear: Read in split segment Violet Area after coming down with Ib
- Red Button: Read in Violet Area rope maze
- Blue Button: Read in Violet Area rope maze
- Green Button: Read in Violet Area rope maze
- Milk Puzzle: Read in Violet Area
- The Force of Quarrel: Read in Violet Area room where you meet Mary
- Depths: Read in split segment Violet Area after coming down with Ib
- (Doll Head): Check top-left-most doll in doll room after having kicked the doll
- (Headless Doll): Check top-left-most doll in doll room after having avoided the doll
Brown Area
- Aspiration: Read in Brown Area room with stairs to Sketchbook
- Illusion: Read in Brown Area rainbow bridge room
- Heavenly Thread: Read in Brown Area main room
- Fallen Star: Read in Brown Area winding stair passage
- Bashful Glance: Read about it with Garry in Abyssal Space break room book
- Skin and Squama: Read with Garry in Brown Area main room
- Tattletale: Read in Brown Area main room
- Clown: Read in Brown Area winding stair passage
- Lady With Her Umbrella: Read again in Brown Area after giving her Umbrella
- A Lone Keyhole: No requirement
- Fisherman: Effectively no requirement (fish up umbrella)
Orange Area
- Stirred Up: Read in Orange Area main room
- Concealed Secret: Read in Orange Area first room
- Truant Seconds Hand: No requirement
- Deja Vu: Read with Garry in Orange Area first room
- Stubborn Twins: Read with Garry in Orange Area main room
- Beyond Halcyon Skies: Read with Garry in Orange Area right room before nightfall
- Teeming Night Sky: Read with Garry in Orange Area right room after nightfall
- Mistake: Read in Orange Area right room
- Light Within the Canvas: Effectively no requirement (take it with you)
- A Spectacle of Blood: Read with Garry in Orange Area main room
- A Place Out of Reach: Read in Orange Area main room
- Queen of High Society: Read in stairs room at end of Orange Area
- Night-Owl Man: Read in Orange Area main room after nightfall
- Hard-to-Wake Man: Read in Orange Area main room before nightfall
- Malice's True Form: Read left painting in Orange Area dark room
- Prelude to Wine: Read right painting with Garry in Orange Area dark room
Abyssal Space
- Cycloptic Smile: Read Abyssal Space Central Park sign or break room book with Garry
- Place of Warmth: Read at end of Abyssal Space Endless Corridor
- Flowers Without Color: Read in Abyssal Space croquis room
- Guertena: No requirement
- Incomplete Youth: Read torn-off nameplate in Abyssal Space croquis room
- Insomnia Coffin: Read with Garry in Abyssal Space croquis room
- Mayhem of Color: Read in Abyssal Space cactus maze
- Flexible Stone: Read in Abyssal Space Central Park
- Tryst After Death: Read with Garry in Abyssal Space Central Park
- Drinking in the Night: Read in Abyssal Space Central Park
- Birth of the Copernicus Revolution (bottom-right exit): Read in Abyssal Space
Abyssal Space: Secret Room
- The Beauty of Blanc: Read with Garry in Abyssal Space Central Park
- Three Crows and Five Fish: Effectively no requirement (solve secret room)
- Peep: Read with Garry in Abyssal Space break room after returning from secret room
- Annulated Woman: Read with Garry at start of Abyssal Space
- Jewel Box of Temptation: Read with Garry in Abyssal Space small room after fall
Black Area
- Forgotten Portrait: Get Forgotten Portrait ending
- Mary: Burn Mary's painting
- Final Stage: Read in the Atelier
All Artwork Guide (Remake Version)
Artworks are listed more or less in order from left to right, top to bottom.
The rule of thumb for a piece being added to the True Exhibit is that Ib specifically must know its full title, with Garry present to help when needed. Most tricky situations with regard to this are pointed out here, but take particular note of this rule for the parts where you play as Garry.
Main Hall
- Isolation at Water's Edge: Read with Garry in dark gallery at end
- Eternal Sleep: Read in intro gallery
- Serpentine Spirit: Read with Garry in dark gallery at end
- Horizon View: Read in intro gallery
- Glass of Antipodes: Read with Garry in dark gallery at end
- A Well-Meaning Hell: Read with Garry in dark gallery at end
- The Sky Seen From A Hill: Read in intro gallery
- Selfless Guard: Read in intro gallery
- Nature-Morte on Table: Read with Garry in dark gallery at end
- The Hanged Man: Read in intro gallery
- Lady Taking the Newspaper: Read in intro gallery
- The Coughing Man: Read in intro gallery
- Couplet Towers: Read with Garry in dark gallery at end
- The Lady in Red: Read in intro gallery
- Worry: Read in intro gallery
- Abyss of the Deep: Read with Garry in dark gallery at end
- Bitter Fruit: Read in intro gallery
- Misshapen Diamond: Read with Garry in dark gallery at end
- Your Dark Figure: Read in intro gallery
- Spectacle of Century's End: Read with Garry in dark gallery at end
- Embodiment of Spirit: Read with Garry in dark gallery, or ask him in either Garry ending
- Taste-Cleansing Tree: Read in intro gallery
- Fusion: Read with Garry in dark gallery at end
- Wariness: Read with Garry in dark gallery at end
- Reserved Seat: Read in intro gallery
- Death of the Individual: Read in intro gallery
- Together, Forever: Get Together, Forever ending (not part of total count)
- Promise of Reunion: Get Promise of Reunion ending (not part of total count)
Blue Area
- The Geometric Fish: Come back to Blue Area and read with Garry
(No, reading name in Brown Area book does not count)
Green Area
- Prologue: Read in Green Area right passage
- Chapter 1: Read in Green Area right passage
- Chapter 2: Read in Green Area right passage
- Last Chapter: Read in Green Area right passage
- Epilogue: Read in Green Area near first Death of the Individual
Yellow Area
- (Moon): Find in Yellow Area hide and seek room
- (Nude): Find in Yellow Area hide and seek room
- (Handprint): Find in Yellow Area hide and seek room
- (Fallen Ib): Find in Yellow Area hide and seek room
- (Evil Face): Find in Yellow Area hide and seek room
- (Music Note): Find in Yellow Area hide and seek room
- A Chef's Talent: Read in Yellow Area hide and seek room
- (Hider): No requirement
- Unbalanced Box: Read in Yellow Area main hall
- Clockwork Plant: Effectively no requirement (check in Yellow Area)
Red Area
- Smoking Aristocrat: Read with Garry in Red Area large room
- Heart Wounds: Read in Red Area large room
- Breath: Read in Red Area first room
- Soul-Sapping Throng: Read with Garry in Red Area shadowy hallway (secret passage)
- Heartbeat: Read in Red Area large room
- Eternal Blessing: Read next to infinite vase in Red Area
- Abstract Art: Read with Garry in Red Area room where he joins
- Forsaken Shelter Under Cloth: Read with Garry in Red Area left room
- Open: Read in Red Area large room
- Shut: Read in Red Area large room
- Living Mountain: Read in Red Area room where Garry joins
- Peacock Pattern: Read with Garry in Red Area large room
- The Lady in Blue: Read plate in Red Area left room
Gray Area
- Untitled: Read in Gray Area safe room
- Guardian of Time: Read in Gray Area second half
- Scent-Sensitive Porcupuss: Read in Gray Area tea room
- Grieving Bride: Read in Gray Area before putting on ring
- Grieving Groom: Read in Gray Area before putting on ring
- Blessed Bride: Read in Gray Area after putting on ring
- Blessed Groom: Read in Gray Area after putting on ring
- Bride's Left Hand: Check in Gray Area
- Bride's Right Hand: Check in Gray Area
- Lady Reading the Newspaper: Effectively no requirement (check in Gray Area)
- Melancholy: Read in Gray Area sculptures room
- Wine Sofa: Read in Gray Area sculptures room
- Feeling: Read in Gray Area sculptures room
- Puzzle: Read in Gray Area sculptures room
- The Lady Gazing at Emptiness: Read in Gray Area second half
- Red-Clothed Step: Read in Gray Area second half
- Noble Boasting of Gold: Effectively no requirement (read in Gray Area)
Violet Area
- Red Eyes: No requirement
- Flowers of Jealousy: Read at Violet Area split-up point before being split up
- Separation: Effectively no requirement (read in Violet Area)
- Heart in Custody: Read in split segment Violet Area after coming down with Ib
- Two of One Flesh: Read in split segment Violet Area after coming down with Ib
- Depths: Read in split segment Violet Area after coming down with Ib
- Marvelous Night: Read in split segment Violet Area after coming down with Ib
- Juggling: Read in split segment Violet Area after coming down with Ib
- (Headless Doll/Doll Head): Have Garry kick the persistent doll
- Strained Ear: Read in split segment Violet Area after coming down with Ib
- The Force of Quarrel: Read in Violet Area room where you meet Mary
- Enlightenment: Read in split segment Violet Area library after coming down with Ib
- Fishing Hook: Read in split segment Violet Area after coming down with Ib
- Fleeting Thoughts on a Moonlit Night: Read in Violet Area
- Milk Puzzle: Read in Violet Area
- (Palette): Check giant palette in Violet Area after coming down with Ib
Brown Area
- Illusion: Read in Brown Area rainbow bridge room
- Lady With Her Umbrella: Read again in Brown Area after giving her Umbrella
- Lady Without Her Umbrella: No requirement
- Aspiration: Read in Brown Area room with stairs to Sketchbook
- Two of One Flesh: No requirement
- Dried-Up Helical Lifeforms: Read with Garry in Brown Area sculptures room
- Fallen Star: Read in Brown Area winding stair passage
- Rotation: No requirement
- Guardian of the Door: No requirement
- Tattletale: Read in Brown Area main room
- Bashful Glance: Read about it with Garry in Abyssal Space break room book
- Heavenly Thread: Read in Brown Area main room
- Worry: Read in Brown Area main room
- Clown: Read in Brown Area winding stair passage
- Skin and Squama: Read with Garry in Brown Area main room
- Fisherman: Effectively no requirement (fish up umbrella)
- The Gleam of Ores and Stars: Read with Garry in Brown Area passage
Orange Area
- Stirred Up: Read in Orange Area main room
- Concealed Secret: Read in Orange Area first room
- Déjà Vu: Read with Garry in Orange Area first room
- Truant Seconds Hand: Read in Orange Area first room after returning hand
- Red Spheres: Read in Orange Area right room
- Reading in Progress: Read in Orange Area right room
- Shark's Head: Read in Orange Area right room
- Freshly-Poured Tea: Read in Orange Area right room
- Dwelling for Little Ones: Part of bonus dungeon progression
- Malice's True Form: View top-left painting in Orange Area dark room
- Prelude to Wine: View top-right painting with Garry in Orange Area dark room
- Hard-to-Wake Man: Read in Orange Area main room before nightfall
- Night-Owl Man: Read in Orange Area main room after nightfall
- Mistake: Read in Orange Area butterfly room
- A Spectacle of Blood: Read with Garry in Orange Area main room
- Light Within the Canvas: Part of bonus dungeon progression
- A Place Out of Reach: Read in Orange Area main room
- Beyond Halcyon Skies: Read with Garry in Orange Area butterfly room before nightfall
- Teeming Night Sky: Read with Garry in Orange Area butterfly room after nightfall
- Queen of High Society: Read in stairs room at end of Orange Area
- (High-Up Socialites): Part of bonus dungeon progression (enter stairs room)
- Imprisoned Flame: Part of bonus dungeon progression
- Stubborn Twins: Read with Garry in Orange Area main room
Abyssal Space
- Cycloptic Smile: Read with Garry in Abyssal Space paintings room or break room book
- Flowers Without Color: Read in Abyssal Space croquis room
- Sleepless Dead: Read in Abyssal Space croquis room
- Guertena: Part of bonus dungeon progression
- Jewel Box of Temptation: Read with Garry in Abyssal Space messy room
- Incomplete Youth: Read torn-off nameplate in Abyssal Space croquis room
- The Beauty of Blanc: Read with Garry in Abyssal Space Central Park
- Place of Warmth: Part of bonus dungeon progression
- Tryst After Death: Read with Garry in Abyssal Space Central Park
- (Croquis Book): Part of bonus dungeon progression
- Violent Colors: Read in Abyssal Space cactus maze
- Five Hours Earlier: Read left/right painting (depending on title choice) after break room puzzle
- Five Hours (Earlier/Later): Part of bonus dungeon progression
- Five Hours Later: Read left/right painting (depending on title choice) after break room puzzle
- Circular Woman: Read at start of Abyssal Space
- Flexible Stone: Read in Abyssal Space Central Park
- Drinking In the Night: Read in Abyssal Space Central Park
- (Cacti): Part of bonus dungeon progression
Black Area
- Fabricated World: Read with Garry in Black Area
- Forgotten Portrait: Get Forgotten Portrait ending
- Mary: Burn Mary's painting
- Final Stage: Read in the Atelier
Extra Links
These posts contain spoilers for all aspects of the game. Only read them after you've beaten it fully.
Translation Notes
Gallery
kouri's Blog
Leave...