
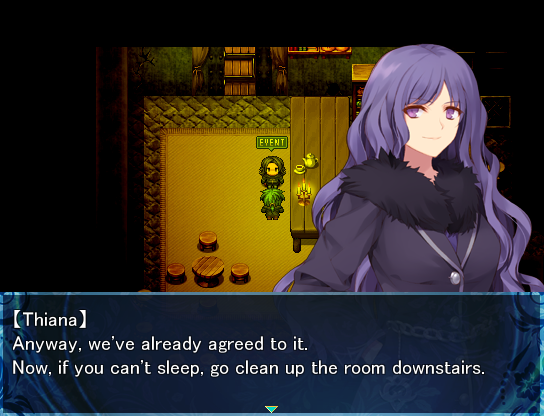
In a far-off corner of the land of Ilnacia, siblings Velk and Thiana run an underground slave market.
One rainy night, a customer arrives with an unusual request: for the two to take a girl into their care for six months.
Offered a large sum, Thiana accepts without a second thought. But great danger looms on the horizon...
Capella's Promise is a JRPG made by PlainSoft in RPG Maker VX Ace. It has a main plot about 20 to 30 hours long with optional sidequests and many other gameplay features, including:
- The Specialize system, where earned SP can be used to level up Specialties and learn moves or passive skills.
- An item synthesis system, where you can use raw materials to create anything you have the recipe for.
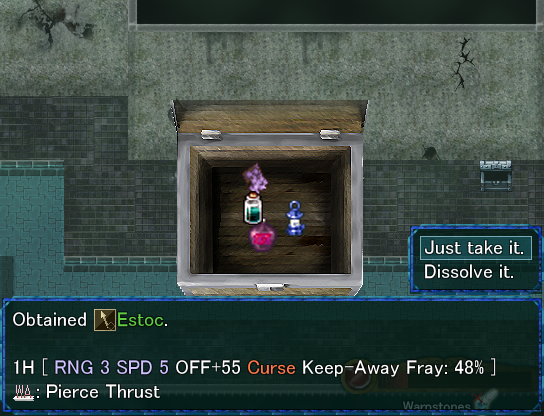
- Fully-randomized equipment dropped by enemies, as well as fixed equipment from shops and the like.
- A fortification system of embedding Orbs into equipment to grant it additional properties and stat boosts.
(Content Severity: Fairly Mild)
Click here for content warnings.
Slave trading (albeit depicting very little actual abuse of slaves).
Mild swearing.
Download Capella's Promise 1.09 | Mirror
(Chrome may falsely flag the download as malicious, but it's safe to ignore.)
Installation of the RPG Maker VX Ace Runtime Package (not VX) is required to play.
Download VX Ace Runtime Package (RTP)
Supported Platforms
The game's engine is made for Windows only, with no native support for other platforms. To play on Mac, you can try a general-purpose tool like WineBottler.
Official Soundtrack Download
(Do not reupload these songs elsewhere without permission.)
Troubleshooting
Make sure to extract the game to its own folder instead of running directly from the ZIP file. If you don't do so, any saves made will be lost the next time you run the game.
If you extracted the ZIP but save data is still being erased, try running the game as an administrator. Without admin privileges, the game may not have permission to create save files.
"RPG Maker VX Ace RTP is not installed" means you need the RPG Maker VX Ace RTP. This is distinct from the VX RTP which other games may require. The download link is up above.
If dialogue seems to be using the wrong font (which may cause cutoff text), download and install MS PGothic.
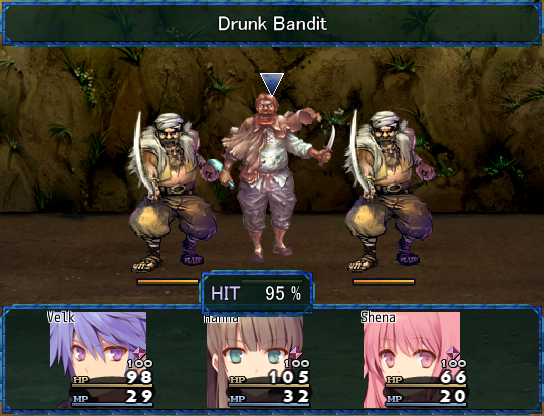
Screenshots
Specialty Skills
Tables of all skills learned via leveling up Specialties, to assist in deciding which ones to focus on.
Specialty Skills
| TAC | |||
| Level | Name | Type | Description |
|---|---|---|---|
| 2 | Momentum Blow | Tech | Attack an enemy. Damage is higher the more Stamina the attacker has left. |
| 3 | Eagle Eye | Tech | Boost Accuracy, Offense, and ST recovery for 5 turns. |
| 5 | Chain | Tech | Get two actions on the next turn. |
| 7 | Grand Swing | Tech | Deal minor damage to all enemies. (Spear Only) |
| 9 | Impact Rush | Tech | Deal physical damage to all enemies. (Sword Only) |
| 10 | Flame Dance | Tech | Deal fire damage to an enemy. |
| 13 | Arm Break | Tech | Attack the arm to temporarily lower Offense. |
| 16 | Offense Up I | Passive | Boosts Offense by 10%. |
| 18 | Big Swing | Passive | Adds +5% to critical rate. |
| 20 | Defend Buff | Passive | Improves effect of Defend command. |
| 22 | Defense Up I | Passive | Boosts Defense by 5%. |
| 23 | Heaven's Road | Tech | Instantly halve enemy HP, but it gradually recovers over 10 turns. |
| 25 | Double Shot | Tech | Fire two shots at an enemy. (Bow Only) |
| 28 | Enemy Block | Tech | Block all damage from a single attack. |
| 31 | Demon Break | Tech | Deal major damage to demon-type enemies. (Sword Only) |
| 35 | Offense Up II | Passive | Boosts Offense by 20%. |
| 37 | Born Crusher | Tech | Attack an enemy and greatly lower their casting speed. (Staff Only) |
| 40 | Dragon Slayer | Tech | Deal major damage to dragon-type enemies. (Spear Only) |
| 44 | Last Nerve | Tech | Increase Offense by 50% for 10 turns, but lose all commands but Attack and Item. |
| 48 | Defense Up II | Passive | Boosts Defense by 10%. |
| 50 | Tech Mastery | Passive | Teaches the skill Imperador. [Attack an enemy with a three-stage attack.] |
| INT | |||
| Level | Name | Type | Description |
|---|---|---|---|
| 2 | Fray | Spell | Deal minor fire damage to an enemy. |
| 3 | Melica | Spell | Recover some HP to a member. |
| 4 | Meditate | Tech | Recover some MP, and continue to slowly recover MP. Defense is slightly lowered throughout. |
| 5 | Ricov | Spell | Unpoison a member. |
| 6 | Snoa | Spell | Deal three bursts of ice damage to an enemy. |
| 8 | MP Up I | Passive | Boosts max MP by 10%. |
| 9 | Sparca | Spell | Deal minor lightning damage to two random enemies. |
| 10 | MP Regen I | Spell | Recovers 1 MP each turn. |
| 11 | Aeril | Spell | Deal minor wind damage to all enemies. |
| 13 | Spirio | Spell | Boost all members' Agility for 5 turns. |
| 15 | Frayd | Spell | Deal fire damage to an enemy. |
| 17 | Snoal | Spell | Deal ice damage to all enemies. |
| 19 | Offinis | Spell | Boost all members' Offense for 5 turns. |
| 21 | Sparced | Spell | Deal lightning damage to three random enemies. |
| 23 | Aerspra | Spell | Deal wind damage to an enemy. |
| 25 | Ricoval | Spell | Unpoison all members. |
| 27 | Delife | Spell | Absorb HP from an enemy. |
| 29 | Melicrain | Spell | Recover HP to all members. |
| 30 | MP Regen II | Passive | Recovers 2 MP each turn. |
| 31 | Aerspard | Spell | Deal major wind damage to an enemy. |
| 33 | Frayzed | Spell | Deal major fire damage to an enemy. |
| 35 | Rosary | Spell | Bring back a fallen member. |
| 37 | Snoastra | Spell | Deal major ice damage to an enemy. |
| 39 | Melicado | Spell | Recover HP to a member. |
| 41 | Sparcion | Spell | Deal lightning damage to all enemies. |
| 45 | MP Up II | Passive | Boosts max MP by 20%. |
| 48 | Chaos Blade | Spell | Deal major physical damage to an enemy, and induce Bleed. |
| 50 | Magic Mastery | Passive | Increases power of all fire, wind, and ice spells, as well as Chaos Blade. |
| DEX | |||
| Level | Name | Type | Description |
|---|---|---|---|
| 2 | Focus Attack | Combo I | Any [ Damage -20% Priority ] |
| 3 | Black Pain | Combo II | Any [ Damage +30% AGI Down: 100% ] |
| 4 | Search | Tech | See enemy weakpoints. |
| 5 | Accuracy Up I | Passive | Boosts Accuracy by 5%. |
| 6 | Upper Slash | Combo I | Knife [ Damage +30% ] |
| 8 | Spin Shot | Combo I | Bow [ Damage +20% Pierce: 20% ] |
| 9 | Revelation | Combo I | Any [ Damage +20% EVA Down: 100% ] |
| 10 | Evasion Up I | Passive | Boosts Evasion by 5%. |
| 11 | Step Blow | Combo II | Fist [ Damage +50% Skip Combo Stage ] |
| 12 | Divine Light | Combo III | Any [ Damage +80% DEF Down: 100% Always Hits ] |
| 14 | Break Mind | Combo II | Any [ Damage +20% MAG Down: 100% ] |
| 16 | ST Regen I | Passive | Recovers 3 Stamina each turn. |
| 18 | Drain Slash | Combo II | Knife [ Damage -30% HP Sap: 100% ] |
| 19 | Mega Blow | Combo II | Fist [ Damage +150% Fatal Wound ] |
| 21 | Technical Blow | Combo III | Any [ User/Target Skill Difference Damage Bonus ] |
| 25 | Dragon Pierce | Combo III | Spear [ Damage +50% Pierce: 100% Dragon Killer ] |
| 28 | Accuracy Up II | Passive | Boosts Accuracy by 10%. |
| 30 | Evasion Up II | Passive | Boosts Evasion by 10%. |
| 33 | Counter | Passive | Adds +5% to Counter rate. |
| 36 | Drowsy Arrow | Combo IV | Bow [ Damage +50% Sleep: 100% ] |
| 38 | ST Regen II | Passive | Recovers 6 Stamina each turn. |
| 40 | Bleed Bash | Combo IV | Fist [ Damage +100% Bleed: 100% Always Hits ] |
| 47 | Stun Edge | Combo IV | Knife [ Damage +50% Stun: 100% ] |
| 50 | Combo Master | Passive | Teaches the skill Twin-Dragon Waltz. [For 3 turns, sacrifice Stamina recovery and Accuracy for an extra action each turn.] |
| SPE | |||
| Level | Name | Type | Description |
|---|---|---|---|
| 2 | Divine Wrath | Prayer | Deal lightning damage to an enemy, and sometimes cause Stun. |
| 3 | Rising Light | Prayer | Slightly recover a member's HP, leaving a healing aura for a few turns. |
| 4 | Favor I | Passive | Improves recovery of oneself. |
| 6 | Rain of Fire | Prayer | Deal fire damage to all enemies. |
| 8 | God of Fortune I | Passive | Sets minimum Luck at 20. |
| 10 | Stat-Down Evasion I | Passive | Reduces chance of getting stat-down ailments. |
| 12 | Healing Wind | Prayer | Recover HP to all members with a soothing breeze. |
| 15 | HP Regen I | Passive | Recovers 10 HP each turn. |
| 17 | Fog of Decay | Prayer | Deal poison damage to all enemies. |
| 20 | Droplet of Rebirth | Prayer | Cure a member of Curse, Fatal Wound, Sleep, and Stun. |
| 23 | Hypnotize | Prayer | Put all enemies to sleep. |
| 25 | HP Regen II | Passive | Recovers 20 HP each turn. |
| 28 | Light of Tribulation | Prayer | For 15 turns, all members' current HP is reduced, but max HP is boosted by 30%. |
| 31 | Favor II | Passive | Improves recovery of oneself. |
| 34 | Stat-Down Evasion II | Passive | Reduces chance of getting stat-down ailments. |
| 37 | Wind God Guard | Passive | Increases wind resistance. |
| 40 | Spirits' Blessing | Prayer | Recover 20 MP to all alies. |
| 43 | Blessing | Passive | Boosts EXP gain by 10%. |
| 46 | Conviction Blade | Prayer | Deal physical damage to all enemies. |
| 48 | God of Fortune II | Passive | Sets minimum Luck at 50. |
| 49 | Flames of Retribution | Prayer | Deal fire damage to an enemy. Damage increases based on number of fainted members. |
| 50 | Prayer Master | Passive | Reduces consumption of alms by Prayers, and powers up all recovery and poison spells. |
| MYS | |||
| Level | Name | Type | Description |
|---|---|---|---|
| 2 | Icicle | Space Magic | Deal minor ice damage to two random enemies. |
| 3 | Relaxation | Space Magic | Recover minor Stamina to all members. |
| 4 | Holy Might | Space Magic | Makes weapon absorb 20% of damage for 2 turns. |
| 5 | Poison Injury | Space Magic | Deal poison damage to an enemy, which may inflict poison. |
| 6 | Armor Breath | Space Magic | Reduce physical damage to all members for 3 turns. |
| 8 | Illusion | Space Magic | Make a member less likely to be targeted for 5 turns. |
| 10 | Element Resist I | Passive | Slightly increases magic and element resistance. |
| 12 | Spell Speed Up I | Passive | Speeds up casting of Magic and Space Magic. |
| 14 | Magic Barrier | Space Magic | Boost all members' element resistance for 3 turns. |
| 16 | Discord | Space Magic | Increases all enemies' MP costs for 5 turns. |
| 18 | Healing Mist | Space Magic | Slowly recover members' HP for 5 turns. |
| 23 | Cyclone | Space Magic | Deal wind damage to two random enemies. |
| 28 | Diamond Dust | Space Magic | Deal ice damage to all enemies. |
| 32 | Spell Wall | Space Magic | Halve a member's defense in exchange for a spell-reflecting wall. Runs out after 5 turns. |
| 36 | Element Resist II | Passive | Slightly increases magic and element resistance. |
| 40 | Meteor Storm | Space Magic | Deal fire damage to all enemies. |
| 43 | Spell Speed Up II | Passive | Speeds up casting of Magic and Space Magic. |
| 47 | Bold Magic | Space Magic | Raise a member's MP cost and boost their Magic for 5 turns. |
| 50 | Space Magic Mastery | Passive | Teaches the skill Delta Shield. [Create a powerful shield that protects all allies from just one attack.] |
| SUV | |||
| Level | Name | Type | Description |
|---|---|---|---|
| 3 | Torchlight | Survival | Make dark dungeons brighter than usual. |
| 4 | Cure Potion | Survival | Use 1 Pure Fruit to cure poison and heal a member. |
| 7 | Toughness I | Passive | Increases resistance to Poison, Sleep, and Bleed. |
| 8 | HP Up I | Passive | Boosts max HP by 10%. |
| 10 | Shower Potion | Survival | Use 1 Medicine and 1 Vitality Shroom to recover some HP to all members. |
| 13 | Pharmacy I | Passive | Boosts effect of items. |
| 15 | Skill Up I | Passive | Increases Skill by 10%. |
| 16 | Critical Bomb | Survival | Use 2 Bombs to deal fire damage to an enemy. |
| 19 | Revival | Survival | Bring back a fainted ally, but with very low HP. |
| 20 | Power Bomb | Survival | Use 1 Bomb and 1 Vitality Shroom to deal fire damage to all enemies. |
| 22 | Coin Shoot | Survival | Throw money to deal physical damage to all enemies. Damage and amount thrown increases with total money. |
| 25 | Stun Raid | Survival | Attack an enemy normally, then Stun it 3 turns later. |
| 28 | Pharmacy II | Passive | Boosts effect of items. |
| 30 | IQ Potion | Survival | Use 1 Wisdom Wing to boost a member's Magic and lower their MP cost. |
| 35 | HP Up II | Passive | Boosts max HP by 20%. |
| 40 | Stoic | Survival | Boost personal EXP gain for the battle by 10%. |
| 42 | Skill Up I | Passive | Increases Skill by 20%. |
| 45 | Toughness II | Passive | Increases resistance to Poison, Sleep, and Bleed. |
| 47 | Spirit Cluster | Survival | Use 1 Bomb to deal lightning damage to all enemies. |
| 49 | Enchant Force | Survival | Use 1 Wild Flower to make weapons adjust to weakpoints. |
| 50 | Weapon Mastery | Passive | Allows use of all weapons. |
Help
For the most part, the plot lets you know exactly where you need to go next. The Progress screen will also remind you of where to go at all times.
However, there are times when this may be insufficient, and there is less guidance in sidequests. Check here if you have a problem of this nature. Descriptions may contain spoilers, but as few as possible. (Also, I have little to offer in the way of battle strategies. Sorry.)
Help
Main Story: Where am I supposed to search in the archives?
There's a switch in the bottom-right bookshelf in the room where you fought the boss.
However, you'll need to use Manarel Dust to light the torch near the shelf to be able to see and interact with the switch.
(This is an introduction to the idea of revealing items by lighting torches, though it's entirely optional other than this, generally only getting you extra materials.)
Quests: I'm missing a quest and I don't know where...
Two of the easiest quests to miss are Orlando's in Prismriver.
After you do Nagura's quest and get the Small Beer Bottle, you aren't alerted to it at all, but you can give it to Orlando nearby to fill him with energy and get a quest from him.
Once you complete that quest, you'll get the Crystal Key Seal. Restore the Crystal Key at the Ancient Forge and give it to Orlando to get a second quest.
Since you're never required to go to it, you may miss the town of Orge entirely. Go south from the entrance to Persadal to reach it, then go east to Seaside Path to find Maple, who has a quest.
Another one you could miss is the very last quest. Zeke only appears in the castle center if you've liberated that area and freed the people in the dungeon west of the courtyard. (Or after beating the final boss.)
Guides
Miscellaneous information, mostly about how to get 100% of everything. Spoilers for the entire game within!
Guides
One-Time Rewards
There are three ingredients around Sugar to put in the gross Cranberry Tea. You only need one, but the number you collect changes the reward you get from the messenger: a Manarel Shard for one, a Shiny Manarel for two, and an Engrave Orb for three.
During the ship segment, there are two quasi-sidequests.
The first: Before the Devil's Sea part, read the notice near your room, and defeat the ants at all three marked barrels. You will receive a Silver Idol once you reach Lumist.
The second: Read the notice after the Devil's Sea and talk to Pearl on the bottom deck to get her cooking. Give it to the captain after Blue Orion leaves. You will receive a Shiny Manarel once you reach Lumist.
Healing Mechanics
The cost of healing at crescent moon monuments is based on Velk's level squared; other members' levels and number of moon monument uses have no bearing. Each Faith Talisman reduces the cost by 4%.
During certain parts of the game, usually when you have a small party, the cost is reduced to a fifth of the usual. The maximum amount healing can ever cost is 5,000 Galuc.
The cost of inns, on the other hand, is simply double Velk's level plus 5.
Material Gathering
Materials picked up from the ground/walls/water (in "overworld" areas, not in dungeons) don't go away forever; there's a timer that puts back a scattered selection of materials every 100 seconds. It does this in six groups, so any given material is guaranteed to respawn within 10 minutes.
However, the timer also advances 20 to 30 seconds (random in that range) after normal battles. Note, though, that the timer doesn't run as normal when you're in battle, so you're only saving time if you win faster than that.
Rozea's Rewards
Rozea in the northeast corner of Lumist gives rewards for every five Thank-You Notes you get from completing quests. There are a total of 40 quests. Two quests (in Fort Pana) are missable, but as of 1.08, will be auto-set as completed after you beat the main game.
5: Manarel Shard x5
Raw materials for synthesis.
10: Restore Jewel
Used at the Ancient Forge to restore sealed items.
15: Astrology Compass
Allows you to influence chests to more often contain a specific type of equipment (weapon, shield, armor, helmet, accessory).
20: Spirit Compass
Allows you to influence the elemental resistances of random equipment.
25: Medicine of Meusta
A powerful Tome weapon.
30: Orion Ring
A ring that adds 200 Luck.
35: Entry Permit B5F
Allows entry to the bottom floor of Chardam.
The most notable rewards there are recipes for the Diffusion, Almighty, and Engrave Orbs.
40: Doldoa Silver Crown
The crown that was, uh, stolen from the entrance to Sanuzam Ruins in Distana.
If you put it back on that pedestal, it opens the door. You can get the Gold Crown and recipes for Miracle Apples in the last room.
Both crowns being gone will cause the Dark Dragon to appear at the entrance; beating it gets you the Kagenui, a very powerful sword.
Crystal Shrine
The Crystal Shrine is an optional area that's tricky to actually get to.
It's split into a north and south half, and you can only reach it via Warpstones to those halves.
Said Warpstones can only be gotten from the Ancient Forge; their seals drop randomly from high-level chests.
Of course, you can still use the codes without having the seals.
I'll provide them here if you don't want to farm for the random seal drops.
Crystal Shrine North: Moon 265 125
Crystal Shrine South: Moon 813 196
Treasure Map Treasure Locations
Map 1
Capella, below the "fountain" just outside the front door of the castle.
Map 2
Filip's Home, in his vegetable garden in the backyard.
Map 3
North of Prismriver, right outside the Mountain Cabin.
Map 4
Sandcloud Valley, right outside the Sacrificial Altar.
Map 5
Persadal Crossing.
Map 6
Mersus, at the broken statue in the northeast.
Map 7
Ice Dragon's Den, just northwest of the Entrance to Meusta teleporter.
Map 8
Crystal Shrine. From the South entry point, go west to the next map, follow the path, and turn right at the T-shaped intersection to two Tear Stone doors across from each other.
Map 9
Sanuzam Ruins, right next to the Silver Crown pedestal. (To get to the ruins from Central Desert, go west, south, and enter the upper hole.)
Map 10
Seaside Path. (East of Orge.)
Map 11
Teleport Forest. (Take the right teleporter in Ancient Throne.)
Map 12
Mersus Mining Camp. (North then west from Mersus.)
Map 13
The gate leading to Persadal.
Map 14
Cranberry Fields, south of Cranberry.
Map 15
Chardam B5F, next to the orb recipes.
Map 16
South of Fort Pana, right by the entrance to the fort.
Map 17
Blue Orion Base, by the Water Ruins entrance.
Map 18
Carnack Path, north of Carnack.
Recipes
Forest Megaloma
Do the quest for Baron in Norma Woods (outside Chardam), and you'll get the recipe for beating Karsikko.
Titan Megaloma
Defeat the Fog Titan at the end of the marsh segment (as part of the plot).
Spirit Megaloma
Defeat the Relic Lord on the bottom floor of Ludoir Ruins (as part of the plot).
Evangelist Megaloma
Do the quest for Dhamso in Carnack, and you'll get the recipe from Ralg.
Chief Megaloma
Do both goblin quests at the Travelers' Outpost. You'll get the recipe for beating the Goblin Boss.
Comet Megaloma
Do the quest for Porte in Cranberry to get it in the reward.
Recursion Stone
In a chest next to the Ancient Forge.
Restore Jewel
Do the quest for Kino in Meusta.
Goblin Helm
Same as the Chief Megaloma, but the recipe is on the sign behind the Goblin Boss.
Diffusion/Almighty/Engrave Orb
Get 35 Thank-You Notes to earn the Entry Permit B5F from Rozea, then go to the bottom floor of Chardam. The recipes are written on a pillar at the top of the area.
Miracle Apples
Get 40 Thank-You Notes for the Doldoa Silver Crown, allowing you to proceed in the Sanuzam Ruins. Recipes for all types of Miracle Apples are on signs in the last room; one for HP/MP, one for the other five stats.
Item Recipes I (Analyze Sphere, Bomb)
Given to you by Hanna in Balha Cave (as part of the plot).
Item Recipes III (Elixir, Happy Cologne)
Do the Trick House quest for Bamboo in Mersus to get the permit to enter Chardam B3F/B4F, then get it from a chest on B4F.
Orb Recipes IV (Intercept Orb, Cross Orb, Protection Orb)
Do the Crystal Key quest with Orlando in Prismriver. The chest is at the south side of the secret area in Prism Cave.
Weapon Recipes IV (Ame-no-Habakiri, Skewering Spear, Exalfa, Cross Staff)
In a chest near the start of the Undersea Tunnel.
Omniscient Megaloma
Win a fixed encounter with four Elementals on the first screen of the Sleeping Forest (west of Capella Castle in the post-game).
Wing Megaloma
On a slab in the second screen of the Sleeping Forest (west of Capella Castle in the post-game).
Warrior Megaloma
On a slab in the Ancient Arena Ruins. (Go through the door in Norma after receiving the Fallen Empire Key from Junoa.)
All other recipes are available from recipe shops.
Recipe shops everywhere have the same stock, which is added to as you progress the plot, finalizing once you arrive in Capella.
Faith Tailsmans
Carnack Path: North from the right side of the waterfall, through the trees.
North of Outpost: North and right of where you hop over the river.
North of Mersus: Behind a tree in the area with the Drakes and their fangs.
Trick House: Bottom floor, the only unopened chest in the room with the emptied chests.
Seaside Path: Head directly east from Orge.
Path to Valgard Region: The path between East of Valgard and West of Prismriver.
Prism Cave: Top-right of the secret area in Orlando's Crystal Key quest.
Windy Grotto: The path between Valgard Plains and Sand Path.
Sacrificial Altar: Behind a stone door in the bottom-left of the second floor.
Undersea Tunnel: On the first screen.
Translation Notes
(These contain spoilers for all aspects of the game. Only read after you've beaten it fully.)