
Blank Dream is a freeware horror-exploration game by Kanawo (Teriyaki Tomato) made in RPG Maker VX Ace.
Wishing that she had never even existed, Mishiro Usui threw herself into the lake.
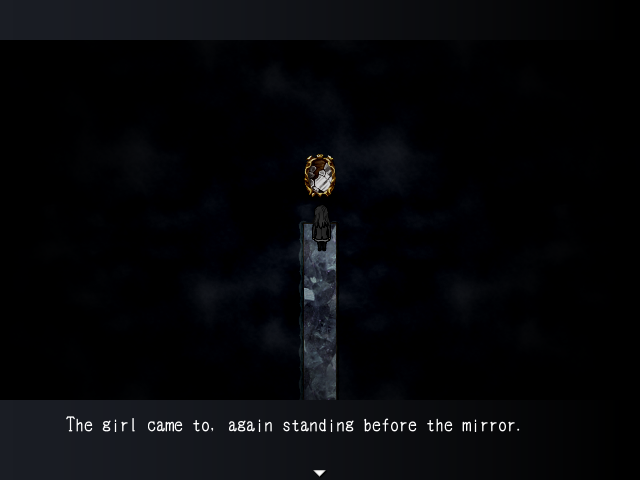
When she came to, she was in the Mirror World, a place neither heaven nor hell.
There, her reflection instructed her: "Find the mirrors in this world, and break them."
WARNING: This game features many dark themes, with a particular focus on suicide. It is recommended you not play this game if you feel the subject matter may be too much.
(Content Severity: Discretion Strongly Advised)
Click here for more detailed content warnings.
Many kinds of suicide, including but not limited to stabbing, drowning, and jumping from a height.
Death and murder.
Mention of incest and pedophilia.
Blood.
Jumpscares.
Some bullying.
Download Blank Dream 1.05 | (Mirror)
(Chrome may falsely flag the download as malicious, but it's safe to ignore.)
Installation of the RPG Maker VX Ace Runtime Package (not VX) is required to play.
Download VX Ace Runtime Package (RTP)
Supported Platforms
The game's engine is made for Windows only, with no native support for other platforms. To play on Mac, you can try a general-purpose tool like WineBottler.
Troubleshooting
Make sure to extract the game to its own folder instead of running directly from the ZIP file. If you don't do so, any saves made will be lost the next time you run the game.
If you extracted the ZIP but save data is still being erased, try running the game as an administrator. Without admin privileges, the game may not have permission to create save files.
"RPG Maker VX Ace RTP is not installed" means you need the RPG Maker VX Ace RTP. This is distinct from the VX RTP which other games may require. The download link is up above.
If the font is incorrect and squares appear in messages, install the Cinecaption font in the Fonts folder.
Screenshots
Walkthrough
A guide through the game. It also explains how to get all the endings.
Click or highlight the black boxes to show hidden text.
Walkthrough
Intro
Go up and check the mirror. Walk away, then check it again and talk to the reflection.
In the mirror, check the bag on the desk twice to get the Knife.
Use the Knife from the Items menu.
Realm of Greenery
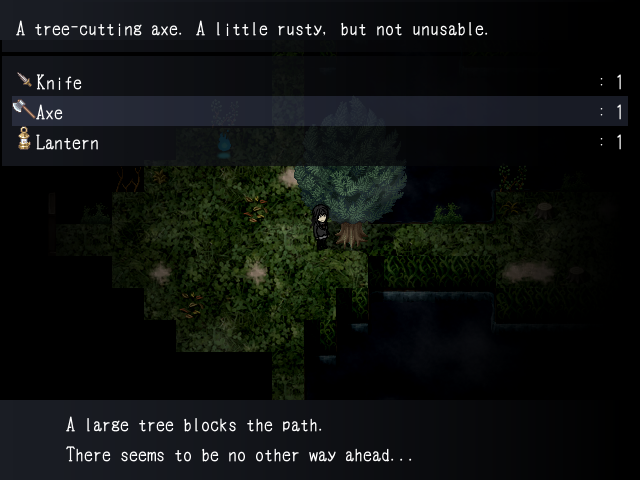
Take the Decorative Axe from the first room.
Enter the upper door and take an Axe from the box. Put the Decorative Axe in to replace it.
In the main room, cut down the dead tree in the corner for Firewood.
Enter the lower door and take the Lantern by the fireplace. Navigate out.
Burn the large tree with the Lantern and Firewood.
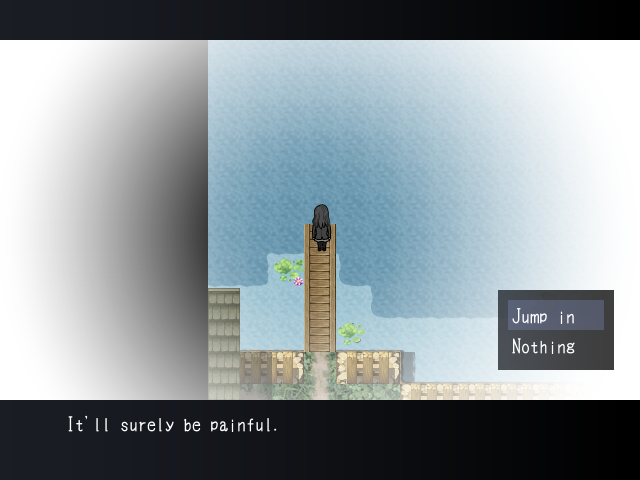
In the mirror, go to the pier and jump into the lake.
When you approach where the tree was, you'll be attacked.
Immediately turn around and go through the door to avoid it.
With the Bronze Key, you can enter the Realm of Beauty or Realm of Love.
They can be done in either order.
Realm of Beauty
Don't step on the blood underneath the chandelier, or it'll fall on you.
You need to bring the artist in the main room three types of paint. Two of them need bottles to contain the paint in.
Bottle 1
Enter the top-left door, then the upper door.
Don't take the middle passages or chandeliers will fall on you.
Instead, go between the shelves and boxes on the right.
Get the Empty Bottle from the middle shelves.
Bottle 2
Enter the top-right door, then the lower door.
Take the Wood Plank from the middle box and put it on the gap.
Walk across one of the bridges and take the Empty Bottle from the shelves. Walk across the other bridge.
Before leaving, pick up the Wood Plank and put it back in the middle box (not the others!).
Also, the weight of the Gold Ingots or Wood Plank will make the bridges snap instantly.
Blue Paint
Enter the bottom-left door.
Avoid letting the shadow see you (or hear you, via the glass shards).
If it does, you're safe as long as you can make it into the top-left passage, where it won't follow.
Get the Blue Paint from the bags in the back room, then avoid the shadow on the way back.
(Try to get the shadow to come around one side of the table, then run the other way.)
Red Paint
Enter the top-left door, then the lower door.
Use the Knife on the painting and collect the blood in an Empty Bottle.
Black Paint
Enter the top-right door, then the upper door.
Fill the Empty Bottle with the Water in the container, then use it to put out the fireplace.
When the fire goes out, the statues will attack, so quickly leave the room.
Re-enter and get the Black Paint from the container. (Be quick and don't go too far up, as the statues are still there.)
A statue will chase once again as you return to the main room, so make sure to run.
In the mirror, check the fire extinguisher twice.
Realm of Love
In the room of junk on the far right, do not step directly in front of the doll.
Go around the hole to get the Hammer.
Enter the room below the save point.
Pat the doll's head and lead her to the stool, then tell her to stop following to stop her on the stool.
With the doll in the seat, use the Hammer to play "mi-do-re-do-mi" (top, bottom, middle, bottom, top).
Get the Candies from the crushed pumpkin.
When you exit to the left, you'll suddenly be in a long hallway - keep running.
Give the Candies to the guard and enter the room.
Keep saying yes to the Smiling Soul, but say "That's enough" at the end.
Talk to the receptionist and enter the party room.
Don't talk to the guests too much, and if you do, smile.
Talk to the distant guest in the lower-right and choose "..."
Flee to the lower-left door.
(Running up-left and then down-left should work; if not, try to herd the guests.
Also, make sure you press the button to check the door, and hold Down to enter after the textbox.)
In the mirror, get the Tweezers from the drawers by the TV, wash your hands, and check the electrical outlet twice.
Watch out for the doll when you return to the party room.
With the Silver Key, you can enter the Realm of Spirits.
Realm of Spirits
To enter the mirror room, you need to experience one through six of the Seven Mysteries.
Beware of the shadow lurking in the hallways.
The music will stop whenever it appears, so leave and re-enter to get rid of it.
First Mystery
There's a 1 in 3 chance of a bronze statue appearing in either the central hall (with the save point) or the northwest hall (outside the bathrooms). When you find it, hit it with the Hammer.
Second Mystery
Enter the reception room, left of the note about the Second Mystery in the central hall.
Check the painting and flee the room.
Third Mystery
Get the Sheet Music from the Forgotten Classroom (Sixth Mystery).
Put it on the piano in the music room (right door in the northeast hall).
Fourth Mystery
Enter the girls' bathroom, knock three times on the far-left door, and choose "Machiko, Machiko."
Don't go into the open stall afterward.
Fifth Mystery
Check the shoe rack near the top-left in the entrance room.
Sixth Mystery
The entrance to the Forgotten Classroom is right across from the girls' bathroom.
(There's also a "Nothing here" message on the other side, but you can't enter from that side.)
In the mirror, talk to the girl so she leaves, and bring the boy his pen from under the teacher's desk.
Then jump out one of the windows.
With the Gold Key, you can enter the Realm of Blood and Realm of Death. They can be done in either order.
Realm of Blood
Follow the path.
In the mirror, choose "Stab the knife" unless you want a bad ending.
Take one of the side exits for a shortcut back to the entrance.
Realm of Death
Proceed right to the room with several staircases.
Follow the cracks and blood: bottom-right stairs, right door, top-middle stairs, back down the bottom-right stairs.
(The last bloody door is a trap.)
Take the Blue Book.
Put the Blue Book in the bookcase with the missing book.
Immediately run out the right door to escape the statue.
Enter the room behind where the statue was.
Go into the first cell.
When you step on the tile in front of the lever and then off it, spikes will come up.
So make sure you step on, pull the lever, and step off.
Enter the second cell (opened by the lever in the first) and get the Manual.
Go down from the start room.
Avoiding the shadow, go to the statue on the right.
Input the correct date given by the bookcases: 0612
Get the Matches from the middle shelves.
The shadow will attack when you leave, so immediately retreat back into the room to avoid it.
With the Manual and Matches, you can enter the upper room from the start.
Make the west room a mirror image of the east one.
Specifically: flip the sword, the upright stool, and the wine bottle and glass.
In the next room, weaken the Lantern and read the message you can only read in the dark.
Get the Western Swords from the previous room (both sides, to keep it symmetrical).
With the Lantern still set to weak, use the Western Sword on the bloodstain (from the Items menu).
Strengthen the Lantern and enter the fireplace.
Once you've broken all six mirrors, you can enter the large gray door in the center.
But without meeting any requirements, you can only get Ending 4.
Other Mirrors
In addition to Mishiro's mirrors, there are extra mirrors which are important to getting the better endings.
You're free to wait until the end to find these.
The only time you're blocked off from any is if you get locked into Ending 2 or 3.
They all require returning to earlier realms with new keys and/or items.
Also, their presence is indicated by teddy bears nearby.
You need to first find the mirror, then talk to the character in World's Center, then bring them to it.
Yuzu's Mirror 1
Requires: Bronze Key, pulling lever by the teddy bear in the Realm of Beauty.
There's a bronze door in the top-right of the main room in the Realm of Greenery.
You need to pull the lever in the Realm of Beauty to lower the iron bars in the way.
Yuzu's Mirror 2
Requires: Silver Key, ability to adjust the Lantern's light from Realm of Death.
There's a silver door in the room of junk where you got the Hammer in the Realm of Love.
Weaken the Lantern to find directions: Top-left stairs on the right side, bottom-left stairs on the left side.
Yuzu's Mirror 3
Requires: All of Mishiro's mirrors broken, Yuzu's Mystery Key.
Go down the fireplace in the room you got the Matches in the Realm of Death.
Entering the door beyond will lead to Ending 2. If you want Ending 1, take Ryotaro to all of his mirrors as well.
Ryotaro's Mirror 1
Requires: Escaped the party guests in Realm of Love.
Go down the stairs in the banquet room.
Ryotaro's Mirror 2
In the Realm of Blood, look for the room with a teddy bear and a bed.
Enter the door to the right and head up the narrow hallway.
Ryotaro's Mirror 3
Requires: All of Mishiro's mirrors broken, Ryotaro's Mystery Key.
Go down the fireplace in the Black Paint room in the Realm of Beauty (with the Lantern at strong).
Entering the door beyond will lead to Ending 3. If you want Ending 1, take Yuzu to all of her mirrors as well.
Someone's Mirror
(An optional mirror that has no effect on endings.)
Requires: Ability to adjust the Lantern's light and Western Sword from Realm of Death.
Return to the dark room in the Realm of Greenery, where you first got the Lantern.
With the stronger lantern light, you can enter the fireplace.
There's a box containing a Knight Portrait you can place on the wall, but this is incorrect.
Instead, place the Western Sword, then you can safely enter the door.
Endings
Ending 5 (Bad)
Choose "No, not yet" in the Realm of Blood mirror.
Ending 4 (Normal)
Go into the final door without finding enough of the others' mirrors.
Alternatively, meet the requirements for Ending 1/2/3, but choose to grant the wish.
Ending 3 (Good)
View all three of Ryotaro's mirrors, but not all of Yuzu's.
Entering the big door to hear Rinzou's story without having shown Yuzu her final mirror will lock you onto this ending.
Go into the final door and choose "I can't."
Ending 2 (Good)
View all three of Yuzu's mirrors, but not all of Ryotaro's.
Entering the big door to hear Tamaki's story without having shown Ryotaro his final mirror will lock you onto this ending.
Go into the final door and choose "I won't grant my wish."
Ending 1 (Best)
View all three of both Yuzu and Ryotaro's mirrors.
Make sure you do not see either Tamaki or Rinzou until you've shown both characters their final mirror.
Once both have seen their third mirror, visit both Tamaki and Rinzou.
Go into the final door. At the end, choose "I won't grant my wish."
Translation Note
(This contains spoilers for the game. Only read after you've gotten Ending 1.)
The game's title, and the title of Ayato's painting, is a play on the names of Utsuro and Mishiro. It puts together the kanji 虚 (utsuro, hollow) and 白 (shiro, white).
This isn't really an actual word, but gives the impression of "empty and white," which would seem to fit with Mishiro (and Utsuro)'s wish to have never existed. That was essentially what I chose the English title based on, since incorporating the names was infeasible.
Still, Mishiro and Utsuro both mention hating their names and how they mean "white" and "hollow." Thus, you can at least connect that with the "blank" in the title. Also, the game's given romanization reads the kanji in an alternative way as "Kohaku," masking the true meaning.