
All To Get Her is a puzzle-platformer by vgperson about two girls and their quest for the ultimate reward.
Asha and Brooke are girls with a shared dream: to become the next Mana Goddess, the source of all magic.
However, they're also fierce rivals, always doing what they can to show each other up, never conceding to the other.
Then one fateful day, an opportunity presents itself, and Asha sneaks out to head for the Divine Dungeon...
(Content Severity: Very Mild)
Summary
This is a puzzle game where you control two characters, and must get both to the end of each level.
You can play it One-Player and switch characters with a button press, or play local Two-Player and control one each. Each character has her own capabilities - Asha using items, Brooke casting spells - and you'll need both to work your way through!
No one object or mechanic is especially complicated, but there are many different ways they can interact with each other. Good reflexes should not be required, and there is a Rewind feature that makes it easy to recover from mistakes. Meanwhile, reaching the ending will unlock time trials, as well as a level editor to create your own dungeons!
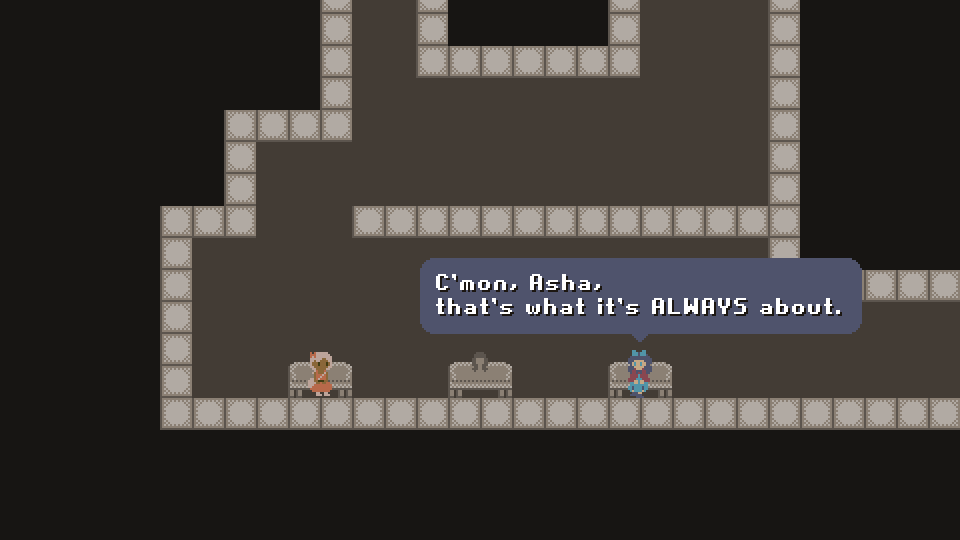
Last but not least, there are cutscenes between areas that further the story of Asha and Brooke. They may be rivals, yet they find themselves working together. Clearly this state of affairs dissatisfies them, but I wonder...
(This goes to itch.io, where you can download it for free or pay what you want.)
Supported Platforms
There are downloads available for Windows and Mac OS. Other platforms supported by Unity are possible given demand, but these are the only two I can test.
Usage Notes
Videos and live streams are allowed.
Troubleshooting
The Dungeon Editor makes use of the F1 and F2 keys. On some laptops, these may perform system functions like changing volume instead. Holding the Fn key will make them work normally, or you can look on your computer for a setting to switch the behavior. The 7 and 8 keys also work as alternatives.
Trailer
Screenshots
Level Guides
Guides to the intended solutions for every level. Spoils the puzzle aspect of the game, obviously. These are far from the only solutions, however, and there are many cases where you can bring things from earlier levels to do a different solution.
Level Guides
Area 0
Level 0-1: Here I Go!
Move and jump to exit off the right side of the screen.
Level 0-2: Make Your Own Stairs
Push the box right to the wall and climb up. Jump and push the upper box to make a 3-box staircase to climb.
Level 0-3: Blocked Passage
Press the Action button to pick up the box, then again to throw it left and make stairs.
Don't push the next box; pick it up and throw it to the right. If you push the box too far, you'll be stuck, so hold the Rewind button to undo it.
Level 0-4: Handle Without Care
Push the wooden box off the left edge to break it. Push the lower-left wooden box right to drop and break it, and pick up and throw the lower-right wooden box to break it. This opens the wooden box door.
Level 0-5: Self-Defense
Jump up the thin platforms and push the box left at the right time to crush the Slime (rewind and try again if you miss), which opens the monster door.
Level 0-6: Thought I'd Drop In
Push the wooden box right to crush the first Slime. Pick up the iron box and throw it right into the alcove with the second Slime to crush it. Break the last wooden box to open the wooden door.
Level 0-7: Watch 'Em Fall
Just walk right, dropping the floating boxes and opening both doors.
Level 0-8: Watch Your Step
Proceed along until reaching the lower-left section. Make sure both floating iron boxes fall. Push/throw all three boxes toward the right to create a 3-box staircase.
Level 0-9: Precision Drop
Jump up the thin platforms and stand on the floating box. Jump to make it fall with the right timing to crush the Slime. Jump up the boxes.
Level 0-10: For Your Safety
Drop the floating boxes so the Slime falls into the spike pit.
Level 0-11: Stair Renovation
Pick up the bottom box and throw it left at the stack. Jump on it, then jump and hold left to push the top box and create a full staircase to the top.
Level 0-12: A Slight Problem
Drop into the pit and form a partial staircase on the left by picking up and throwing boxes (three boxes on the bottom, two above, but missing a final one on top). Try to jump up to the ledge from this staircase; a scene will take place after a number of seconds.
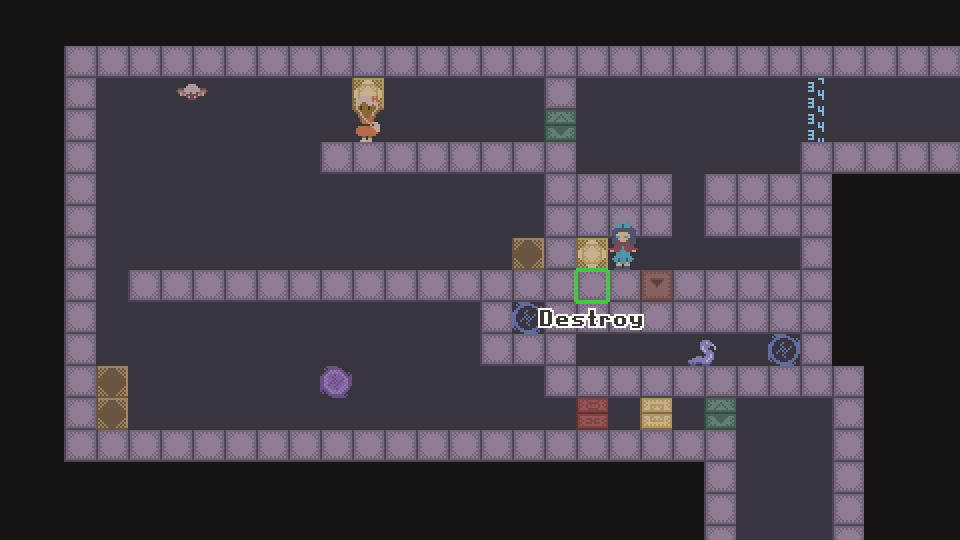
If playing solo, press the character switch button to change between Asha and Brooke. With Brooke, stand near the "ungrabbable" box in the ground. Press the Action button, target that box, and press Action to "grab" (Unmake) it. Stand atop the staircase, press Action, and place (Remake) the stored box at the top to complete the 6-box staircase.
Have Brooke grab the box at the top, place it on the leftmost ledge, and attempt to jump off it toward the high-up box near the Slime. Brooke is unable to push iron boxes, however, so Asha must help.
Have Asha jump toward the iron box to push it and crush the Slime. Have both girls fall into the exit.
Area 1
Level 1-1: Here We Go!
Push the iron box right with Asha. Asha cannot relocate the wooden box without breaking it, so use Brooke's Unmake/Remake to place it on the far right of the platform and jump up.
In the last section, use either girl's ability to create a 3-box staircase to the exit.
Level 1-2: Special Deliveries
Break the three wooden boxes at the top of the level any way you like. Have Brooke pick up the lower wooden box and drop it on the upper Slime.
Note that the wooden door will open as soon as you Unmake the last wooden box, close again when you Remake it, and open for good once the box breaks. So if you do it quickly, the door re-closing might crush the lower Slime right as they're leaving.
If this doesn't happen, though, you can still use the iron box to defeat it. Either have Asha throw the box directly at the Slime in their little passageway, or wait for them to come out and crush them from above.
Level 1-3: Separate Ways
Use either girl's ability to relocate the 3-box staircase to the right side.
Jump onto the floating wooden box, but make sure not to jump off it (which is what causes it to fall) until the other girl is safely across. (In solo mode, holding the character switch button and lining them up so they move as one is easiest for situations like this.)
Have Brooke grab the wooden box blocking the stairs, and put it on top of the iron box on the far right. Grab the other wooden box and put it on the ground next to the stack form a 3-box staircase.
Level 1-4: Safety Net
Cross the floating box bridge and drop the iron box on the Slime. Have Brooke go to the bottom-left, break the first wooden box, and grab the wooden box in the floor. This will open the wooden doors and defeat the two trapped Slimes.
Defeat the bottom-right Slime by having Brooke drop the wooden box on them. (You can also grab one of the iron ones from the spikes if you already broke the wooden one.)
Level 1-5: Gotta Take the Stairs
Since storing the wooden box will make the wooden door "stairs" unusable, have Asha pick up the wooden box and carry it to the top; do not break it. Have Brooke grab it out of Asha's hands and put it safely down on the ground.
Push the box right, next to the wooden door blocking the exit. Making sure both girls on the right side of the wooden door "bridge," break the box.
Level 1-6: Gentle Golems
Jump off the Grass Golem onto the ledge. Have Asha push the box down, grab it ,and throw it to the right into the ceiling corner, then drop the floating box. This will allow the second Golem to walk across to the right wall and let you jump up.
Have Brooke pick up the wooden box. Drop down and place it to her left, and push it into the spikes to safely block them. (The lower Grass Golem isn't really relevant, but you can save them by doing this quick enough.)
Level 1-7: Did I Forget Something?
You can't jump up the wall at the start empty-handed; walk back into Level 1-6 to grab the iron box by the exit and make a 1-box staircase.
Have Asha pick up the next box, climb up, and throw it left so it falls into the bottom-left section. Pick up the other box and throw it left through the spikes so both girls can reach the bottom-left section.
In the bottom-left section, use the box from earlier to make a 1-box staircase to the exit.
Level 1-8: Piggyback
Have Brooke stay up top, and have Asha drop down and grab one of the boxes. Brooke can jump onto the box Asha is carrying to be carried around; use this to carry Brooke left toward the trapped box, which she can get out with Unmake. Use all the boxes to make a 3-box staircase on the right side.
In the bottom section, again have Asha pick up the box and have Brooke ride on it. By having Asha walk directly left, Brooke can safely go above the spike balls. Break the wooden box, use carrying to get Brooke out safely, then use Asha's iron box to replace the lower wooden door as a 1-box staircase.
Level 1-9: Floating Away
Jump across the first floating box together. Have Brooke grab the lowest floating box of the three. Ensure both girls are on the elevated right section, and place the floating box just off the ledge to create a set of three floating steps they can jump up together.
Have Brooke relocate the two floating boxes on the side into a two-step staircase that allows you to jump up onto the thin platforms. (Note that the bottom step box doesn't need to remain floating, since it's on ground level anyway.)
Level 1-10: Clean Through
Have Brooke jump over the gap and go into the right section. Grab the trapped wooden box and place it on the right side as a staircase. Grab the next wooden box and place it up-left among the spikes, just right of the pit containing a Slime.
Have Asha fall into the left section. Throw and push the boxes to crush the two Slimes. Grab the lower iron box and throw it right; it should hit the wooden box Brooke placed and fall onto the final Slime, opening the monster doors.
Area 2
Level 2-1: Pressure's On
Have one girl stand on the pressure switch and the other move the iron box to the bottom-right corner. Jump off it to grab the second box, and bring both boxes out into the open with Brooke.
Place one iron box on the lower switch, which also serves as a way to get up. Destroy the wooden box on the upper switch and place the other iron box on it instead.
Level 2-2: Let Me Help With That
Drop the floating boxes on the pressure switches. Have Asha drop down and throw the box such that it both crushes the Slime and lands on the last switch. Have Brooke grab the box behind the monster door and drop it in the pit so Asha can get back up.
Level 2-3: New Heights
Grab the Levvies, a new item for Asha. You can now switch between the Gloves of Power (for throwing boxes) and Levvies (for high jumps) by holding the Action button and selecting the item.
Use the Levvies to jump up the high steps and onto the thin platforms. Switching back to the Gloves, throw one of the boxes left to crush the Slime. Throw the other three boxes right so they fall into the pit. Have Brooke use these boxes to make stairs for herself (first a 3-box staircase, then a 1-box staircase).
Level 2-4: Wood or Wood Not
The 1/2 gate changes Brooke spell set to one that can swap boxes between iron and wood. Make the first two boxes iron (Fortify). Have Asha pick one up and stand on the other to throw high and have it land on the right switch. Then throw the second box low to get it on the left switch.
Make the floating wooden box iron before dropping it so it doesn't break. Asha can then throw it through the spikes at the last pressure switch in the bottom-left.
To reach the exit, the wooden doors must be closed again so you can use the "bridge." Do this by making the box in the floor wood (Weaken) - you can have Asha stand inside the middle door while it's open to hold it open for Brooke.
Level 2-5: Sturdy Stairs
The 0/9 gate will switch Brooke back to her original spell set, so using it and the 1/2 gate lets you access both. There are two main solutions, depending on which spells Brooke has after the 0/9 gate gets blocked.
Unmake/Remake Solution
First, make the three wooden boxes on the right into iron. Take Brooke left to the 0/9 gate to regain Unmake/Remake. Making sure Brooke is far enough to the right, have Asha throw the boxes to the left to form a 3-box staircase.
Have Asha climb up the wooden box stairs, but don't crush the Slimesnake yet. Have Brooke move the wooden boxes off of the monster doors; stack two just to the left of the doors, and keep one in storage. Once you've done this, have Asha push the upper iron box onto the Slimesnake to open the monster doors.
Relocate the wooden boxes to the right wall to create a 3-box staircase to the exit.
Fortify Solution
First, make the three wooden boxes on the right into iron. Asha can then throw them to the left to form a 3-box staircase. Make at least two of the upper wooden boxes into iron as well (I recommend the two on the right). Have Asha push the upper iron box onto the Slimesnake to open the monster doors.
Relocate the boxes to the right wall to create a 3-box staircase to the exit. If you followed the recommendation to only Fortify the two boxes on the right, have Asha pick up the iron box used to crush the Slimesnake and throw it on top of that stack. Then have her push each box out from the bottom of the stack over to the right one at a time.
Level 2-6: Door Stopper
Have Asha stand on the pressure switch, and Brooke go through to grab the box in the floor. Place that box on the switch to keep it held down. Have Asha jump up the ledge with Levvies, and throw the box down so Brooke can climb up.
Have Asha use Levvies to jump up the thin platforms and to the box above the Slimesnake. Switch back to the Gloves, pick it up, and throw it to crush the Slimesnake and open the monster door.
Level 2-7: Leave It To Me!
Throw the box at the Slime and drop the wooden box on the Slimesnake. Have Brooke grab the box in the wall and go back up to drop it on the Grass Golem.
To avoid being locked in by the pressure switch door, either stay close to it when dropping the box and quickly move left before it closes, or have Asha stand in the door to keep it open.
Level 2-8: Thinking Ahead
Have Brooke jump up onto the floating iron box, and make the floating wooden box to her left into iron. Have both girls climb up; the first three pressure switches at the start of the level should now be held down by the iron boxes.
Have Brooke turn the wooden box to iron, then jump up on it to get on the upper ledge. Have Asha pick up the box on the right and throw it onto that ledge, but make sure it doesn't end up against the left wall (most easily done by throwing it on Brooke's level so she blocks it).
Have Asha push the lower box onto the last pressure switch, then use Levvies to jump up. Push the box on the ledge to the far right edge, and jump off it to the upper-right ledge.
In the final section, pick up a box with Asha, and have Brooke hop across it to reach the exit. Asha can then jump up herself using Levvies.
Level 2-9: Overcoming Danger
Push the first box onto the spike so both girls can safely jump over. Have Brooke grab the box and drop it on the right side of the pit, and drop the other box on the left side of the pit.
Have Brooke go into the left chamber and turn the box to iron, and have Asha throw it across to the right chamber. Have Brooke grab the box at the bottom of the "stack" (below the floating box), and place it on the left to make a 3-box staircase.
Level 2-10: Safe Passage
Have Asha jump up with Levvies. Push the box on the lower level left so the Slimesnake won't go into the spikes. Grab the box in front of the Slimesnake and get out of the way; it will now go back and forth, occasionally pressing the pressure switch.
Have Asha throw the box right into the pit, and have Brooke move the far-right box in the pit to make a staircase for herself. Go to the pressure door and, while the Slimesnake is on the left, have both girls stand on it and wait for it to open.
Area 3
Level 3-1: Warp to Warp
Enter the warp. Drop the box in the pit warp to crush the Slime. Throw both boxes into the warp to first hold down the pressure switch, then defeat the Slimesnake (may not work if the Slimesnake is overlapping the warp destination).
Enter the warp and move the box to serve as a staircase up to the open monster door.
Level 3-2: Narrowing the Options
Enter the warp. Grab the floating wooden box so that the iron box on top covers the warp destination. Place the stored box on the second destination. Stand on the pressure switch long enough for the Grass Golem to fall onto another warp destination.
Have Brooke stand up near the warp. Have Asha throw the staircase boxes to the left side and cover up those warp destinations, then jump up to the warp with Levvies. With all other warp destinations covered, enter the warp, and you'll end up in the exit passageway.
Level 3-3: Moment of Silence
Have Asha push the upper box to form a 3-box staircase. Have one girl stand in the gap between wooden boxes, and the other push the isolated wooden box over her head to the left edge. Jump up to the Unmute gate.
Have Asha push boxes to the right (past the Mute gate) for Brooke to grab. Put one just left of the Unmute gate, and another on the upper ledge. Climb up. Have one girl stand on the pressure switch, then have the other stand inside the open door to keep it open and get both through.
Level 3-4: Controlled Destruction
Destroy the block underneath the box so it lands on the pressure switch. Revive it after both girls pass by. Destroy a block in the floor to enter the chamber with the Golem and Slime, have both girls fall through, then Revive it. Destroy a block in the floor so both monsters fall into the spikes, and Revive it afterward.
Destroy a floor block in the center so Brooke can get down to the warps. Destroy the blocks under each wooden box to break them, then take one of the warps back up.
Level 3-5: Heavy Press
Destroy the block placed over the pressure switch to unpress it. Have Brooke cross the upper bridge and Asha cross the lower bridge. After Reviving the destroyed block, the switch will be pressed again, making the bridges unusable.
Have Brooke destroy the upper block in the Bat's cage to let them out, and Revive it after they escape. Destroy the block right of the bridge spikes so that the Bat flies into them.
Destroy a block in the floor so Brooke can fall down to where Asha is. Stand on the box and Destroy the corner block to the upper-right so you can jump up to the exit.
Level 3-6: Box Product
Grab the Portabox, a new item for Asha. Place the first Portabox in the left corner. Have Brooke Destroy the ledge corner so they can both climb up. Do the pressure switch/door trick to get both girls through the door.
Have Asha jump up with Levvies to collect the two Portaboxes. Place one over the Bat and one over the Slime to crush them. Have Brooke Destroy the block over the pressure switch door to let both climb up.
Level 3-7: Three Objectives
Have Asha pick up the wooden box at the top and throw it at the Bat. Drop in the hole to the right, and pick up and break the wooden box on the switch. Have Brooke Destroy the block right of the iron box, and have Asha push it onto the switch as a replacement..
In the bottom section, have Asha pick up one of the boxes, stand on the other, and throw it right so it goes over the warp and lands on the right side. Throw the other box into the warp so it covers the left warp destination. Grab the box you threw before and throw it left into the warp, so that it flies into the Slimesnake. (It may pass through if the Slimesnake is on top of the destination at that moment.)
Level 3-8: Across the Way
Destroy the block under the iron box on the right side so it falls into the warp and covers the right destination.
Have Asha enter the warp to end up on the left side (avoiding the Mute gate in the middle). Crush the Slime, drop the floating box, and pick it up. Have Brooke Destroy the left wall of the Bat's little chamber, and have Asha throw the box at it. Do the pressure switch/door trick to get to the exit.
Level 3-9: Fill 'Er Up
Push the box into the warp. Destroy the ledge corner to climb up. Pick up the box and throw it into the warp. Destroy a floor block to make a path down to the Slimesnake, though don't let Brooke fall in. Have Asha go down, push the box right into the warp, and jump out with Levvies.
Climb up and pick up the iron box to put it into one of the warps. Put the remaining two wooden boxes into warps (must be the last two so they don't break). Once the chamber on the right is filled, enter either warp to reach the exit.
Level 3-10: Thrown Together
Have Asha throw one box right to make a staircase. Pick up the other box, stand on the floating wooden box, and throw it into the warp; it'll land on the pressure switch. Have both girls jump up to the warp together.
Have Brooke Destroy a block in the floor. Have Asha pick up the box, go into the hole Brooke created, and throw it left to crush the Slime. Enter the warp.
Destroy the ledge corner to climb up. Pick up the Portaboxes, place them to make a 3-box staircase, and Destroy the ledge corner to complete the stairs.
Area 4
Level 4-1: Formidable Foes
Jump over the Animate Armor. Have Asha throw the box right on top of the second Armor and climb up it. Push the wooden box onto the switch, and the Armor will walk through the warp and into spikes. Enter the warp and jump off the Armor to climb up.
Land on the floating box, jump back up to the thin platforms, and wait for the Armor to touch the Mute gate and collapse. Jump off it toward the exit.
Level 4-2: Assigned Duties
Step on the floating wooden box to drop it, making the Armor in the pit walk into spikes (ideally the ones in the right chamber). Have Asha pick up the iron box and jump away, letting the other Armor walk into the spikes in the left chamber. Drop down and throw that box into the right chamber. Have Asha push the box in the left chamber into the switch.
In the right chamber, throw one of the boxes to the right side to cover the spikes. Pick up the other box and have Brooke ride on it, and jump up on the Armor to let Brooke reach where the warp is. Asha can then put the box down and jump up with Levvies.
Go through the warp. Have Asha throw the box right and quickly move left to avoid the Armor. Once the Armor collapses next to the Mute gate, both warp destinations in this chamber should be covered, so the warp will take you to the exit.
Level 4-3: Bombs, Away!
Grab the Bombs, a new item for Asha. Place one on the floor and explode it. Pick up the next Bomb, place it right in the middle of the path split (jump up twice from the bottom), and explode it; this will let you access both the lower and upper paths.
Take the Bomb in the bottom chamber and use it in the far right corner to blow up the Slime. Take the Bomb on the upper path, place it on the floating box, step off, and explode it after it lands, allowing you to enter the right warp and go to the exit.
Level 4-4: Tunnel Diggers
Pick up the three Bombs. Have Brooke grab the box, and blow up the first Bomb where it originally was. Place the box all the way to the right, and blow up the second Bomb on top of it. Push the box further right, and blow up the third Bomb on top of it again.
Jump up, push the box into the hole, and pick up three more Bombs. Blow up the first bomb on top of the box. Blow up the second to the right side of it. Blow up the third just to the right of the spike ball to get rid of it. Have Brooke grab the box and place it on the pressure switch. Go through the warp.
Pick up the two bombs and push the box into the pit. Blow up the first Bomb on the far right of the ledge, and the second on top of the box. Push the box into the remaining spike ball and climb up.
Level 4-5: Making It Dangerous
Use Brooke's Safety spell to turn the spikes into blocks. Use Danger to turn the left wall of the area the first Armor is patrolling into spikes, so that it touches them and collapses on the pressure switch.
For the second Armor, turn a block in the floor into spikes; it should fall down below, close enough that Brooke can jump from it to the door. Turn the left wall into spikes so that the trapped Armor collapses on the switch in its chamber. Use Safety to turn the spikes in the exit passageway into blocks.
Level 4-6: Danger Drop
Have Asha align the boxes so they're over the switches, then have Brooke make the blocks underneath the boxes spikes so they fall through.
Pick up the three Bombs. Place one over the second Slime from the left, have Brooke use Danger so it falls through, and blow it up to defeat three Slimes at once. Repeat this for the rightmost Slime and the second Slime from the right, and all of the Slimes should be defeated. Use Safety on the spikes to the left to make a staircase to the exit.
Level 4-7: Heavy Explosives
Pick up the Bomb. Use the pressure switch/door trick to go through the door. Use Danger twice to make the box fall through onto the switch. Have Asha pick up the other Bomb and detonate one in the upper-left. Push the wooden box off the switch.
Have Asha go down to the bottom and pick up the iron box on the switch. Have Brooke jump off it to reach the exit passageway, and have her stay there.
Have Asha throw the box to the right side of the pit and use Levvies to climb up. Place a Bomb on the upper switch, but don't explode it yet. Return to the bottom, put the box back on the switch, and use Levvies to jump up to where Brooke is. Put both girls past the pressure switch door, then blow up the Bomb so it no longer holds down the switch, restoring the bridge to the exit.
Level 4-8: If There's a Wick...
Use Safety on the first spike ball. Pick up the two Bombs. Blow up one on the left edge, then again in the same horizontal position. Enter the warp. Have Brooke go over the wooden box and past the spikes. Turn them into blocks and push the box onto the switch.
Pick up the Bomb. Place it left of the switch, and blow it up while on the left side of the pressure switch doors. Pick up the Bomb. Push the box off the left edge, place the Bomb on it, jump up with Levvies, and blow it up.
Level 4-9: Exterminate, Excavate
Pick up the three Bombs. Blow up the first on the Slime. Blow up the second where the second Slime was. Blow up the third where the third Slime was.
Have Brooke bring the wooden box down to use it as the staircase instead of the iron box. Have Asha hold the iron box so Brooke can jump off it to the top-right area. Have Asha throw the iron box into the top-right area. Jump to the right with Levvies, pick up the Bomb, and blow it up atop the iron box to defeat the Bat.
Push the iron box left so Brooke can climb up to the top level. Have Brooke grab the floating wooden box and place it above the pit with the Armor. Have Asha pick up the Bomb, place it on the floating box, and drop the box. Blow the Bomb up in the bottom-right of the pit. The Armor will walk into the spikes and open the monster door.
Level 4-10: A Way Up
Pick up the Bomb. Place it on the floating box and step off. Blow it up when it lands in the spikes. Have Brooke pick up the next floating box (without stepping on it) and place it directly in the leftmost or rightmost warp, so it floats and blocks the midair warp destination.
Have both girls take any of the warps to the top, then go right and drop down into the small chamber. Have Asha push the iron box off the stack. Have Brooke jump onto the wooden box, grab it, and place it in the bottom-right corner. Grab the iron box and place it on the next step up (up-right tile when standing on the wooden box).
Have Asha pick up the wooden box, and have Brooke take it from her hands from above (while standing on the isolated block beneath the warp destination). Jump up out of the chamber and over to the the top-left section, and place the stored wooden box on top of the wooden box there.
Have Asha use Levvies to jump on top of the wooden box stack, and from there, onto the wooden doors. Pick up the Bomb, drop back down, and blow up the left wall to open a way for both girls.
Area 5
Level 5-1: Trial of Mana
Have Asha stand on the pressure switch. Have Brooke touch the 1/2 gate and make the box wood to push it left. Touch the 5/6 gate and make the spikes into a block, then touch the 3/4 gate and Destroy that block. Before moving on, touch the 0/9 gate.
Have Asha pick up the iron box on the left and carry Brooke across with it. Have Brooke jump into the left cubby above the Slime. Have Asha throw the box left into the alcove, where Brooke can pick it up and place it over the Slime.
Drop down and go through the 1/2 gate. Make the floating box iron before dropping it. Pick up the box with Asha. Have at least one of the girls standing on the warp destination, and throw the box right; it should go right past the warp.
Level 5-2: Going Berserk
Have Brooke use Berserk up-right to fly up to the 3/4 gate. Destroy the block leading to the next chamber. Touch the 7/8 gate again and Berserk to the right across the gap, pushing the iron box onto the switch as you go.
After touching the 0/9 gate, pick up the nearby box and drop it down for Asha so she can jump up with Levvies. Have Brooke stand in the pressure switch door and grab the box from the switch, putting it down to the right.
Have Brooke jump up, have Asha pick up the box, and have Brooke grab it from her hands to drop on the Slimesnake. Place the box on the right side of the ledge to jump up to the exit.
Level 5-3: Saved by the Spell
Have Brooke jump onto the isolated block and Destroy the block to her right. Have Asha blow up a Bomb in that same position. Afterward, Revive the block and use it to cross.
Have Brooke stand on the floating box and Destroy the block under the 1/2 gate. Have Asha blow up a Bomb there. Have Brooke enter the warp. Destroy the left wall and touch the 5/6 gate. Drop down avoiding the 1/2 gate and use Safety on the spikes by the exit.
Level 5-4: You Go On Ahead
Have Brooke Berserk up-right across the gap. Grab the box and drop it in the pit of Armors so Asha can jump across.
Have Asha pick up the box in the bottom-right. Have Brooke stand on it and turn the spikes into blocks. Touch the 3/4 gate and Destroy the corner block so Asha can jump up. Move Brooke out of the way, and have Asha throw the box left into the center chamber.
Have Asha pick the box up again. (Use Berserk to get Brooke up if she dropped down.) Carry Brooke left to Destroy part of the left wall (just above the spikes, just below the floating box). Have Brooke touch the 7/8 gate and Berserk up-left through the hole. Drop the floating box so Asha can jump up with Levvies and grab the bomb. Place the Bomb, Destroy the block underneath it, and blow it up to open up the exit.
Level 5-5: Staying Afloat
Go across the floating boxes together, but don't let all of them drop. Have one girl stay on the last box while the other enters the warp and stands still at the destination. She'll hold up the last box when it falls, keeping the destination open so the first girl can safely enter the warp.
Destroy the corner block to climb up. Have Asha stand on the floating wooden box. Destroy the block beneath it, then have Asha walk off to the right side and pick up the iron box.
Destroy the lower block of the left wall and have Asha throw the iron box through so it lands on the bottom floating wooden box. Destroy the upper block this time and get onto that iron box; this keeps the bottom floating box from falling and breaking. Jump up to the exit passageway together.
Level 5-6: Weighed Down
Have Asha use Levvies to jump to the ledge and push the box off the right edge. Have Brooke destroy the corner block and jump up to the 0/9 gate. Have Brooke grab the box next to the lower pressure switch and place it on that switch. Have Asha pick up the left box so Brooke can grab it out of her hands from the ledge and put it on the upper switch.
Get both girls to the upper-left. Have Asha pick up the box and have Brooke grab it from her hands, then place it to her right. Have Brooke Berserk right across the spikes to break the wooden box and stand on the switch. Over on the left, have Asha place the box back on the switch. Have Asha stand inside the pressure switch door, and have Brooke Berserk back to the left so they can exit together.
Level 5-7: Through the Air
Have Brooke Berserk up-left through the warp. Touch the 3/4 gate, jump to the thin platforms, and Destroy a block above so Asha can come down.
Destroy the block under the 1/2 gate, then Destroy the block holding up the stack of two iron boxes. Have Brooke touch the 1/2 gate. Have Asha pick up one of the boxes. Have Brooke jump on top of it, then have Asha jump on the other box so Brooke can reach the upper level. Turn the wooden box to iron, then have Asha jump up there with Levvies to push it onto the switch.
Get one of the boxes out of the way (push it left into the spike pit or throw it right), but keep one positioned to the bottom-right of the Destroyed block. Have Brooke touch the 3/4 gate and Destroy the block under the 1/2 gate to avoid it. Jump up on the box and Destroy the left wall, opening a way to the upper-left wooden box. Have Asha go up there and throw the box, breaking it and opening the exit doors.
Level 5-8: Some Way, Somehow
Use Safety to make the second spike into a block. Drop the floating box and run from the Armor, which will fall down the hole with the first spike.
Use Danger on the block below the formerly-floating box to make it fall through. Do the same for the block right of that, so that Asha has room to pick the box up and throw it to the right. Have her use Levvies to jump up to the Bomb.
Have Asha drop down, and throw and push the box left into the pit. Place a Bomb all the way on the right, where the floor is only one block thick. Have Brooke use Danger to drop it down onto the spike ball, and blow open the exit for later.
Have Asha go down and pick the box up. Let Brooke ride it, and have Asha jump on to the collapsed Armor so Brooke can jump over the wall. Have Asha put the box down on the Armor and jump up with Levvies. Pick up the Bomb.
Push the lower box all the way right, then blow up a Bomb on top of it. Push the box back left to be underneath the Armor, have Brooke stand on it, and use Danger to make the Armor (and the box on top of it) drop through. Have Asha take both boxes over to the right, and hold one so Brooke can jump up to the end. Have Asha jump up with Levvies.
Level 5-9: Meet Up Later
Have Brooke Berserk left across the spikes. As you drop down, make sure to land on the stack of two wooden boxes and grab the top one. Carefully rearrange the wooden boxes without breaking any so that all three warp destinations in that area are blocked, then enter the warp.
Have Asha throw the box left at the Bat and block the warp destination Brooke just came out of. Have Brooke climb up to the next ledge. Have Asha hold the box she used as a staircase, then have Brooke grab it from her hands and place it on the warp destination.
Have Asha jump up to the top with Levvies, pick up the box, drop down, and stand to the right of the other box. Have Brooke climb this staircase to get on top of the wall, but don't fall down yet - have Asha jump up halfway on the box so that Brooke can grab the box from her hands.
Have Asha jump up with Levvies, and have both girls fall down. Get on the left side of the bottom warp destination and block it using Brooke's stored box. If all other destinations have been covered, the warp will go to the exit.
Level 5-10: The Final Push
Have Asha push the box right into the pit and pick up the Bomb. Pick up the box so Brooke can jump across to the 3/4 gate. Destroy the left wall and touch the 5/6 gate. Turn the right wall into a spike. Have Asha throw the box left, then push it off the left edge. Get Brooke out of the way and throw the box right, so it goes past the series of spike balls.
Have Brooke drop down and use Safety on the spike ball. Touch the 3/4 gate and Destroy the formerly-spike block. Use the Bomb all the way to the right to open the way forward and drop the box down.
Place the box in the right corner and have Asha jump up with Levvies. Have Asha pick up the box on the second level and drop down, and have Brooke use it to jump up. Have Asha jump up on the corner box so Brooke can grab the box from her hands. Place that box on the left edge of the second level. Have Brooke jump up to the third level.
Have Asha jump up to the second level with Levvies, pick up the box there, and stand halfway off the left edge. Have Brooke grab the box out of her hands, then go place it on the pressure switch.
Area 6
Level 6-1: Like Daughter, Like Mom
Have Lisa (Asha's mom) push the box right to form a 3-box staircase. Have Rita (Brooke's mom) grab the wooden box and place it on the pressure switch. Have Lisa jump up with Levvies and grab the box. Bring it down so Rita can grab it. Have Rita place it on the left edge of the platform and jump up.
Standing where the door is, use Rita's extra spell range to grab the box below. Put it down next to you and have both moms climb up.
Have Rita grab the box again and place it in the right corner of the pit to the right. Have Rita grab the wooden box on the switch and place it down in the pit. Have Lisa pick up one of the boxes so that Rita can jump up over the wall. Have Lisa jump up with Levvies.
Level 6-2: Portable Stairs
Have Asha go down and pick up one of the boxes. Have Brooke grab it from her hands and place it in the right corner. Have Asha jump back up with Levvies. Have Brooke grab a box through the right wall and place it on the left side. Have Asha pick up one of the boxes so Brooke can make it over. Have Asha throw the box right (making a stack of two boxes) and climb over with Levvies.
Have Brooke grab the two boxes through the left wall and create a 3-box staircase on the right. After climbing it and falling down, grab those three boxes from below, using two to cover the spikes and dropping the last one in the section below (don't fall down there yet).
After using the boxes to cross the spikes, pick those boxes up once again and drop them in the section below. Put one box in the right corner and one on the pressure switch. Have Asha pick up the third box. Have Brooke ride on Asha's box, and have Asha jump on the right box so Brooke can reach the exit. Have Asha throw her box onto the right box and jump up with Levvies.
Level 6-3: Hot on Your Heels
Have Lisa pick up a box so Rita can use it to jump up. Have Rita grab the box from Lisa's hands and place it in the center of the lava. Have Lisa jump up with Levvies.
After crossing the lava, have Rita grab the box from the lava and put it down next to her. Have Lisa pick up a box for Rita to ride, then jump up so Rita can reach the upper level and touch the 3/4 gate. Stack the two boxes and have Lisa jump up with Levvies.
Have Rita destroy the block holding up the box above so it falls on the Slimesnake. Destroy the block holding up the wooden box in the floor so it breaks. Have Lisa throw the box used to crush the Slimesnake left.
Destroy the leftmost block in the upper ledge. Have Lisa pick up the box and stand in the hole where the wooden box was. Have Rita ride the box, then have Lisa jump up so Rita can reach the upper level. Have Lisa put the box down and jump up with Levvies.
Have Lisa push the box and throw it right, so that it lands in the left part of the lava. Have Rita Destroy the block holding up the trapped iron box to drop it in the lava. Have Rita Destroy the block holding up the wooden box to break it and open the wooden door. Have both moms jump across.
Destroy the rightmost floor block separating the Armor and the Slime, so the Armor falls in with the Slime. Destroy the rightmost floor block separating them from the lava so they both fall in, opening the monster door.
Level 6-4: Fire in the Hole
Have Asha pick up the Bomb. Have Brooke Destroy the upper wall so Asha can get another Bomb. Move the box just left of the Destroyed wall. Destroy the block under it, then Destroy the block it lands on so it falls all the way down. Place a Bomb where the box was and repeat that process so the Bomb lands on the box. Blow it up.
Destroy the upper wall and have Asha bring the box back into that small upper chamber. Place a Bomb on the box. Destroy one of the floor blocks (not the one under the box) and have both girls drop down. Destroy the block under the box, then have Asha push the box right into the spikes. Destroy the block under the box. Blow up the Bomb. Use Destroy on the left wall to get out.
Jump up using the box and pick up the Bomb. Take both girls through the warp. Destroy the block under the left floating box and drop it into the lava. Have Asha place a Bomb on the right floating box and Destroy the block under it. Have both girls jump down onto the box. Have Brooke Destroy the block to the right of the box, then jump left to safety. Have Asha push the box right, jump left to safety, then blow up the Bomb.
Have Asha use Levvies to jump back over to the box. Pick it up and stand on the box in the lava. Brooke can then jump up to the exit using it, and Asha can jump up using Levvies.
Level 6-5: To the Other Side
Have Rita turn the two spikes into blocks. Have Lisa jump up with Levvies and grab the two Portaboxes. Stand halfway off the edge to place one Portabox in the center of the first lava pit, and stand on that box to reach the third Portabox.
Have Rita turn the block left of the warp into a spike. Have Lisa drop a Portabox down in the starting pit and pick it up so Rita can climb up using it. Once Rita is up, have Lisa throw the box right into the warp, defeating the Bat and landing on the right pressure switch.
Have Lisa jump up with Levvies. Have Rita turn the spike between the lava pits into a block. Have Lisa stand on that block and drop the last Portabox in the center of the second lava pit. Have both moms walk right off the box to reach the bottom section.
Have Lisa push the box all the way left to pin the Armor against the wall. Have Rita stand on the box and turn the left wall into a spike to defeat the Armor and open the monster door. Have Lisa pick up the box, jump on the Armor, and jump up so the box goes in the warp and lands on the left pressure switch.
Level 6-6: Hold Down the Fort
Push and break the wooden box in front of you at the start.
Have Asha pick up the iron box and let Brooke ride it. By having Asha stand halfway off the switch and Brooke halfway off the box, you can reach and Destroy the block on the upper pressure switch to break the wooden box on it.
Have Brooke go down below and Destroy the block left of the wooden box, allowing her to push the wooden box and break it.
Riding Asha's box again, have Brooke destroy the block under the collapsed Armor. The Unmute gate will revive it (which also makes the monster door close, holding down that switch) and make it walk onto the pressure switch. Have Asha throw the box she's been holding onto the bottom-left switch.
In the bottom-right, place a Bomb on the right edge near the spike to blow it up. Pick up and throw the last wooden box.
Have Asha pick up the iron box and carry Brooke to the right wall. Have Brooke Destroy the corner block and jump up into the exit passageway. Have Asha put the box down on the switch. Go back to the first switch and place a Bomb on it, holding it down so that both girls can leave.
Level 6-7: Shared Resources
Have Lisa enter the warp. Pick up the box while the Bat is to her right and throw it right at the Bat, blocking the warp destination. Have Rita enter the warp and come out on the right side. Have Lisa pick up the box, throw it right on the lower level, and push it right to the end of that passage.
Have Rita grab the box from the end of the passage and place it as far right as it can go in the lava (second tile from the left). Jump across and grab the box there, then place it in the lava (second tile from the right). Grab the first box out of the lava and place in on the trapped pressure switch.
Jump back to the right and grab the other box out of the lava. Walk up to the floating wooden box, and place the stored box in the Slimesnake chamber down below, crushing it. Have Lisa push the box in the bottom-left onto the pressure switch. Have Rita grab the floating wooden box.
Get both moms just left of the wooden door "bridge." Have Rita place the floating wooden box as far up-right as possible, have both moms cross the bridge, then grab the floating wooden box to open the doors again.
Level 6-8: Friend to the End
Destroy the separating wall so the Grass Golem can walk through, and Revive the block to keep it on the right side. Have Brooke Destroy the corner block and use the Golem to jump up above.
Stand on the box and use Destroy to free the upper Golem. Destroy the block under the box to drop it and cover the spikes. Destroy the separating wall so the lower Golem can proceed further right, eventually getting stuck in a one-tile hole.
Have both girls go all the way right. Destroy the upper-right corner block so that Asha can jump up there with Levvies. From there, have Asha jump left to the pressure switch door blocking the upper Golem. Destroy the block Asha is standing on; this will give Asha room to jump across and pick up the box on the right.
Position this box above the spikes in the bottom chamber (easiest to throw left into the hallway, with Brooke positioned so she stops it at that position). Destroy the block underneath the box so it falls and covers the spikes, in addition to freeing the Golem to walk unharmed onto the pressure switch.
Destroy the block right of the upper spikes so Asha can pick the box covering them back up. Throw it right, careful not to crush the freed Golem.
Have Asha pick up the box and carry Brooke on it. Have Brooke Destroy the corner block to her right, then jump into the opening on the left. Have Asha throw the box right into the alcove. Revive the corner block. Have Asha jump up with Levvies and grab the box again.
Have Brooke Destroy the block above her so she has room to jump. Jump up onto Asha's box, then up to the exit. Before she leaves, have her Destroy the block under the first pressure switch door so Asha can jump up there with Levvies.
Level 6-9: Coming to a Close
Have Lisa go up, push the iron box off the switch, and stand on it herself. Have Rita grab that iron box and place it over the top-left wooden box. Grab that wooden box.
Have Rita stand inside the lower pressure switch door. Have Lisa leave the switch to come stand inside it with her. Have Rita drop down and put down her stored wooden box. Grab the wooden box to the left through the wall and put it down safely.
Have Lisa pick up one of the wooden boxes so Rita can jump up to the wooden door. Have Rita grab the box out of her hands and drop it on the trapped Slime. Grab the other wooden box the same way, but keep it in storage.
Have Rita touch the 3/4 gate and destroy the far left wall, opening a path back to the start. Have Lisa go through, jump up with Levvies, and grab the iron box. Bring it to the bottom section. Destroy the top-right corner block. Have Lisa pick up the iron box.
Have Rita touch the 0/9 gate and stand inside the wooden door. Place the stored wooden box over to her right. Grab the iron box out of Lisa's hands and place it on top. Use these boxes to cover the first two spike tiles, and have Lisa come up through the door while the wooden box is "in storage." With two boxes in place, the moms can run over the spikes to the exit.
Level 6-10: Together At Last
Have one girl stand in the small "pit" and the other push the wooden box over to the pressure switch, using the first girl as a platform. (Have the lower girl move one step at a time, standing in half-tile positions, so that she's always holding the box up.)
Unmute Brooke. Have her stand inside the pressure switch door and grab the wooden box. Put it down to her right. Have Asha pick up the wooden box so Brooke can jump up to the thin platforms.
Make sure Asha is safely on the solid block on the right, still carrying the wooden box. Have Brooke grab the wooden box from her hands, and drop it on the Slimesnake, all while staying up on the platforms. Have Brooke grab the trapped iron box, then drop down and drop it on the Bat.
Push the box onto the spikes, cross over them, then have Brooke grab it from the left side. Drop the box in the lava so Brooke can land on it and jump to the ground on the left. Grab that box and place it to the right of the first box. Have both girls move toward the right by repeatedly grabbing the current left box and dropping it further right in the lava.
After reaching solid ground, take both boxes out of the lava. Put one in the bottom-right corner and have Asha pick up the other so Brooke can get up to the exit. Have Asha throw the box right and jump up with Levvies.
Extras
You can use a special code to set the game as cleared, unlocking Level Select and the Dungeon Editor within.
Warning: Since this unlocks Level Select, which also contains all scenes, doing this may spoil the plot. There is also a scene with some spoilers upon entering the Dungeon Editor for the first time.
Game Clear Code
Enter the Options menu and go to Audio Options.
Set Music Volume to 2%, Sound Volume to 22%, and Talk Volume to 15%.
Select Back. If done correctly, the character switch sound will play, and the volumes will reset to 100%.
Afterward, go to Data Deletion.
Choose Create Game Progress and confirm three times.
Once the game is set as cleared, One-Player and Two-Player will take you to Level Select instead of loading.