
Insanity is a freeware horror-style adventure game by Uri made in WOLF RPG Editor.
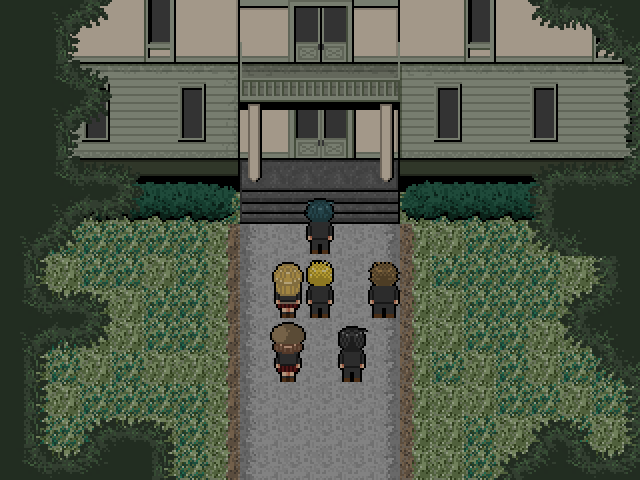
A group of high-school friends is talked into exploring an abandoned mansion.
Before long, they discover a dead body. They hurry to call the police, but find the front door's stuck.
As they search for another way out, they learn the truth about what happened in this house...
(Content Severity: Discretion Advised)
Click here for content warnings.
Themes of mental illness.
Ableist language.
Death and blood.
Suicide.
A few chase scenes.
Some swearing.
Download Insanity (Remake) | (Mirror)
(Chrome may falsely flag the download as malicious, but it's safe to ignore.)
Supported Platforms
The game's engine is made for Windows only, with no native support for other platforms. To play on Mac, you can try a general-purpose tool like WineBottler.
Usage Notes
Videos are allowed, but should not be profited off of, with the exception of YouTube monetization. Live streams are allowed.
Fanworks are generally allowed and can be sold. However, you should not sell anything that uses any specific resources from the game.
Troubleshooting
Make sure to extract the game to its own folder instead of running directly from the ZIP file. If you don't do so, any saves made will be lost the next time you run the game.
Screenshots
Walkthrough
A guide through the game. Click or highlight the black boxes to show spoiler text. Note that you must generally switch to the indicated character for each step.
Walkthrough
Phase 1
Keisuke: Talk to Kenta, then open the front door. Enter the Dining Room.
Keisuke: Check the corpse in the Dining Room to obtain the Key.
Keisuke: Open the Butler's Room at the far east end of 1F. Find the diary under the bed.
Kenta: Check the off-color wall in the Storage Room (first lower door in the east 1F hallway) to move the shelves. Obtain the Small Key from the vent behind them.
Kenta: Use the Small Key on the diary in the Butler's Room to obtain the Diary.
Keisuke: Check the blocked door to the Kitchen (first upper door in the east 1F hallway), then check the mansion map in the Storage Room to notice the other way in.
Keisuke: Open the curtains in the Dining Room to enter the Kitchen. Move the cardboard boxes.
Ryouji: Obtain the Key from the cookie tin in the Kitchen.
Ryouji: Open the Mistress's Room (first upper door in the east 2F hallway). Check the music box inside.
Ryouji: (Optional if you know the solution.) Obtain two pieces of Sheet Music from the shelves in the Servant Lounge (second upper door in the east 1F hallway) and the piano in the Guest Hall (first large door in the west 1F hallway). You can have Riho play them on the Guest Hall piano. The Servant Lounge trash can also has clues.
Ryouji: Solve the music box puzzle in the Mistress's Room for a Key. Solution: Turn the keys in the order right, left, center. If you choose wrong, make sure to hit Cancel before trying again.
Ryouji: Unlock the Daughter's Room at the far east end of 2F.
Ryouji: Go to the west end of 1F to hear a noise. Enter the Guest Room (lower door) and check the broken vase.
Kenta: Read the diary in the Daughter's Room.
Kenta: Open the safe in the Butler's Room. Solution: 1126. You can determine Yanase's birthday from "3 days after Labor Thanksgiving Day" and the November calendar in the Guest Hall.
Keisuke: Go to the Dining Room.
Phase 2
Kyouko: Check on Ryouji. Talk with Yuuki twice. Lastly, talk with Riho.
Keisuke: Check the safe in the Butler's Room.
Keisuke: Obtain the Key in the Guest Room (lower door on far west end of 1F).
Keisuke: Enter the Study (big door on far west end of 1F) and check both shelves to learn about Murai Pharmaceutical and the underground shelter.
Keisuke: Obtain the Crowbar from the 1F Restroom (now with blood outside).
Keisuke: Use the Crowbar to pry open the door to the Bedroom (far west end of 2F).
Keisuke: Look at the family photo in the Master's Room (right of the Bedroom).
Keisuke: Return to the Guest Hall.
Phase 3
Keisuke: Descend down the fireplace in the Master's Room to go to the basement.
Keisuke: Unlock the Reference Room with the keypad; the clue is in the Chemical Storage room to the right. Solution: 4916728639. In = 49, S = 16, A = 7, Ni = 28, T = 6, Y = 39.)
Keisuke: Use the Crowbar on the shaking, noisy locker in Storage 2.
Kenta: Go to the Kitchen to obtain the rest of the Diary, then read through it.
Kenta: Go to the Dining Room for an encounter. Hide in the fireplace in the Master's Room (first door to the west on 2F).
Kenta: Pick up the Thick Book from the left table in the Reference Room. (Only possible if you unlocked the Reference Room as Keisuke earlier.)
Kenta: Pick up the Blood Pack in the Chemical Storage.
Kenta: Obtain the Key in Laboratory 1.
Kenta: Go to the Experiment Animal Cages. Branching point: If you have both the Thick Book and Blood Pack, Kenta will survive.
Phase 4
Kyouko: Obtain the Necklace on the east end of 1F.
Kyouko: Go to the Study for an encounter. Run to the Daughter's Room (far east end of 2F).
Keisuke: (Required, but easy to overlook!) Keep talking with Yuuki until a scene occurs.
Kyouko: Check the wall to go to the basement, and enter Laboratory 1.
Kyouko: Enter Laboratory 2. (Warning: Finish with Keisuke first, or you'll have to reload a save.) Branching point: If you grab one of the folding chairs in time, Riho will survive.
Kyouko: Run to Storage 2. (Must have finished talking to Yuuki as Keisuke. Otherwise, you'll have no way to actually escape.)
Phase 5
Keisuke: If Riho is alive, return to Laboratory 2 and cut Riho's restraints with the Knife.
Keisuke: Obtain the Rusty Key from Murai in Storage 2.
Keisuke: Check the door to Ryouji's cell in Experiment Animal Cages.
Keisuke: Check the elevator keypad in Experiment Animal Cages, then go to Storage 2.
Keisuke: Enter Laboratory 3. Ending branches: If anyone died, you get Bad Ending 1.
Keisuke: Talk to Yuuki, then Ryouji, then check the phone on the wall in Laboratory 1. Ending branches: If Ryouji wasn't put in position, you get Bad Ending 2. If he was, you get Good Ending 1, or Good Ending 2 on a second playthrough.