Bevel's Painting is a freeware horror exploration game by Maninu made in RPG Maker VX. It's not too long, estimated to be about 2 hours, but will likely be longer than that if you replay for other endings.
A girl named Bevel explores a painting of her own creation.
Note: While there aren't any for most of the game, there are some "run and hide" type chases toward the end.
Note 2: The game features a made-up language called Bevelese. A reference is included in the download. Only a few puzzle hints are given in it, and these are often short and put in places like notes on the wall. If a Bevelese message seems long, it's very likely not important for gameplay, so you can safely gloss over it.
(Content Severity: Mild)
Click here for content warnings.
Sudden chase scenes.
Implied bullying and abuse.
Some violence.
Download Bevel's Painting 4.00 | (Mirror)
(Chrome may falsely flag the download as malicious, but it's safe to ignore.)
Installation of the RPG Maker VX Runtime Package (not VX Ace) is required to play.
Download VX Runtime Package (RTP)
Supported Platforms
The game's engine is made for Windows only, with no native support for other platforms. To play on Mac, you can try a general-purpose tool like WineBottler.
Troubleshooting
Make sure to extract the game to its own folder instead of running directly from the ZIP file. If you don't do so, any saves made will be lost the next time you run the game.
If you extracted the ZIP but save data is still being erased, try running the game as an administrator. Without admin privileges, the game may not have permission to create save files.
"RGSS202E.dll could not be found" means you need the RPG Maker VX RTP.
This is distinct from the VX Ace RTP which other games may require. The download link is up above.
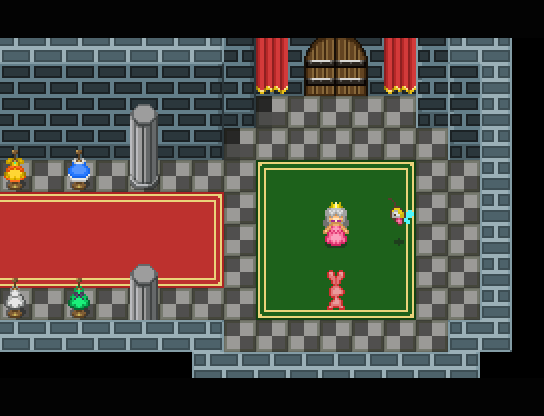
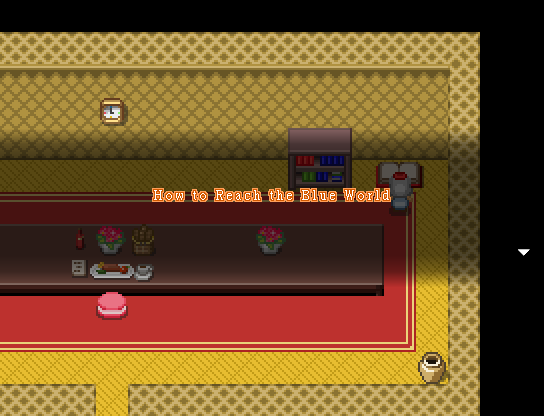
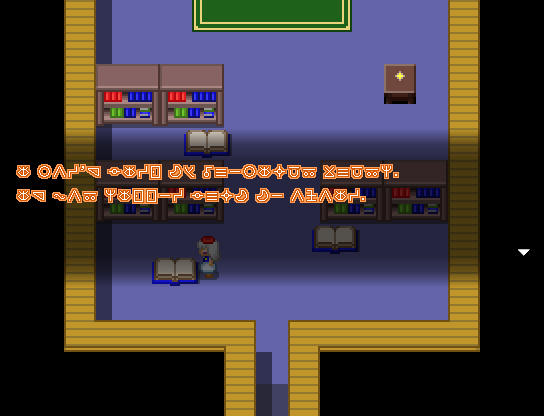
Screenshots
Walkthrough
A guide through the game. It also explains how to get all 10 (plus one extra) endings. Click or highlight the black boxes to show hidden text. This guide contains spoilers.
Walkthrough
Intro
Leave the room. Use the bathroom (the red door) in the hall. Return to the starting room and inspect the glowing blue canvas. Proceed ahead.
Fun World
Go through the center door in the central hall. Eat the entire meal.
Go to the left and enter the first door. Push the shapes into the right holes to get a Brush. Enter the second door and grab the Blue Paint, but don't go any further.
Go right to the door that leads back to itself. Use the Blue Paint on the door (from the Paint menu) and enter.
Blue World
Once you reach the central area, go down the right hall. Repeatedly try to open the right door to get inside. After seeing the other Bevel, leave the room and go to the right, and the mirror will shatter; get the Mirror Shard.
Go in the door in the back of the central area. Go left in the tunnel. Grab the Scissors in the room.
Go right in the tunnel and use the Scissors to cut the curtain. In the hidden room, put the Mirror Shard in the broken mirror to reveal a switch. However, you don't actually need to use the Shard if you know where the switch is. Press it and go down to get Green Paint.
Clean your brush in one of the bottles (in the central room, or in the room of reflective water) and use Green Paint to add leaves to the tree painting.
Open the door to the left of the tree and drop the Scissors or the Mirror Shard in the toolbox. Go back down and left to the piano room to get the Red Paint. Avoid the skulls.
Clean your brush in the other bottle and paint the door in the central room red.
Red World
Go left and keep going until the dark room with a red floor. Check the red-eyed skull in the lower-right for the Desk Key.
Return to the save point and go up to a storeroom. Unlock the desk drawer with the key for the Red Key.
Return to the dark red room of skulls and open the door on the right. Get the Candle. Read the note in the middle for a Bevelese lesson. On the way back, use the Candle on the flame to make it a Lit Candle.
Keep running in the hall of canvases to avoid the other Bevel. After escaping, you can return to pick up the Big Canvas she came out of.
There's a puzzle in the room below the heart room, but it's "optional" in that it's only required for certain endings. (See "the Cloth" in Ending Deciders.)
There are two options for getting to the next world. One is more obvious... but will lead to the "worst" ending.
Option 1:
Use the Lit Candle or the Scissors to clear the vines in the room above the entrance hall. Run over the spikes when they retract and be careful of the cracked floor (don't forget it's there on the return trip!). You'll get the Black Paint.
In the room full of doors on the right, go to the middle door in the top row to use the paint, and the other Bevel will steal it. Follow her down. Use the Big Canvas to bridge the gap and reach her. Step on the button and take the Black Paint back.
Clean your brush. Return to the door to nowhere (fourth from the left or right on the top row) and use the Black Paint.
Option 2:
Use the Lit Candle to burn the door to nowhere (fourth from the left or right on the top row) black.
Black World
Pick up the Empty Bottle by the save point. Head to the backyard, getting the Plant Seed in the bottom-right of the garden area.
There's a statue puzzle in the backyard, the hint for which is hidden under a dresser in the dressing room upstairs: Up Down Left Right Left. Bevel herself must face left as the center "statue." Put the Eye Jewel in the skull to the left.
Run back inside and to the right. You can hide in one of three places: a locker on 1F (room right of the flowerpot), a locker on 2F (top-right room with the duck), or the curtains in the dressing room (top-middle room on 2F).
Reaper Tips:
You must start hiding before the reaper enters the room to successfully hide; if you were too late, he'll keep running around the room at usual speed, so try to slip past him to leave and try again.
Depending on the location and which chase it is, he may have a chance of realizing where you're hiding, but it's identifiable by him slowly moving toward you, so you have a chance to get out.
Lastly, in addition to scripted appearances, he has a small random chance of appearing on 2F. But this will only trigger if you walk through the upper part near the dressing room door, which should never be necessary.
Go to the phone room on 2F (the door will be ajar). Walk up to the phone and walk away, and it'll ring. Answer it, then get the Study Key. Use it to open the study (left of the 1F flowerpot). Get Duckette, and hide from the reaper again.
(Note that standing behind the bookcase in the study works as hiding, again following the "not in the room yet" rule. In fact, it's the most reliable hiding spot.)
Go put Duckette on the blank canvas in the top-right room on 2F. The reaper will be on your right as you leave. (At this point, the dressing room curtain will no longer be effective.)
You can now collect all the items needed to get the Torn Picture. Depending on the ending route, this may or may not be necessary.
First, you can fill the Empty Bottle with water from one of the pots in the top-rightmost room on 2F (with the ducks).
Second, after placing Duckette, the room in the bottom-right of 2F is unlocked; go in to get the Sun Painting. The giraffe... thing gives you a hint about the last item, which in some cases will become fully English if you talk to them five times.
If you don't have the Blue Book, check behind the broken pillar near the front door to get the Battery.
If you do, put it on the switch in the top-left hall on 1F, and get the Battery inside.
Once you have all the items needed to grow a plant (as hinted to by a book in the large room in the back of 1F), go to the room right of the flowerpot.
Sow the Plant Seed in the soil (stand in front of it, not on it), water it with the Bottle of Water, place the Sun Painting on the easel, and put the Battery in the clock. Climb the vines to get the Torn Picture.
To the Shed:
Go to the large room in the back of 1F and use the Torn Picture with the other half on the table. The reaper will appear. The only place you can hide now is the study, by standing behind the bookcase.
As you're leaving, however, the reaper will bust through the left wall. Re-enter the study (you'll sneak around him if you immediately re-enter the door) and run through the hole he made, and he'll stop following. (Or you can hide behind the bookcase again.)
After going through the hole, check the mirror to get the Shed Key. As you move away, the reaper shows up one last time. If you still have the Mirror Shard, you get the choice to use it. Either way, go up to the backyard and open the shed.
To the Fireplace:
If you didn't kill the other Bevel in Red World, then after placing Duckette, a note will appear in the top-rightish room of 2F (there'll be bloody footprints outside the door) with a switch behind it. Press it to open a secret passage in the fireplace downstairs (the same room with the torn half-picture on the table).
You can do part of the "To the Shed" events if you want; just don't actually go to the shed, or have the reaper chasing you until you go to the shed. Go down the ladder in the fireplace whenever you're ready.
Ending Deciders
You can drop either the Scissors or the Mirror Shard in the toolbox. Both have the same immediate result, but which item you get to keep for later is important.
You can use either the Black Paint or the Lit Candle to enter Black World. And to get the Black Paint, you can use either the Lit Candle or the Scissors on the vines.
The switch to open the fireplace passage will only appear if the other Bevel is still alive. So for the endings that require the fireplace (most of them), make sure you do not go the Black Paint route.
If you bring it to that point, you can throw the Mirror Shard at the reaper after getting the Shed Key.
To have a Bottle of Water for the end, you must refill it from the pot full of water after watering the Plant Seed. (Or, if you don't need the Torn Picture, you can simply fill it once and not water the seed.)
At the last save point, you can either enter the dirty door, clean the dirty door before entering it, use the Bottle of Water on the heart, or use the Scissors on the heart. In some cases, watering the heart is followed by the dirty/clean door choice.
After using the water on the heart, you can leave without viewing the scenes in all four doors (returning to the dirty door area), or you can view all the scenes (as long as you meet the requirements to open all the doors).
Once you view the scenes in all four doors, the other Bevel will appear in the hallway. You can leave without talking to her, talk to her and say "right," talk to her and say "wrong," or give her the Brush.
As of version 4.00, doing a playthrough that never uses a save point makes a rabbit appear in the hallway after entering all four doors, who takes you to a special ending.
You need two items to clean the dirty door.
(Provided you have both, using either one gives you the prompt to clean it.)
1. The Cloth will appear in front of the heart sculpture in Red World when you make everything in the room below the heart red.
(Taking it will make the skulls start moving, so be careful.)
Clean your red brush in this bottle, not the one at the entrance. Check the mirror. Color the canvas with Lipstick (in the far-right pot after crossing the Big Canvas gap).
Get the Red Book from behind the left bookcase in the storeroom, and replace the Blue Book with it.
2. The Cleaning Fluid is in a bottle during the chase after going in the fireplace, in the bottom-right after leaving the dining room.
Each of the four doors in the school has a condition you must meet in order to open it.
- Kill the piano player by specifically dropping the Scissors in the toolbox.
- Get the Cloth by making everything red - see cleaning item #1 above.
- Put the Torn Picture back together.
- Throw the Mirror Shard at the reaper.
Note that in the first three rooms, you must examine the important thing in the room (instead of just leaving) for it to count as "seen."
Endings
(No ending is considered "true" by Maninu, but The Real Me is probably the happiest, and only it and the last spoiler-tagged one show the credits.)
Long Dream
Go to the shed without the Lit Candle in your possession.
And I'm Gone
- Drop the Mirror Shard in the toolbox to keep the Scissors.
- Use the Scissors on the vines and get the Black Paint so that you can keep the Lit Candle.
- Go to the shed.
- Use the Lit Candle on the final red canvas.
Dead Inside
- Drop the Mirror Shard in the toolbox to keep the Scissors.
- Use the Lit Candle to reach Black World with the Scissors.
- Go in the fireplace.
- Use the Scissors on the heart sculpture at the end.
(You can see all of the endings below (except one) with minimal effort by first getting everything you need for The Real Me, then saving before you do anything with the heart or dirty door.)
Meaningless Illusion
- Go in the fireplace.
- Enter the dirty door.
A Rousing Success
- Go in the fireplace.
- Clean the dirty door.
Revenge
- Go in the fireplace.
- Use the Bottle of Water on the heart.
- View the scenes in all four doors.
- Don't talk to the other Bevel.
Go back left and enter the dirty door.
First and Last Friend
- Go in the fireplace.
- Use the Bottle of Water on the heart.
- View the scenes in all four doors.
- Talk to the other Bevel, and say "right."
The Real Me
- Go in the fireplace.
- Use the Bottle of Water on the heart.
- View the scenes in all four doors.
- Talk to the other Bevel, and say "wrong."
- Clean the dirty door.
Bevel's Painting
- Go in the fireplace.
- Use the Bottle of Water on the heart.
- View the scenes in all four doors.
- Give the other Bevel the Brush.
Proceed to the right and paint the door white.
The Eternal Ball (Added in 4.00)
- Play through from the start without saving (not even checking a save point).
- Go in the fireplace.
- Use the Bottle of Water on the heart.
- View the scenes in all four doors.
- If you never saved, a rabbit will appear on the right side of the hallway.
Talk to it and follow it.
Lastly, the extra scenario has its own ending.
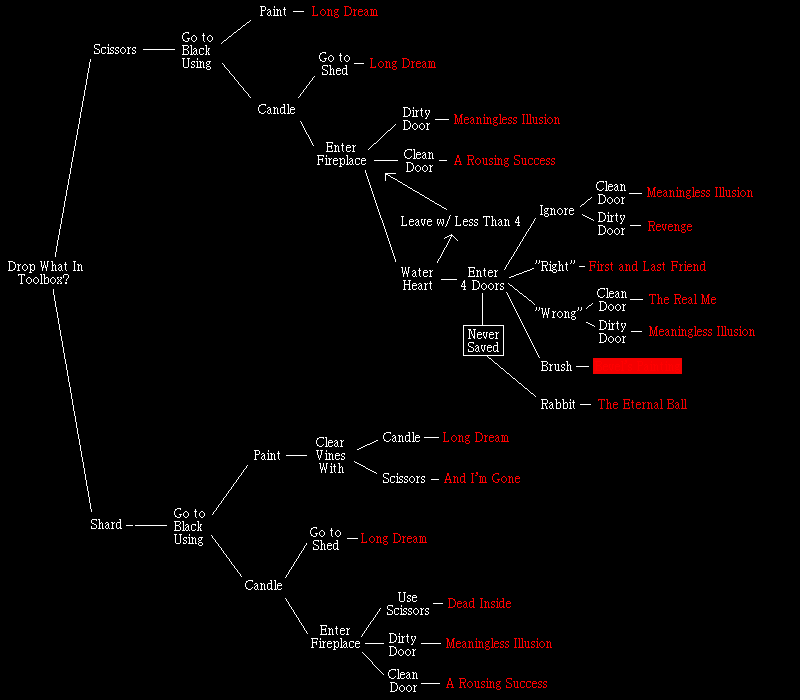
Ending Chart
(This chart sort of assumes you'll get everything you can on that branch, and don't use any items you don't have to.
If a branch seems to "end early," that usually means all choices you can make afterward will lead to the same ending.)
Extra Scenario
This is accessed via a code given after the last ending. On the title screen, press: Up Up Up Up Down Down Down Down Left Right Left Right Down Up.
Check the meat and leave. Solve the block puzzle for a Bomb. Blow up the cracked wall next to the door-to-nowhere to get the Dirty Brush. There's a bottle of water hidden behind the top-left pillar in the central hall.
The Blue Paint is moved up from its original position to the end of the hallway. To avoid the holes, walk up along the left side of the hall until the sparkle comes into view, then step right (the far-left hole is moved up two tiles from the others). Paint the door blue.
The save point is unreachable - the cracked floors don't make you fall, but the ones just beyond them do. Climb down to the tunnel and to the right. Check the mirror twice for a Mirror Shard and Yellow Paint.
Dropping the Mirror Shard in the toolbox to get the Red Paint will eventually get you killed, so don't do that. Use the Yellow Paint on the door with the Dirty Brush, and it'll mix to create green.
In the looping field area, go between the formation of four plant things to be warped to another area. Drop down the hole. Put the Mirror Shard in the mirror and inspect it to go through.
Go around the mansion to get seven crayons. (Some other items are required.)
- Study Key: In the room with Ducky. You can't just take it; you have to hide in the locker for ten seconds to make Ducky go away.
- Canvas Scraper: In the desk in the study.
- Blue Book: In the study.
- Red Crayon: Behind the pillar in the entrance, where the Battery was originally if you didn't have the Blue Book.
- Orange Crayon: In a hidden room across from the study.
- Yellow Crayon: In the room with the giraffe (bottom-left on 2F), the white star on the wall.
- Green Crayon: In the broken flowerpot on 1F.
- Blue Crayon: In the room left of the flowerpot. You need the Canvas Scraper to get it unstuck.
- Indigo Crayon: In the top-leftish room on 2F with the paintings, on the back of the starry painting
- Violet Crayon: In the room opened by putting the Blue Book on the switch, right of the (locked) door to the backyard of 1F. You have to keep flipping the lightswitch until it appears.
Once you have all the crayons, go out what was originally the door to the backyard. Run directly up, or else you'll be thrown back to the start.