
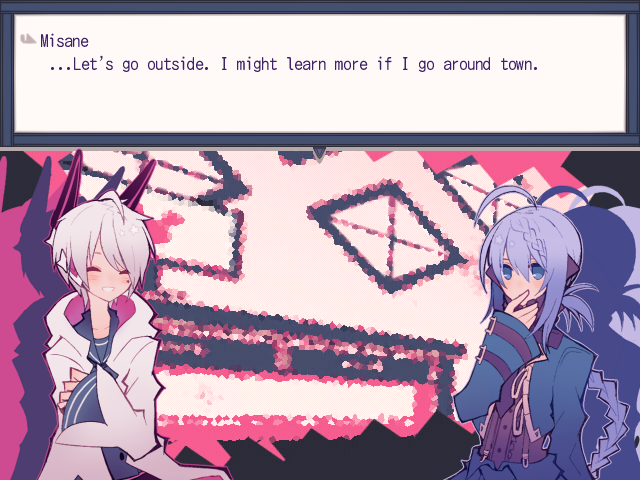
1bitHeart is a friend-making adventure game by △○□× (Miwashiba) made in WOLF RPG Editor. It's a story-oriented game with a focus on making friends around town.
Nanashi is a young, reclusive boy in a high-tech world governed by programs.
One day, a girl suddenly appears in his room, and proposes that Nanashi go out and make friends.
He decides to give it a try, but just as he does, odd things start to happen around town...
(Content Severity: Generally Mild)
Click here for content warnings.
Suicide mention.
One friend event with offscreen animal death.
One friend event with threats of self-harm.
One friend event with an optional horror segment with some jumpscares.
(The horror segment is preceded by a warning, and can be skipped if you say no.)
Implications of a romance between an adult and a young teen.
Offscreen poisoning.
Some mild swearing.
Download 1bitHeart 1.05 | (Mirror)
(Chrome may falsely flag the download as malicious, but it's safe to ignore.)
1bitHeart is now available on Steam for $3.
The game will remain free here, but you can show Miwashiba your support by purchasing it.
Supported Platforms
The game's engine is made for Windows only, with no native support for other platforms. To play on Mac, you can try a general-purpose tool like WineBottler.
Troubleshooting
Make sure to extract the game to its own folder instead of running directly from the ZIP file. If you don't do so, any saves made will be lost the next time you run the game.
If the game freezes your computer on startup, it's likely caused by a problem with auto-installing fonts. Go into the Data folder, install all of the fonts, then delete the font files and try running the game again. It's supposed to install them automatically, but this seems to freeze some systems - deleting the fonts will stop it from trying.
If dialogue doesn't show up or uses the wrong font (which may cause cutoff text), manually install the fonts in the Data folder.
The parts where you must enter a sequence of buttons have had input issues, though they should be ironed out now.
If Z, X, or C do nothing, alternative buttons should work: use Space or Enter for "Z," Escape or Backspace for "X," and Shift for "C."
Screenshots

Walkthrough
A straightforward plot walkthrough. Click or highlight the black boxes to show spoiler text.
Walkthrough
Chapter 1
Talk to Mikado.
Return to Nanashi's bed.
Talk to Mikado again.
You can introduce yourself to everyone around town.
To advance the plot, talk to the boy to the left of the shrine gate in Sunset Hill.
Go inside the candy store to the left and talk to the old lady.
Go to 307 Tower in Blue Sun Street. Go to 5F and talk to the boy.
Leave the tower and go right, and talk to the girl standing outside Rat Ear.
Return to the Manta Swimming School and walk to the right.
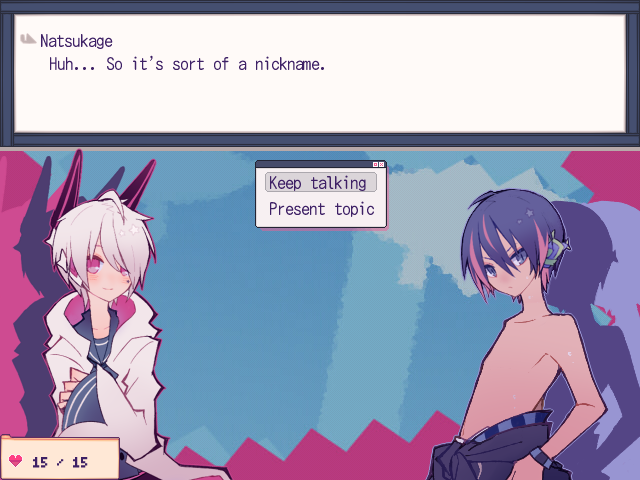
Talking Time:
Keep listening, then present the "Choco-Banana Flavor" topic after he mentions ice cream.
In part two, when he mentions nicknames, present "Nickname: Orca."
Return to Nanashi's apartment and talk to Mikado.
Go to Nanashi's bed.
Talk to Miumi outside the apartment.
Go to Sunset Hill and talk to Natsukage where you first found him.
Return to 307 Tower, and you'll encounter Miumi on the way.
Discussion Time:
When Misane mentions Natsukage having no memory, bring up Wounded Leg.
Choose "Because he's nice."
Present Friends' Behavior.
Go to the Manta Swimming School.
Talking Time:
When he mentions loving sports, present Sky-Sea-Run.
In part two, when he says "Orko," call him out ("Wait a sec!") with Nickname: Orca.
Choose "Wounded leg."
Present Wounded Leg.
During the attack, press the keys shown in order from left to right.
For the D-pad buttons, the direction in gray is the one to press.
Return home and talk to Mikado.
Free Time
During Free Time, you're able to befriend townspeople.
Consult the Friend Guide further down for more info.
It's not necessary to befriend everyone available for completion; you can return in later Free Times.
In the Free Time after Chapter 1, you can get up to a total of 18 friends.
When you've finished your business in Free Time, talk to Misane in Nanashi's room to continue.
Chapter 2
Leave for the new area, CocoAlley.
Talk to the boy outside the flower shop.
Proceed to the left screen of CocoAlley and go through the gate to Honey Garden.
Talk to Moroku, the gardener.
Talk to Natsukage outside the garden gate.
Return to the flower shop, go inside, and talk to the woman.
Go back to Nanashi's apartment in Blue Sun Street and talk to Mikado.
Return to the garden gate in CocoAlley and talk to Natsukage.
Talking Time:
"Ask for more" about "don't want to use my hands" to get the Band topic.
Present the Band topic to "playing piano elsewhere."
Compliment him with the third option.
In part two, present Witness Report 2 to the comment about "coming here looking for it for days now."
Talk to Moroku in the garden.
Talk to Haruya outside the flower shop.
Talking Time:
Ask for more about the first statement (when he last went to see Moroku).
Present the "Haruya" topic to that revised statement to point out the discrepancy.
Go to the cafe and talk to Rocca.
Return to Natsukage outside the garden.
Discussion Time:
When Miumi mentions "knowing who the kid is," present Witness Report 4.
Go to the garden and talk to the white-haired kid.
Go to the cafe and talk to the owner.
Talking Time:
Ask for more when he describes his relation with Haruya. He'll then revise his statement.
After he clarifies that Haruya's habits "haven't changed lately," call him out ("Wait a sec!") with Cafe.
In part two, ask about "Haruya told me about the incident" to get the Cafe Conversation topic.
Ask about "Haruya doesn't want to suspect anyone." He'll revise to add his own opinion.
Choose "Wait a sec!" after he says "Chino told me about...", and pick Cafe Conversation.
Present Haruya's Memories to the owner's bluff.
Go to the garden.
Return home and talk to Mikado.
Free Time
In the Free Time after Chapter 2, you can get up to a total of 26 friends.
When you've finished your business in Free Time, talk to Misane in Mikado's room to continue.
Chapter 3
Leave for the new area, Break Passage.
Talk to the boy right by the entrance.
Enter the studio and talk to the boy on the right.
Go to WAC Burger left of the studio and talk to the lady.
Go to the Backstreet way on the left and talk to Ryuuri.
Return to the studio and talk to Asuto.
Talk to Haruya on the left side of town.
Enter the arcade (Rocket Park) and talk to the guy there.
Talking Time:
Ask for more about how Aira "hasn't lived for very long" to get Only Just Born?
Then present Only Just Born? at that same part.
In part two, present Illegal App to "what else would I have used?"
Go into the warehouse to the left and talk to the girl.
Return to Nanashi's apartment and talk to Mikado.
Talking Time:
Ask for more about "certain people I don't trust" to get Certain People.
Present Certain People at that same part.
In part two, ask for more about "someone else separate from the hackers."
This will update The Other with the possibility of them being Mikado.
Ask for more after Mikado agrees there's likely "an individual commanding the hackers."
(It's the one that ends with "maybe you're seeing the path to a resolution").
After he revises it, choose "Wait a sec!" and The Other at that part.
Return to Break Passage and talk to Akitaka outside the studio.
Go to the Backstreet and talk to Aira.
Talking Time:
Ask for more on "Maybe!" to have her explicitly state she's human.
Then use "Wait a sec!" with Is Aira Human? on the same statement.
During the virus segment, there's a new thing at the end.
Press the button when the bar is full to get past it.
Return home.
Talking Time:
Ask for more on "I don't know Mikado" to get Mikado & Misane.
Then "Wait a sec!" with Mikado & Misane on that same part.
Free Time
In the Free Time after Chapter 3, you can get up to a total of 35 friends.
Chapter 4
Leave for the new area, Sweet Beach.
Go to the beach proper and talk to Aira.
Talk to the girl on the right side of town.
Go into the fortune teller's to the left and talk to the woman inside.
Go to the pet cafe way on the left of town and talk to the boy inside.
Talk to Haruya by the entrance to the beach.
Talk to Izuchi on the beach.
Talking Time:
Ask for more when Izuchi assumes Nanashi isn't influenced by others to get Irregularity?.
Present Irregularity? at the same section.
In part two, call him out with White-Haired Person when he claims he and the girl aren't acquainted.
Answer "Guinea pig and criminal."
Present Potete's Memories to his bluff.
Talk to Akitaka outside the beach entrance.
Talk to Potete on the right side of town.
Go to the beach.
Talk to Izuchi on the right side of town.
Talking Time:
Present Hackers' Objective when Izuchi supposes there's a mastermind.
Go to the beach.
Talk to Kirai outside the beach entrance.
Go to the cafe in CocoAlley and talk to Kotora.
Return to Sweet Beach and talk to Tobari on the right side of town.
Return home to Nanashi's bed.
For the objective, choose Hackers' Objective.
For the difference, choose The Other's Goal.
For the identity, choose The Other's Identity.
Talk to Mikado in his room.
Choose Can't Read His Mind?
Final Time
Go make as many friends as necessary; the max is 44.
When you're done, talk to Misane in Nanashi's room.
This is the point of no return for changing which ending you're getting.
Go outside and check on Miumi.
Go to 307 Tower and take the elevator to the Control Room.
Delete the three sets of viruses along the way and walk to the end.
The Bad Ending requires you make no additional friends (so only the 8 plot ones).
The Normal Ending requires at least 9 friends.
The Happy Ending requires at least 25 friends.
Postgame
After the Happy Ending, you can go befriend everyone, including the hackers and Misane.
Mikado won't let you engage him until you've befriended all 48 others.
Once you've befriended Mikado, you can access a bonus scenario from BitWorld.
Chapter XXX
Talking Time:
When Natsukage says it was "only an argument," present Victim's Room.
In part two, present the Memo Pad to "he was taking notes."
Investigate the scene in Room 102.
Go to Room 103.
Talking Time:
Ask for more about the shouting to get Yoh's Testimony.
Present Yoh's Testimony to "I didn't even know he was a guest."
In part two, ask for more when Yoh says "that's all I did" and suggests talking to the other worker.
Call him out on the revised statement ("I didn't carry it to him") with Memo Pad 2.
Talking Time:
With Miumi, present Memo Pad 2 to "I couldn't meet Mr. Kawano."
Choose "he was lashing out in the hall."
Present Doorknob.
Go to Room 102.
Go to Room 103.
Talking Time:
Ask for more when he says "the reflection was blinding" to make him mention the ring.
"Wait a sec!" with Thrown Objects to the revised statement.
Present Ring.
Present What Was Poisoned.
Present Dirty Apron.
Friend Guide
A guide to befriending people during Free Time. May contain some spoilers regarding who can be befriended and what presents people like.
Friend Guide
General Info
There are two categories of friends:
Those who are befriended as part of the plot, and those who aren't.
Plot Friends
They will be added to your Friend List in BitWorld upon befriending them in the plot.
However, you can still give then presents during Free Time, as long as they're around.
Getting them to 100 fondness points gets you a single Friend Event and their Friend Item.
Non-Plot Friends
These friends can only be befriended during Free Time at the end of a chapter.
They have four Friend Events, one every 25 fondness points.
The final event at 100 points will both add them to your Friend List and give you their Friend Item.
Note: The Friend List bios come with bonus Mutter logs if you press Confirm (Z/Enter/Space).
Also note the difference between Friend Items in the ITEM menu and the Friend List in BitWorld.
The number of friends Nanashi has at the end will affect the ending.
You'll be free to ignore friend-making entirely until the last Free Time with no consequences.
In fact, making no friends until the end will be the easiest way to see every ending.
Bad End: 8 Friends (plot friends only)
Normal End: 9+ Friends
Happy End: 25+ Friends
Fondness
Each person has three "favorite" presents, which result in unique messages when you give them.
Two of the favorite presents will add 15 fondness points, and one of them adds 20. All other presents add 5.
*s mark the gift which is most cost-effective for each person. (Some have two equivalent ones.)
A * on the person's name means their "best" favorite item has a ratio worse or equal to 1 point : 2 bits.
You can get 1:2 with Umai?bos even if they're not a favorite. Thus, Umai?bos are best for them.
| Main Characters | |||
| Friend | +15 Present | +15 Present | +20 Present |
|---|---|---|---|
| Natsukage | Lettuce-jiro | BEAUTY IS PORK | Ice Cream Pop* |
| Miumi | Umai?bo* | Love Takoyaki | Angler Mochi |
| Haruya* | Milky Cookies | Lucky Turn | Black Cocoa |
| Akitaka | Coola Cola* | Guilty Cards | Fingerless Gloves |
| Aira | Muscle Protein | Rolly Beads* | USB Player |
| Potete | Palm Mix | Wolpis | Coola Cola* |
| Sunset Hill | |||
| Friend | +15 Present | +15 Present | +20 Present |
| Yasune | Umai?bo* | Ice Cream Pop | Lettuce-jiro |
| Shitara | Cold Remedy | Stomach Meds | Love Takoyaki* |
| Kuroku/Shiroro | Soda Cider | Love Takoyaki | Ice Cream Pop* |
| Hakuhi | Angler Mochi | Cold Remedy | Heavy Star Ramen* |
| Takamiya | Heavy Star Ramen | Muscle Protein | Stomach Meds* |
| Shiren | Umai?bo* | Heavy Star Ramen | Lettuce-jiro |
| Kaori | Cold Remedy* | Bunny Memo Pad* | Sec-C |
| Blue Sun Street | |||
| Friend | +15 Present | +15 Present | +20 Present |
| Kiri | Umai?bo* | Angler Mochi | Muscle Protein |
| Nio | SEVEN PEACE | BEAUTY IS PORK | Bunny Memo Pad* |
| Sakuma* | BEAUTY IS PORK | Tummy Tummy Ache | Ao Haru Road |
| Sekiyu | Tongue Twister Index | Ice Cream Pop* | Soda Cider |
| Yukinaga | Soda Cider | Ice Cream Pop* | SEVEN PEACE |
| Akuta | Ao Haru Road | Bunny Memo Pad* | Angler Mochi |
| CocoAlley | |||
| Friend | +15 Present | +15 Present | +20 Present |
| Rocca | Rolly Beads* | Milky Cookies | Flower Bandage |
| Chino* | Black Cocoa | Milky Cookies | Flower Tea |
| Sora* | Blankit | Snug Scarf | Star Sand |
| Moroku | Lucky Turn | Black Cocoa | Breadcrumbs* |
| Akashi | Flower Bandage | Manly Eye Mask | Milky Cookies* |
| Misato | Kitten Scrunchie | Blankit | Rolly Beads* |
| Momori* | Manly Eye Mask | Flower Tea | GIRLS |
| Break Passsage | |||
| Friend | +15 Present | +15 Present | +20 Present |
| Enri | Coola Cola* | Morning Glory Fan | Wolpis |
| Asuto | Big WAC | Black Bandana | Larikkuma Stick* |
| Azusa | Wolpis | Coola Cola* | Big WAC |
| Jin | Big WAC | Morning Glory Fan* | Victory Token |
| Hiyu | Wolpis | Fingerless Gloves | USB Player* |
| Yuuto* | Wolpis | Milky Cookies | Flower Tea |
| Ryuuri | Cross Ring* | Rainbow Afro | Fingerless Gloves |
| Kirara | Cross Ring | Rainbow Afro | Sparkly Polish* |
| Sweet Beach | |||
| Friend | +15 Present | +15 Present | +20 Present |
| Sagara | Guilty Cards | Cross Ring* | Chocolate Cake |
| Meu | Rainbow Afro | Vacation Jelly | Palm Mix* |
| Izuchi* | Koala Cigarette | Cold Remedy | Victory Token |
| Saaya | Blankit | Kitten Scrunchie | Cross Ring* |
| Mary* | Stomach Meds | Vacation Jelly | Large Lollipop |
| Meru | Palm Mix | Rainbow Afro | Teeny Bikini* |
| Hitohito | Soda Cider | Coola Cola | Kittytail* |
| Friend | +15 Present | +15 Present | +20 Present |
| Nomiya | Coola Cola* | Angler Mochi | Black Bandana |
| Kotora | Flower Tea | Milky Cookies | Koala Cigarette* |
| Kirai | Palm Mix* | Wolpis | Vacation Jelly |
| Tobari* | Flower Tea | Milky Cookies | Black Cocoa |
| Misane | Blankit | Kitten Scrunchie | Kittytail* |
| Mikado | N/A; all gifts only add 5 points. | ||
Some friend events that have yes/no questions will give you a bonus 5 points for picking the "right" option.
Which I won't bother making a guide for. In general, if there's an "honest" option, that one's better.
Special Notes
Finding Akashi:
He's on the bench on the right side of Honey Garden. Yes, only his legs are visible.
Misato's third event:
If you agree to her request, you'll be sent to a brief horror-esque segment.
Saying no will skip it with no penalty, other than not getting a 500-bit reward.
Each room has part of a message. Put together, it's "NEXT TO THE GIRL."
Examine the wall just to the right of the girl painting in the hall to find the way out.
Finding Kirara:
She appears in the Backstreet only after befriending Ryuuri.
Kirara's third event:
The last part was left "untranslated" because, while it is "readable," it's still basically nonsense.
The gist of the joke is that the conversation becomes increasingly incomprehensible, so I feel it works as-is.
Kirara's Mutter was translated because while it's written in a bizarre way, the content is fairly normal.
Minigames
BiTetris Payouts
Level 5+: 200 bits
Level 10+: 1000 bits
Level 20+: 2000 bits
Level 30+: 6000 bits
Level 40+: 10000 bits
Level 50+: 20000 bits
(Going past Level 50 won't get you any more bits.)
PuyoBits Payouts
50+ Points: 100 bits
250+ Points: 300 bits
500+ Points: 700 bits
1000+ Points: 2000 bits
2000+ Points: 4000 bits
3000+ Points: 6000 bits
4000+ Points: 8000 bits
5000+ Points: 10000 bits
(Going past 5000 points won't get you any more bits.)
There has to be a better way!
Checking the bottom-right tile in BitWorld will give you 999999 bits for free.
Music
Below is a list of songs and their sources. There may be minor spoilers with regard to where songs are used.
The oo39.com songs don't really have proper names, but I put their "tags" in the hover text.
Some songs are from commercial CDs called Free Music Cluster Vol. 1 and Vol. 2. Thus, only previews are freely available for these tracks.
The SENTIVE songs come in a big pack; download from one of the mirrors at the bottom.
Do not reupload these songs elsewhere without permission from their respective creators. This especially applies to the ending music.
Song List
| Usage | Original Name | Artist | Source |
|---|---|---|---|
| Blue Sun Street | ys066 | oo39.com | Full |
| Sunset Hill | ys026 | oo39.com | Full |
| Shitara's Theme | ys117 | oo39.com | Full |
| Kuroku and Shiroro's Theme | Humming Days | watson | Full |
| Takamiya's Theme | ys161 | oo39.com | Full |
| Shiren & Yasune's Theme | ys111 | oo39.com | Full |
| Kiri/Hiyu's Theme | ys199 | oo39.com | Full |
| Sakuma's Theme | Mature Girl | Masaki Takao | Full |
| Akuta's Theme | ys071 | oo39.com | Full |
| Giving Friendship a Shot | Gunshot Straight | watson | Full |
| Talking at Ease | Talking Time | MATSU | Full |
| Getting To Know You | Let Go | Simon Panrucker | Instrumental |
| Conflict | inner flame | MATSU | Full |
| Discussion Time | Big Plans (Remix) | Kellee Maize | Full |
| Discussion Time (Old Ver.) | Idiots 2 | Takashi Waraya | Full |
| Grilling Yukinaga | Treasure Hunt | Simon Panrucker | Instrumental |
| Hackers Theme | A very Strong Element | Utata-P | Full |
| Scheming | Techno-Dubstep BGM | Utata-P | Full |
| Opening | RE:SET | SENTIVE | Song 1 |
| Out on the Town | Party Night! | Free Music Cluster Vol. 1 | Preview |
| Recuperation | Vanilla | watson | Full |
| BitWorld | Glorious Early Afternoon | PANICPUMPKIN | Full |
| BiTetris | DEAEEDEAEE | PANICPUMPKIN | Full |
| PuyoBits | Rampaging Cyborg Creature | PANICPUMPKIN | Full |
| CocoAlley | Working Woman | Studio Greenfield | Full |
| Rocca/Misato/Momori's Theme | ys015 | oo39.com | Full |
| Akashi's Theme | ys022 | oo39.com | Full |
| Mellow Time | Investigation: DBD File No. 03 | watson | Full |
| Asking Akitaka | Bus Stop | Simon Panrucker | Full |
| Questioning Haruya | Alphabets | Simon Panrucker | Full |
| Café Confrontation | Yesterday | Kellee Maize | Full |
| More Scheming | ys138 | oo39.com | Full |
| Game Time | ys028 | oo39.com | Full |
| Break Passage | ys021 | oo39.com | Full |
| Break Band | ys082 | oo39.com | Full |
| Enri/Azusa/Jin's Theme | ys139 | oo39.com | Full |
| Ryuuri & Kirara's Theme | Obvious Errors | Free Music Cluster Vol. 1 | Preview |
| Break Meeting | Hip hopy | UG | Full |
| Yuuto's Theme | jato | ??? | ??? |
| Sweet Beach | ys129 | oo39.com | Full |
| Meu's Theme | BH | ??? | ??? |
| Meru's Theme | game_image37 | UG | Full |
| Talking With Izuchi | Inside of me | Purgatory Garden | |
| Nanashi & Misane | ys126 | oo39.com | Full |
| Game Over / Finale | ys160 | oo39.com | Full |
| Ending | 1BitHeart | Original | N/A |
| Cruise Investigation | smoke on city | UG | Full |
| Cruise Interrogation | Hey pops! | UG | Full |
| Case Closed | game_image9 | UG | Full |
Translation Notes
(These contain spoilers for all aspects of the game. Only read after you've beaten it fully.)